Air Pruning Containers DIY - Transfered from QDMA forum

yoderjac

5 year old buck +
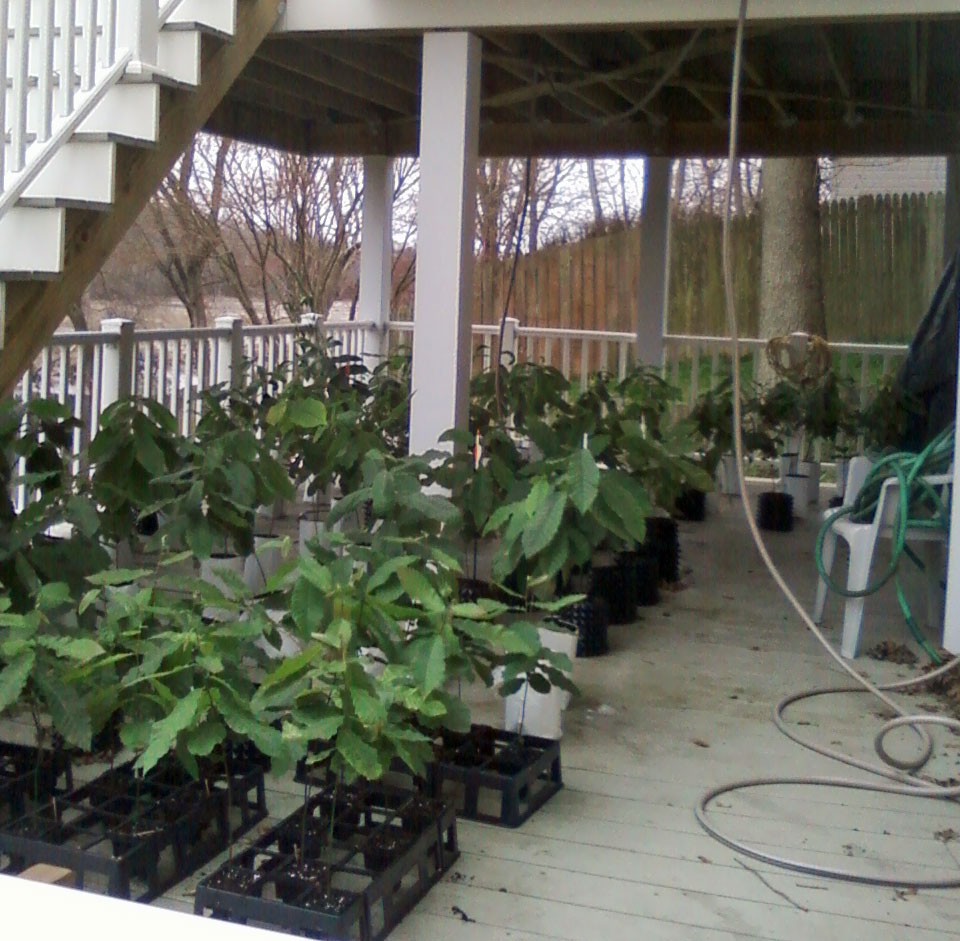
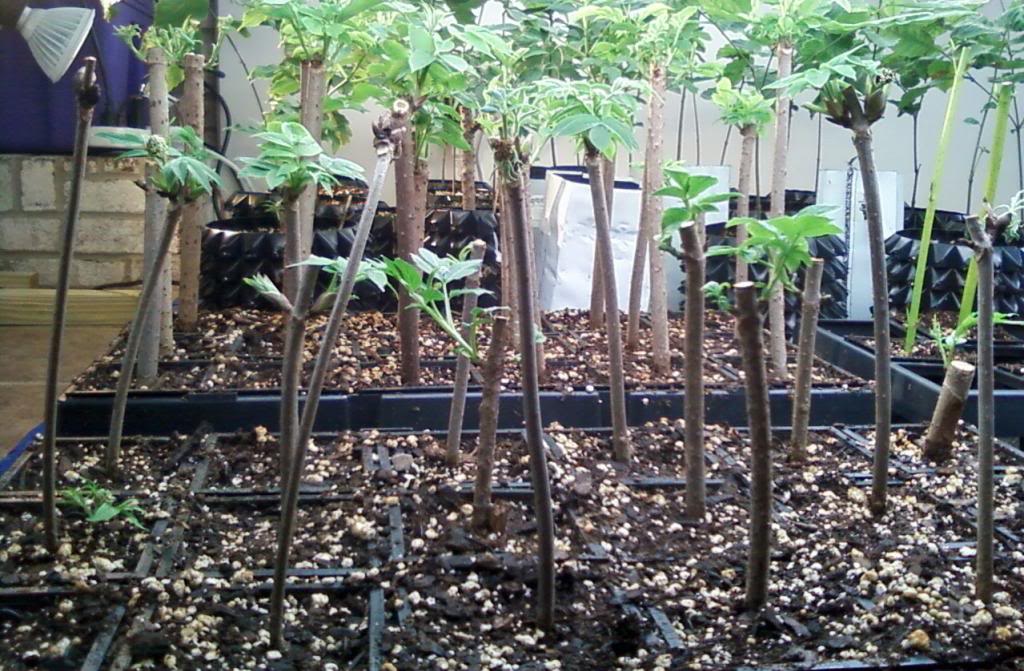
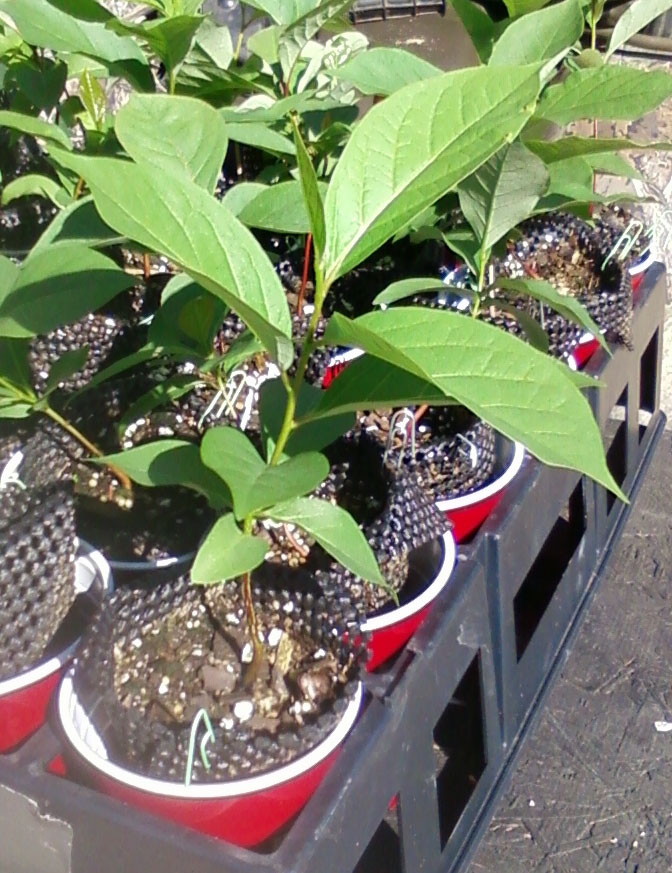
As some of you know, I've been grafting persimmons http://www.qdma.com/forums/showthread.php?t=47890 and I recently ordered some seed to start rootstock for the future http://www.qrgc-forums.org/QRGC_Forums/yaf_postst449_Persimmon-Propagation.aspx. The orchard had just finished planting their persimmons for the year and since the stratified seed had been exposed to warm moist conditions and wouldn't keep, instead if just sending me what I ordered (which was more than I needed), they sent me about 5 times what I ordered!
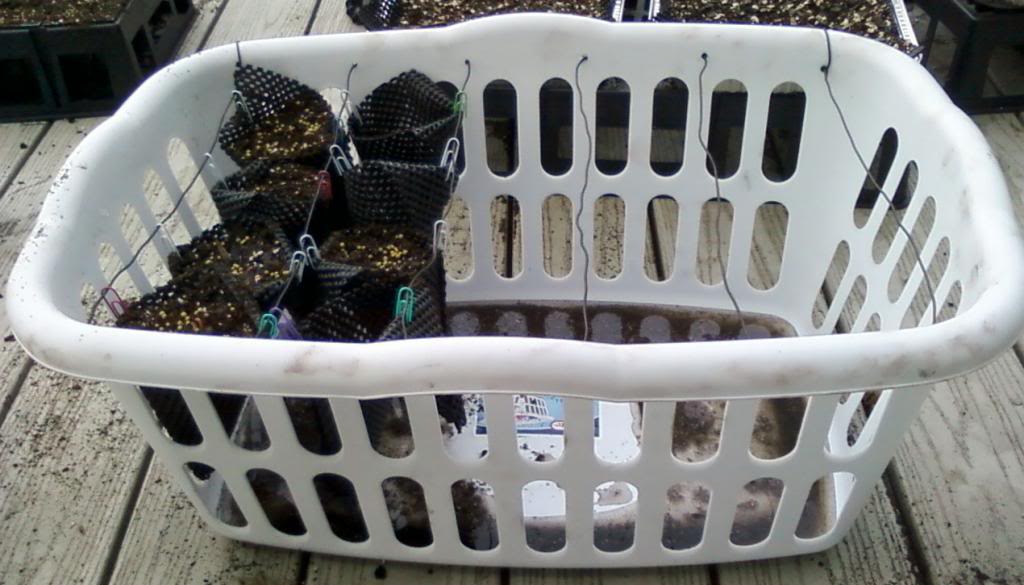
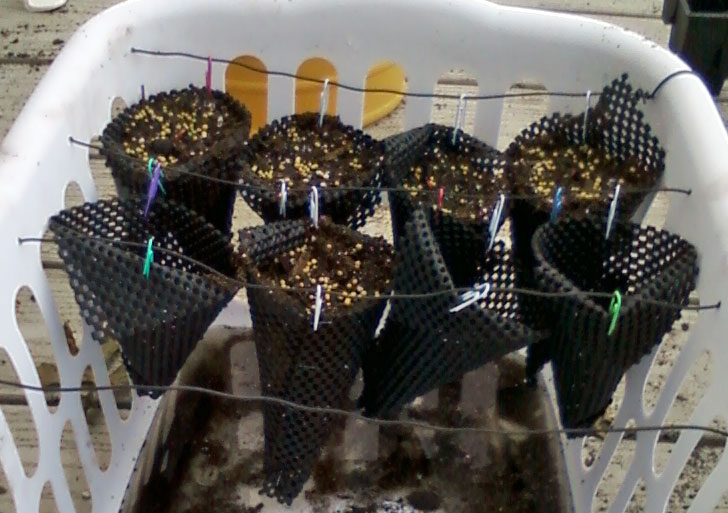
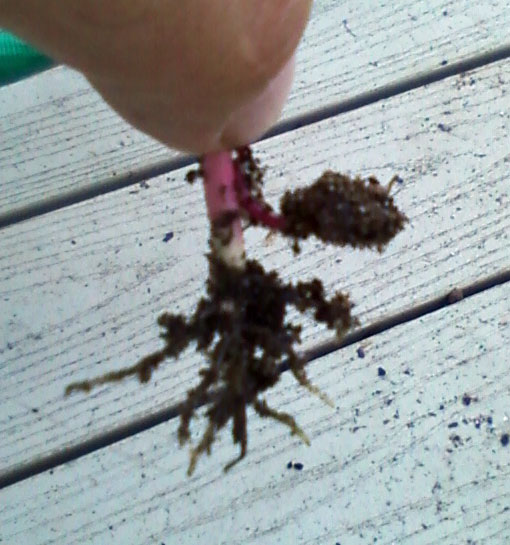
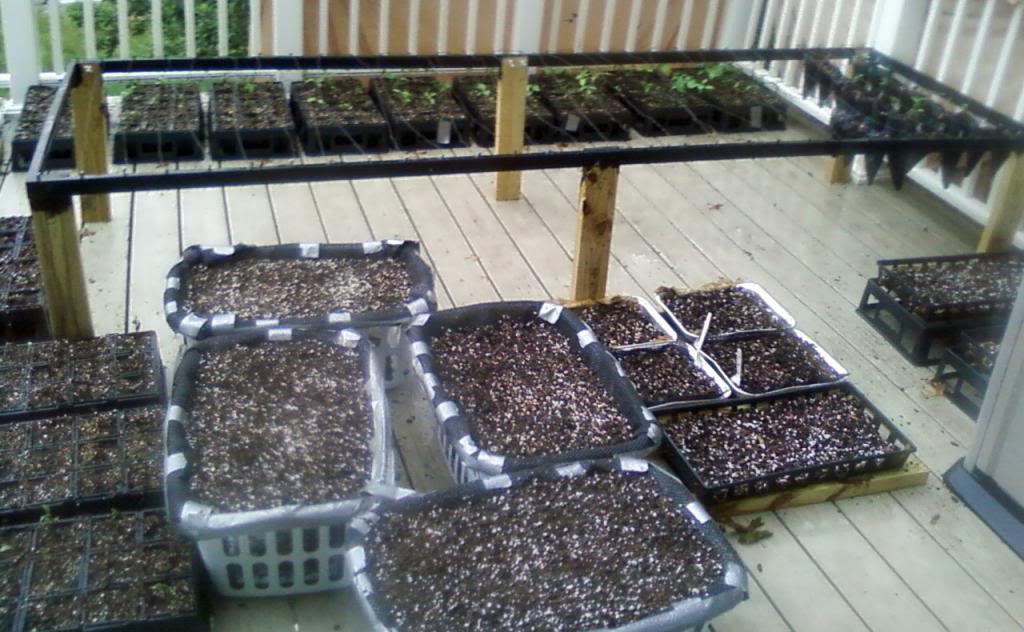
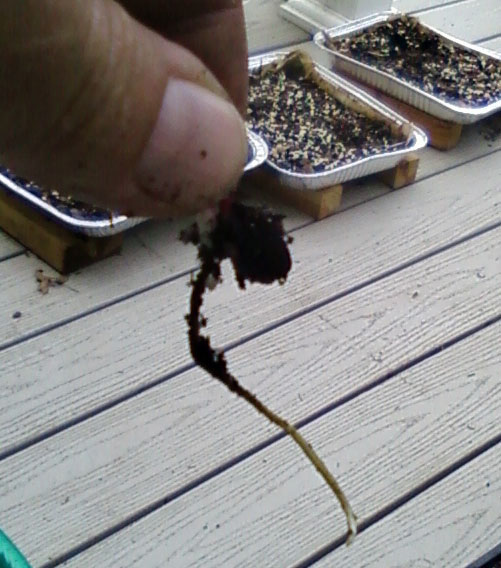
Even after giving away a bunch of persimmon seed, I have way more than I can use. I put about 700 seeds into flats to start. Some have just started germinating and I transplanted the first few into rootmaker cells. While I have a lot of rootmaker cells available, it would be nice to be able to have more so I could give away some started seedlings.
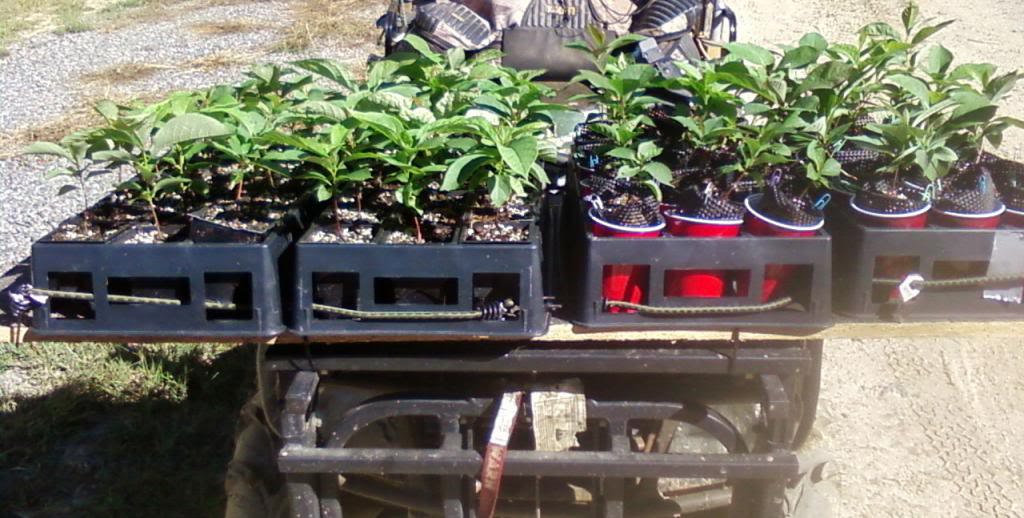
I wasn't willing to buy more rootmaker cells for this, so I decided to take the opportunity to see if I could make my own cheaper.
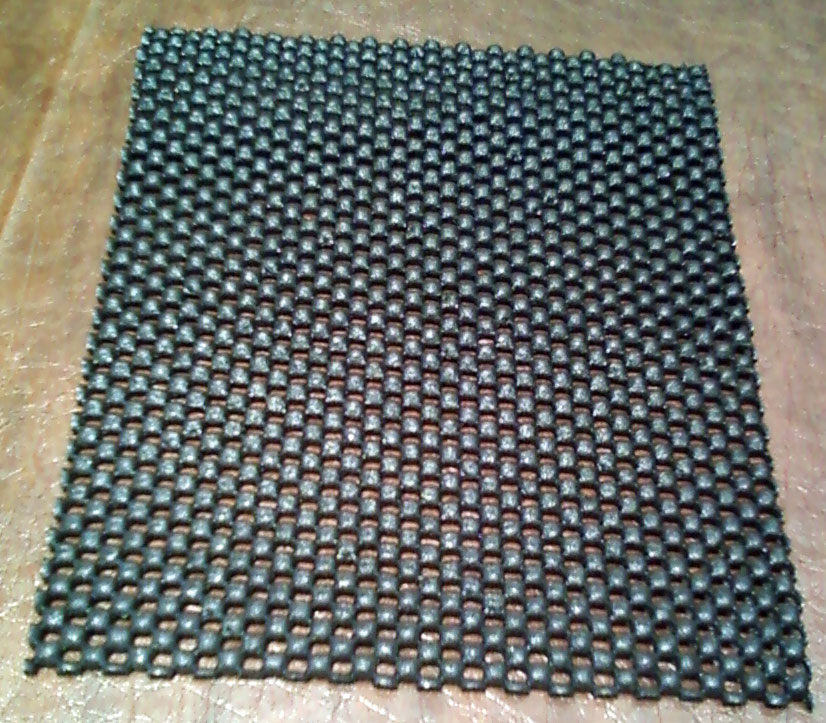
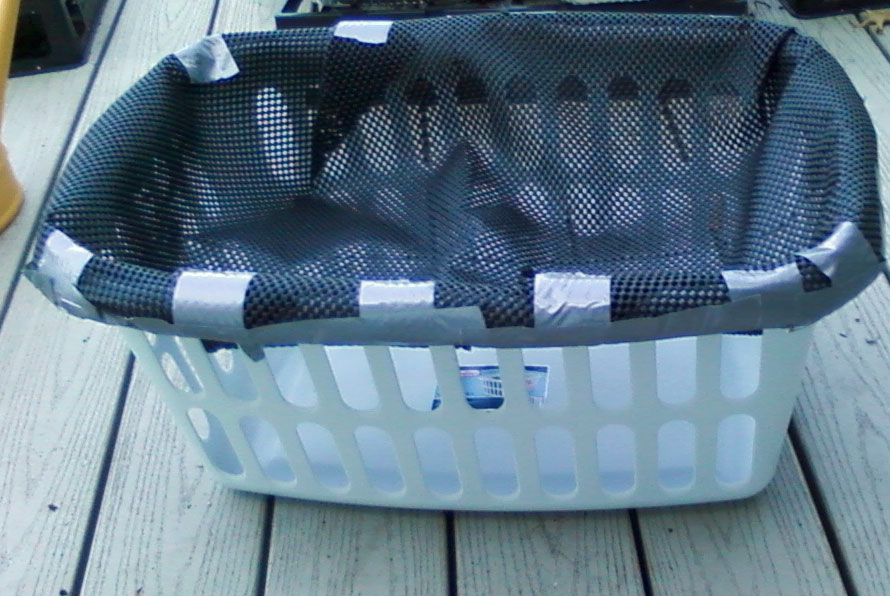
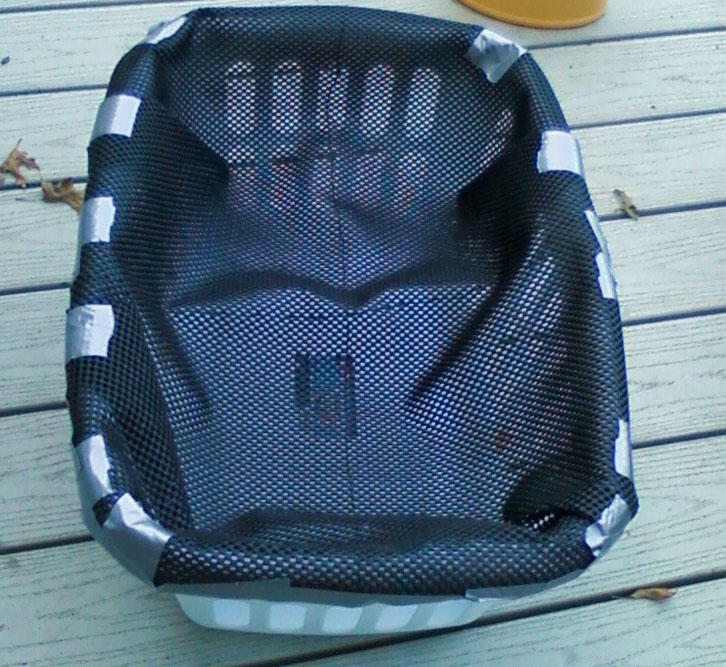
I started with some rubber shelf lining from lowes: http://www.lowes.com/pd_47550-14510-1297467_0__?productId=3137959&Ntt=rubber+shelf+liner&pl=1&currentURL=?Ntt=rubber+shelf+liner&facetInfo=
766fb351-5c2c-4eda-8b27-01d14b5e970c.jpg

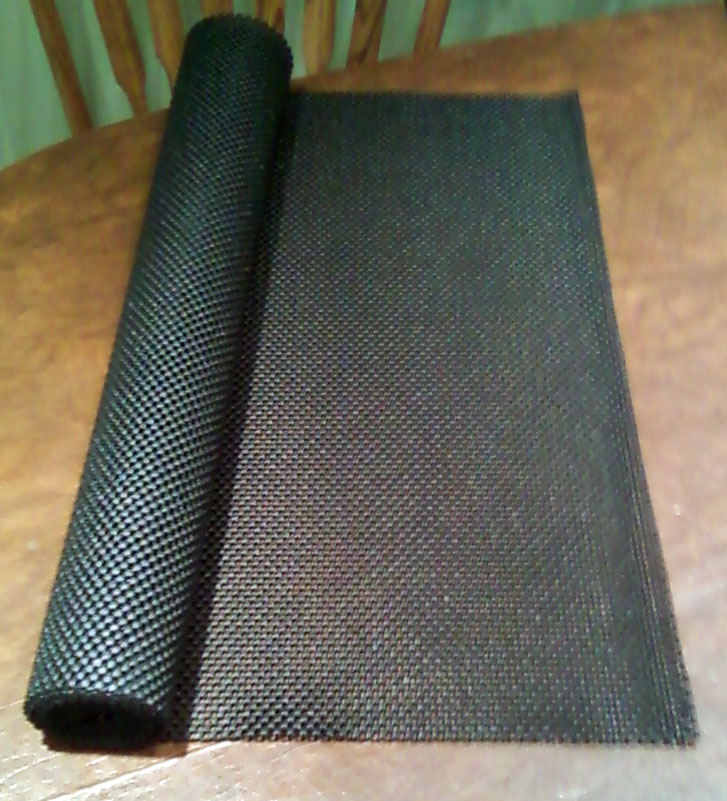
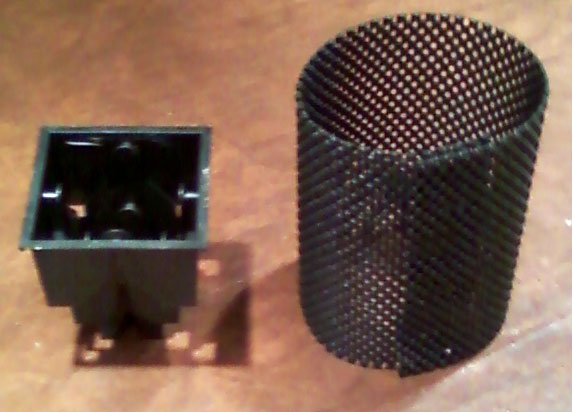
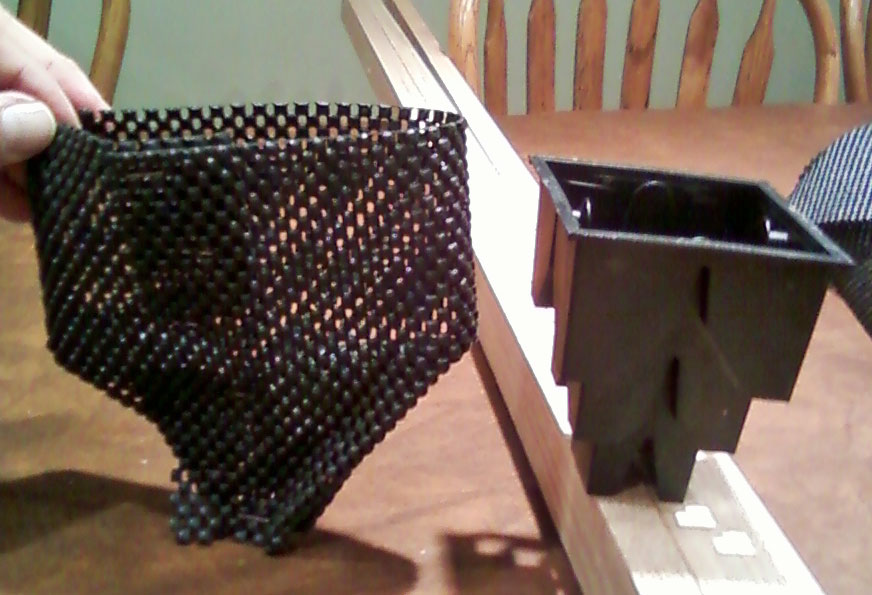
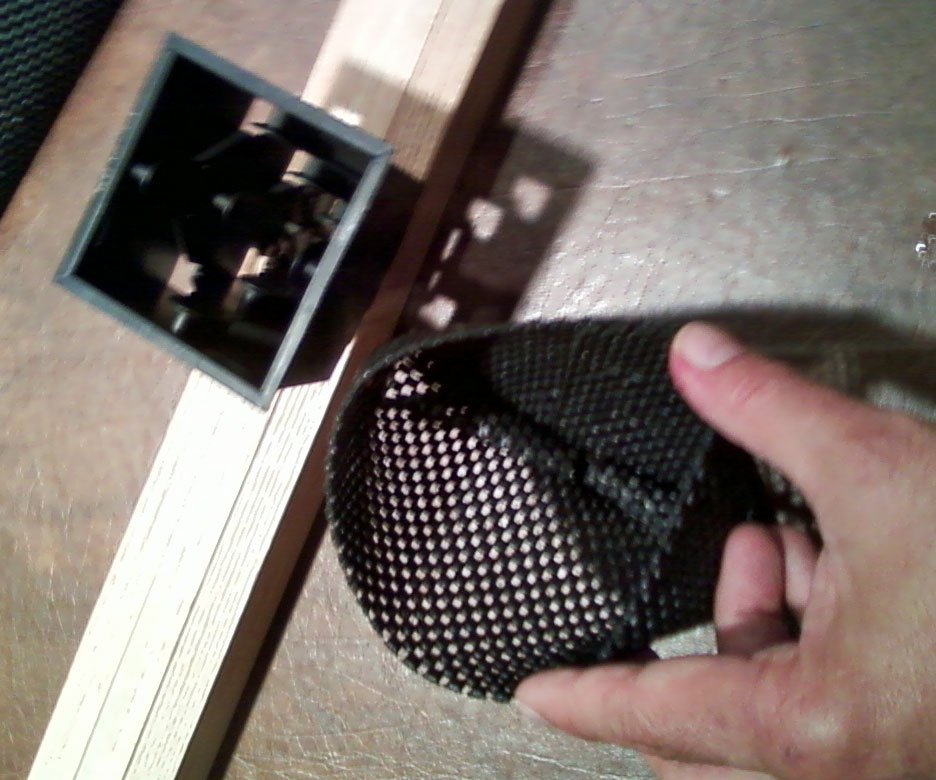
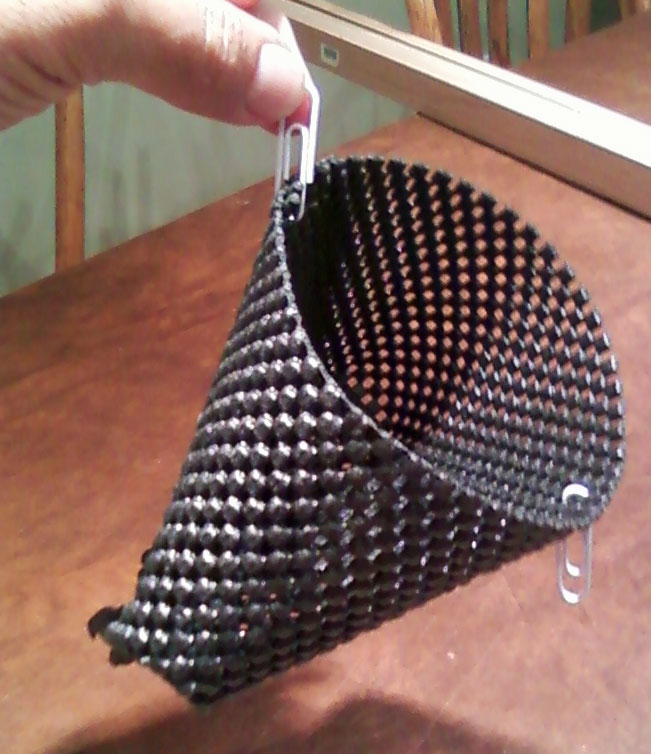
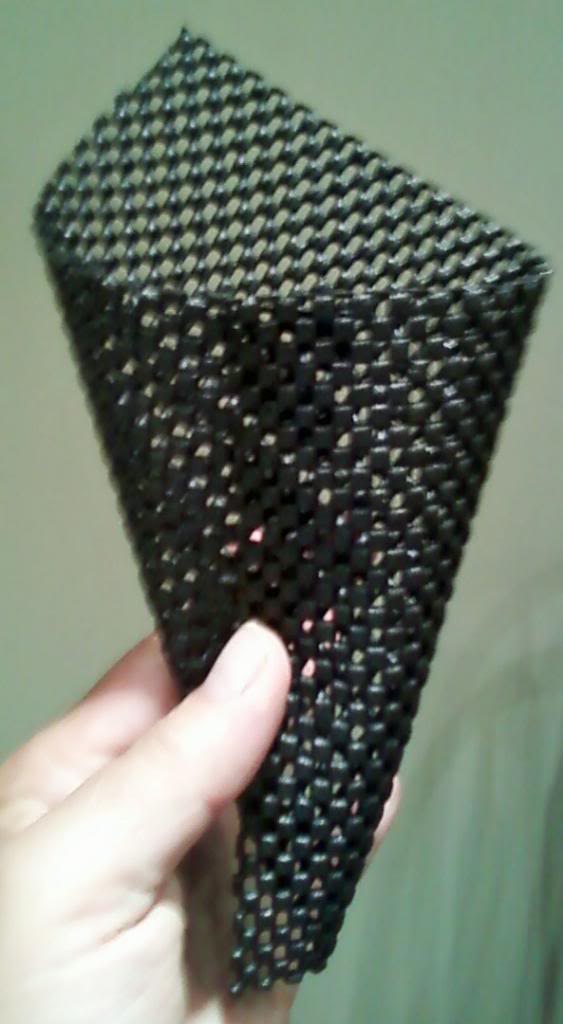
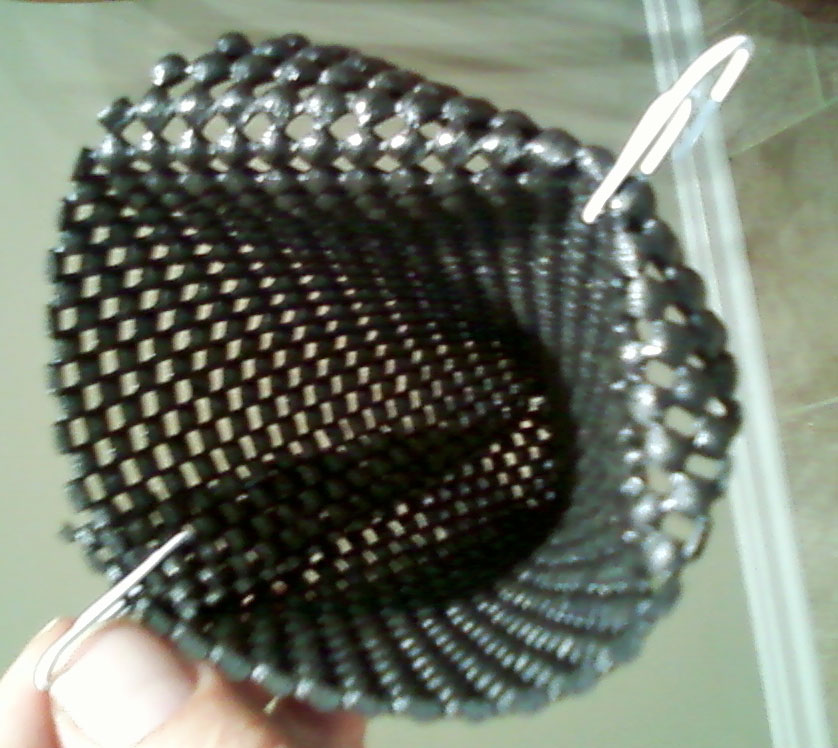
I used a rootmaker cell and measured a length to cover all 4 sides plus an extra inch or so for overlap.
048986d2-3a70-429b-bd4d-8d14b99fe9d5.jpg

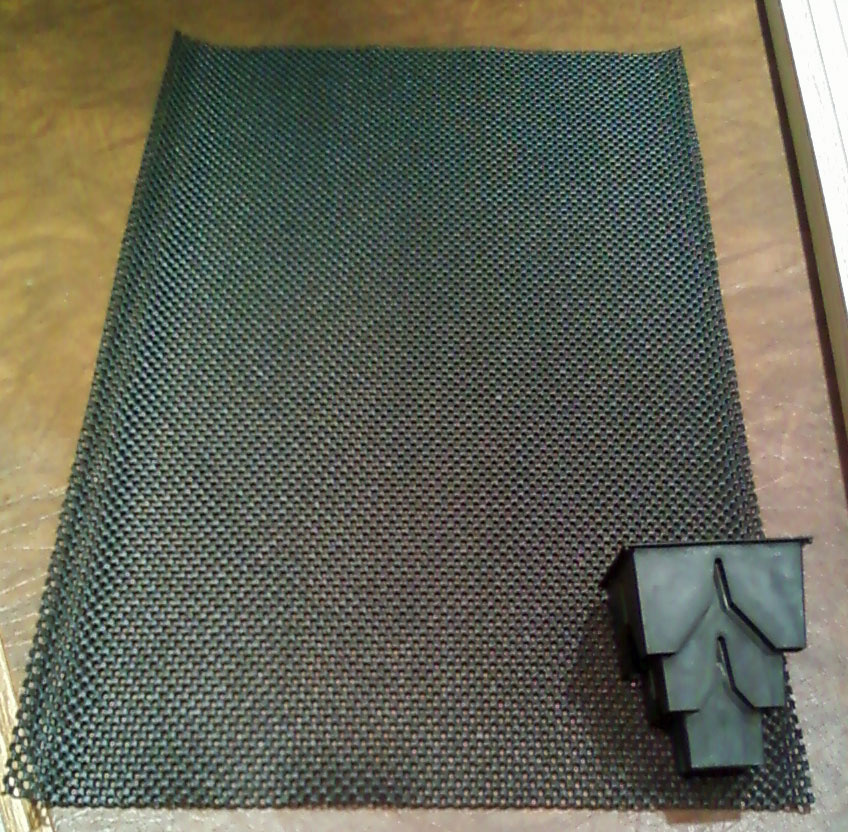
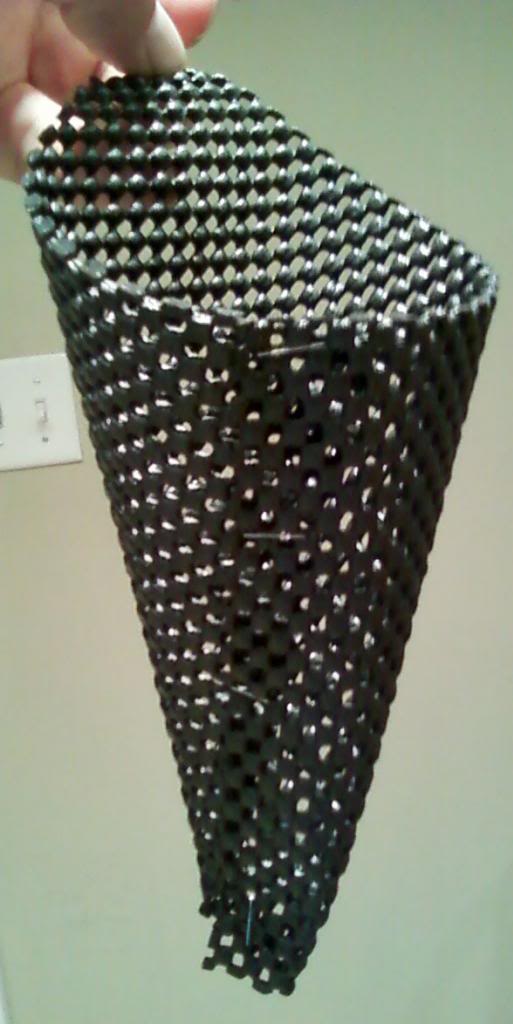
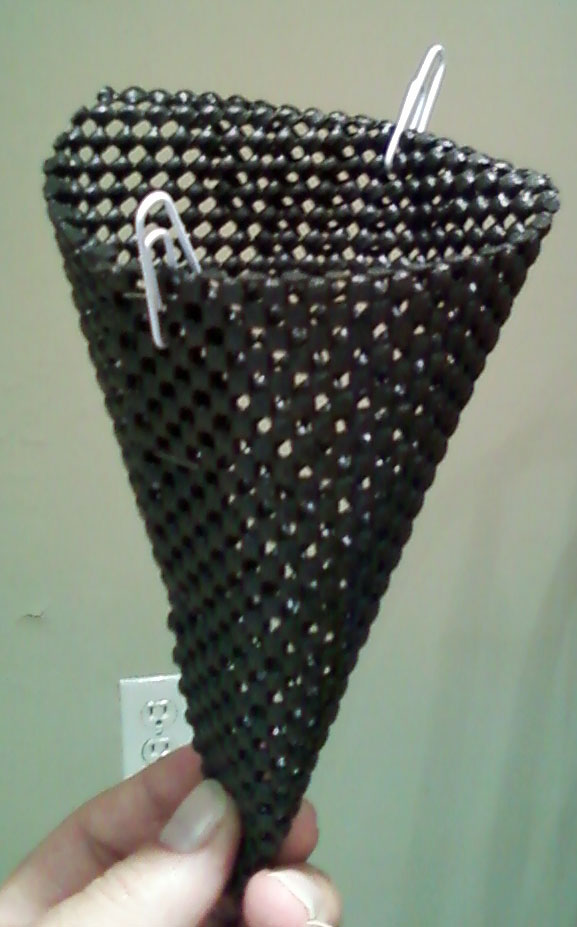
I then cut that piece into 4 strips a little taller than the cell:
31e0830e-b53f-4d8c-9a64-4795b3ec1fb7.jpg

Continued on the next post...
 
Last edited:
I then rolled the material into a cylinder about the diameter of the rootmaker cell and stapled it together:
2ab555c9-431c-48cf-9352-8cde00e18f9d.jpg

I then folded one end in and stapled it to form a bottom:
f17f5fad-02ec-478a-9615-4012ea6b5d87.jpg

d31d3722-dd16-4ff6-995f-ce9a743f6c09.jpg

Since these don't have lips to support them from a rack like rootmaker cells do, I plan to build some kind of support that I can hang them from. So, I inserted paperclips to the sides to use for hangers.
b615de43-71c9-4d41-b523-26783550464f.jpg

I think this material will support the weight of the Fafard 3B even when watered. I'll report back when I get that far.
Thanks,
Jack
 
Last edited:
TrademarkTexan;604146 said:
Awesome idea, hope it works for you!
MOBuckChaser;604153 said:
Sweet! Nice pics! As you get them going show us the progress. Thanks!
NYHUNTER;604260 said:
Seems like it will work great goodluck!
DaveWP;604371 said:
Tried something similar. Used replacement screening, stapled ends after making a "tube". Did not bring end together, but stood them up in containers so as to catch the water. Seems to have worked. Good luck with your project
 
I did a quick comparison on cost. Looking at the retail price of the trays and cells along with shipping (to me) and comparing that with the approach above including a few dollars for 2x4s as well for a frame, and I came out with about 1/3 the cost of rootmaker. Of course this doesn't count the cost of your time to assemble.
I also took at look at volume. While these are roughly the external height, width, and depth of a rootmaker cell on the outside, because of the nature of the materials, they are larger volume and thus need more mix and are heavier when filled and watered than they need to be.
So, I took another cut at it. I started with a 6" x 7 1/2" section:
e76187fa-b48d-4c2a-a4dc-69447453da56.jpg

I simply rolled it like an ice cream cone to start with the edges parallel to each other with about 1/2" of overlap.
7fe688da-2248-45c9-97fc-a25a736c2b8e.jpg

Next I stapled the overlap and then added one staple at the bottom:
154406f6-d30c-4109-b00f-14a2de57b51a.jpg

Continued...
 
Last edited:
Next is folded the top point backwards and inserted a paper clip through both layers for a little more support. On the other side I inserted a second paper clip through the overlap and went below the first staple for added support.
9ee03c8e-ade1-4f89-8d8f-d24c65e40390.jpg

You can see the internal volume is close to a rootmaker cell:
51ed9064-6c24-48ac-8c13-988b61d7f6ed.jpg

This uses about 1/2 the material as the first method so they cost would be about 1/6th of buying a tray of rootmaker cells.
You could also adjust the size as you see fit for your application.
However, I would not advise others to put the time and money into this until I have a chance to report back with efficacy.
Thanks,
Jack
 
Last edited:
Turkey Creek;604453 said:
I have been pondering ideas as well. The only thing I see that might be an issue with your idea is that water might escape out the sides to quickly to migrate through all the potting media. With that much air exposure they might dry out quickly as well. Let us know though...... You will never know if you don't give it a try!
Chris
Chris,
This shouldn't be an issue. Plants in containers this small need watered pretty much daily. I totally drench the medium until water is running out of the bottom of my rootmaker cells. The key is using well drained professional medium that doesn't retain the moisture. I would like to be using a heavyweight mix like Fafard 52 but I can only find a medium weight mix (3B) locally and I don't want to pay for shipping.
I agree with you that if you are using dirt or miracle gro type mix and limiting water, there could issues.
As you say, time will tell and I'll report back.
Thanks,
Jack
 
I had some more persimmons that germinated that needed transplanted tonight. While I still have lots of rootmaker cells available, I couldn't resist testing my DYI, so I took the next step.
I had contemplated a number of options for a frame including building something from 2x4s. In the end, I came up with an idea that is less work and inexpensive.
I purchased a couple laundry baskets from Target for less than $5 each: http://www.target.com/p/sterilite-w...71721#prodSlot=medium_1_3&term=laundry+basket
I bought a spool of wire from Lowes, but any bailing type wire will work. Next, I drilled series of holes near the top of each basket on either side and then ran the wire through the holes across the top of the basket. I used a laundry basket because it is ventilated for good air flow. One of these will hold 20 of my DYI cells.
When I did the first transplant, I used a rootmaker cell to scoop out the mix and put it in the DYI cell. It turns out, I got the size about right. They hold the same volume of mix. So far, I've put two rows of cells in the basket:
e96b5f98-8036-440e-9865-5ee3fc857dff.jpg

405edb44-7a08-415d-89f7-f3404cfb693e.jpg

Chris was right; the water does migrate through these DYI cells faster than the rootmaker cells. At least it seems so thus far. Water propagation through my rootmaker cells slows after the first couple times they are watered.
As if this wasn't enough, I decided to work on another related problem. Some of the persimmons in the flats have the root radicle turning and growing along the newspaper instead of penetrating it like other trees do. I'm trying to transplant at the first sign of germination, but there is often more activity below the soil by the time I see anything above the soil.
On some of the DYI aluminum flats, I used the shelf liner instead of newspaper. Those seeds were planted so recently, none have germinated yet, so I don't know how well it will work. Even so, I decided to use the second laundry basket to construct a larger flat.
I took a length of wire and ran it down the center of the basket length-wise a few inches from the top. I then did the same width-wise. I then used shelf liner to make a suspended bottom. I used duct tape to afix the shelf liner to the basket:
c0c2107f-1ed3-4162-92ed-0e212cc5848c.jpg

5edcf0a1-3818-472d-9686-0e8aa089f110.jpg

This allows me to get a little more depth for the flat and the root radicle does not have to penetrate the newspaper. I planted 77 more seeds in this tonight.
Time will tell how this works.
Thanks,
Jack
 
Last edited:
So far, so good with the DYI containers. I actually think I'm seeing some benefit using the DYI flats rather over the traditional flats with newspaper. While sometimes the tap root penetrates the newspaper and prunes it, quite often the tap root will bend and grow along the newspaper so I end up with a tap root almost too long for a rootmaker cell. I'm checking and transplanting every day as soon as I see any stem, so all this root growth is occurring before the soil surface is broken.
With the flats using drawer liner, I seem to get much more root pruning and much less root turning. Here is a typical example:
26166af7-9ab6-4175-87e1-97cd3e165e99.jpg

I'm assuming this is a good thing, but time will tell.
 
Last edited:
Gator;608356 said:
I know you are dealing with a much larger number of seeds than I do but I always put them in the plastic bag and only plant them to containers when I see the root start developing. BTW, I loaded my 18 cell tray this way and planted the rest directly in the woods. All are doing well thus far.
Good to hear they are doing well. The problem with the plastic bag route is up and down. I've seen Dunstan's with stems and roots growing at odd angles that way. I'm not sure what issues that might present down the road. Starting them in flats is the same concept but instead of the plastic bag being reoriented everytime I pick it up, up is always up and down is always down for the seed. This may not matter for persimmons. Unlike chestnuts where the stem grows up and the root grows down from the nut, with persimmons, the tap root grows out of the seed and then turns down. After the root is established, it lifts the seed out of the soil, straightens, and the leaves deploy and push the seed hull away. So, these may start just as well in a bag.
I hope the persimmons work out well for you. I'll hope to make some setup changes this afternoon to my setup and take some pics.
Thanks,
Jack
 
Here is that picture I promised:
94eeaa31-0a2f-4ffd-b5c8-344023bc2308.jpg

The addition is the large rack in the center. It can hold about 300 of my DIY containers. If you look behind it you can see some of the persimmons that have leafed out. You can see about 1/2 of the setup in this pic.
I ran out of rootmaker cells today. I have 17 trays of persimmons that have germinate and are growing. That is about 300 trees and another 25 trees in my DIY cells in the rack.
Most of the baskets and trays you see in the foreground are germination trays. There are still many hundreds of seeds in them. I've got to get to work making more DIY cells for the rack.
I've been transplanting about 10-30 trees per day. I added one more germination basket today with another 100 seeds or so. I got way more trees going than I can handle!
Thanks,
Jack
 
Last edited:
Turkey Creek;608590 said:
You need to change your forum user name to "Mr. Persimmons?"!
Chris
If the picture was taken earlier this spring it would be Mr Dunstan:
f4faec26-f862-44f2-bf95-da9a8ebdf11f.jpg

Or perhaps Mr. Elderberry:
2ff8e639-8add-497e-85df-43680a760bbd.jpg

Or if it was taken a few steps furth back, you would see Jujube started from root cutting:

Not to mention the little mulberry experiment on the cloning machine right now.
I'm just not a fan of hyphonated names. :D
 
Last edited:
Gator;608686 said:
Maybe just Mr Green! You going to start a nursery when you retire from your current job?
No, I'll likely be on to something else by then. I just enjoy learning new things. I'm only doing these in volume from scratch because I can't afford to buy enough trees to have a significant impact on my property. I did the math, and setup cost are small amortized over a few years. I figure I need about 3 years of Dunstans to get the impact I want and with the infrastructure in place, all the other propagation is just a learning experience.
 
OUTDOORS ADDICT;608729 said:
Jujube....did you mean root cutting??? or just cuttings in general??

Wow 2ft cutting for elderberry and jujube........and they look great.
The Jujube were started from root cuttings. I have not yet tried dormant or herbaceous cuttings from Jujube yet. Since I have Tigertooth trees that I planted grown on their own root stock caged with landscape material, collecting root cuttings was easy. Since this worked out reasonably well (although very slowly), I probably won't bother with top growth cuttings. However, I do plan to try to stool some of these Jujube that I started from root cuttings next year.
That picture makes the Elderberry cuttings look larger than they really were. I'd say about a foot. The issue with Elderberry cuttings is that you really want a couple buds below the soil and a couple above. Buds on them are spaced pretty far apart, so the cuttings are rather tall. In the field, you can just plant them deeper, but when you start them in rootmaker cells you get a lot above ground.
Here is a picture of the Elderberries in May after planting in the field:
46e41476-3c5b-4643-9d52-5e03deafa463.jpg

Thanks,
Jack
 
Last edited:
On the previous page, I posted a picture of the root development of a typical persimmon seed germinated in a flat that was lined with the rubber shelf liner instead of the traditional newspaper.
Here is a picture of a typical one from a flat lined with newspaper:
2e171b28-b717-4aa3-bd4b-eafc40efad34.jpg

Keep in mind you get some of each with both kinds of flats, but I am clearly seeing more of the pruned and spreading roots in the flats lined with shelf liner and more of the unpruned turning tap roots from seeds germinated in the flats lined with newspaper.
Again, I'm not sure if either one is better than the other, just noting the difference.
 
Last edited:
I have now tried a number of different configurations of the containers. The 6" x 7 1/2" rectangle wrapped into cones as shown on the first page is the size I like best. I unroll the 10' x 24" roll and cut off eight 15" strips. I fold each strip in half to max 12" x 15" strips. I then cut each of those in half to make 12" x 7 1/2" strips and finally once again to make 6" x 7 1/2" rectangles.
This gives me 64 containers for a $12 roll.
 
Just thought I'd provide an update on how well these containers worked. I finished up the trees in rootmaker cells this weekend and started planting trees from the DIY containers.
6560ee99-2c79-4d0b-bf06-f3005fc1e3a4.jpg

In the photo above you see the regular rootmaker express tray and cells on the left. The right side shows the DIY air root pruning containers. For easy transport, I simply place them in 16 oz plastic drinking cups and place the cups in the express tray. They fit the express trays very well.
Here is a close up of one of the DIY container plants:
c131e518-453c-4008-b69a-832276e8c3bd.jpg

I planted these similar to how I planted the persimmons from the rootmaker cells. I used a planting bar in a non-traditional way. I inserted it to container depth and then twisted it 360 degrees to carve out a hole roughly the size of the container. Next I dipped the container in a bucket of water. Instead of squeezing the sides like with the stiffer rootmaker cell, I simply roll these lightly between my hands to loosen them, but most of the time I didn't need to do anything. I then placed my hand over the container with the stem between my fingers and inverted it and gave it a shake.
The picture below shows the rootball:
df03d6d8-1f6a-4a42-8030-7edf42549414.jpg

The air pruning works very well. I'm not sure if it is visible in the photo but there are lots of root tips sticking out that have been pruned. Just like with the rootmaker cells, I next put my other hand over the root ball, turned the tree upright, and dunked the rootball in WaterKeep slurry before pressing it into the hole.
The difference I see between these DIY containers and the root maker cells is that the DYIs allow for a slightly deeper tap root. The second difference is that because the entire container is aerated, it needs watered almost every day. The rootmaker cells can go for a day or two without water, but the DIY containers dry out quickly.
Thanks,
Jack
 
Last edited:
buckfever37;703592 said:
How did the rest of experiment go? Would 1 gallon pots work with a bunch of holes drilled in it?
 
Well, I did have some persimmon issues, but they were not related to the DIY containers. I started these too late in the year and planted the in September which is about the worst time. They did not have enough growth and time to harden before winter. I ended up with many of the tips dying from exposure. Because they were so young and small, the only buds were at the tips.
At first, I thought my success rate was about 10%, but in the last few days some of the trees planted in the field are starting to surprise me and bounce back.
As for drilling holes in the bottom of gallon pots, I don't think that would work to well. I don't think the material I used scales much beyond the cell size.
The 1 gal Rootmaker pots have protrusions on the sides that direct roots to the holes. The bottoms of the pots are concave into the pot with ridges. This too direct roots to the outer side holes along the bottom.
Drilling holes in a flat bottomed pot would not direct the roots to the holes. I'd still be concerned with J-hooking and circling. Even if the roots did find the holes, you would need to find a way to elevate the pots so that you would have airflow below.
There were some other guys trying to DIY larger air pruning containers. You might want to see if they have had any success.
As far as a cell sized container goes, my DIY works fine. The only largest drawback is convenience. They do dry out faster and require daily watering when my cells may go for two days outside.
Good Luck,
Jack
 
buckfever37;703607 said:
thanks jack., do you know any links for those guys trying bigger air pruning dyi? I direct seeded 17 Dunstan chestnuts today but I kept 4 in the fridge. Mainly cause I want to grow them at home. I'm thinking use that same material you used but make them similar to a gallon pot.
You could try that. The way I get air flow at the bottom is by hanging the container. I'm not sure if this material could support hanging the way I did with a gallon of mix in it. If you could find a way to hang it, it might work.
 
buckfever37;703611 said:
I thought I could get some 2x4 and 1x2 and make a stand. The 2x4 for the base and 1x2 for the frame. Then maybe those small j-hooks on each side to hang the containers. I use a mix called professional growers mix I get from Lowes. Probably transfer my weeping willow to one as well. Would you put vermiculite into my mix?
I don't know enough about your mix to comment. In general, the professional mixes are soilless and very well drained. They are chunky. The idea is for a lot of space that the roots can eventually fill.
If you do a search on-line, you will find Farfard 52 or Promix BX. Those are both good mixes for growing trees. You can find roughly what percentages are in them of the main ingredients. Compare that to what you are buying and decide what you want to add.
You can also mix your own. Dr Whitcomb has a recipe in his paper on growing trees.
That shelving material is pretty stretchy. You might need to put large tarp like eyelets in it for your J-hooks.
 
Top