Wooded framed CC roller/sprayer

Doug Galloway

5 year old buck +
Thanks for the idea and tip for this in the cultipacker thread. I will add another helpful trick....dip the tip of a deck screw or lag screw into 20W-50 motor oil before driving them...works slick! pun lol

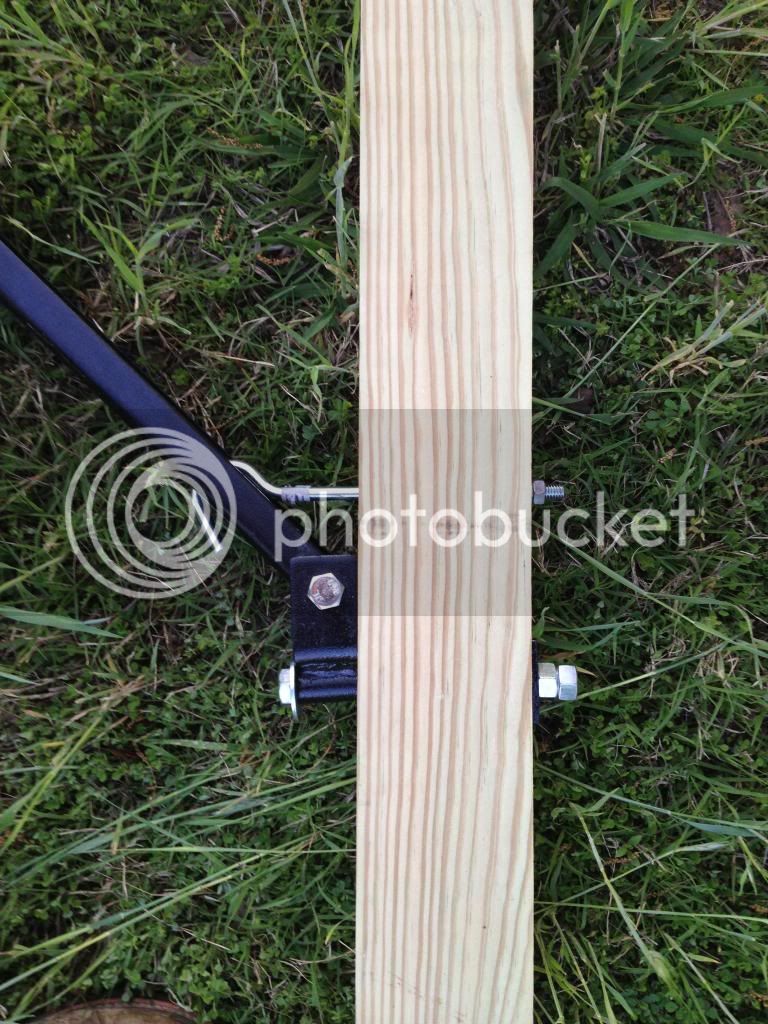
This is a heavy wooden frame for a 10'6" cover crop roller....made from new treated lumber and the auto tow hitch from Harbor Freight. Included some close ups of corner bracing and a mod on the hitch attachment.

An 18-24" diameter log from an old creosoted transmission line pole will be used for the roller. Risers angling toward the back of the unit will hold a 10' boom sprayer.

In one pass, a cover crop can be rolled and sprayed....goal is to save time on planting day and reduce the need for helpers!

If it doesn't work....we aren't out much!

Vanna White showed up for a photo op!...and yes my lawn is overseeded in a cover crop!


Looks good so far. You'll have to show the finished product.
 
Something is up!! I have never seen Vanna in casual attire. :DLooks like a good project, bet it was fun if you got some help from the young lady as well. I wonder if the pole will be enough weight you might have to add some cinder blocks or other source of weight.
 
Pole is 10' 6" and 14" diameter average. Should be heavy enough as I did a few passes in pasture as a test....plus the drill lays quite a bit of rye down and the low wood frame will bend some stems. At that width, two passes would be feasible as is certainly better than a 4' cultipacker. It would need a metal frame to handle added weight....at that point might as well go with a metal roller too. If it works this spring, then we will add angle iron fins which would further focus weight. Won't be able to turn really tight without extending the tongue....but no extension is needed for the sprayer hookup.


Now let's see some trophy shots of some flattened rye. I'm going to have to wait until mid-July to level my rye.

Mature flattened rye that was flattened on the right, not flattened on the left.
69ACF4F0-3086-40F2-900D-0D008890030F.jpg

The rye shoots growing from the seed head. Notice that this seed head isn't really contacting the soil, and it's still growing! Tell me that isn't awesome(Please take these pictures to reassure yourself you don't have to baby your planting and management, it can be real easy). I didn't believeit till I saw it, but this stuff doesn't need to be touching the ground to grow. Last november I observed germination from seed heads a foot off the ground.
57E8D9B7-0E7D-41DB-981E-491117872C45.jpg

Us food plotters don't have to play by any rules. My cultipacker saved me $520 last year, if I would have had to buy rye seed as $20 bushell. The bonus is, this stuff is growing without any soil amendments, that are extremely low in K, and available P.

I assess my flatened rye plots before I spray them. I really only worry about grasses competing with my rye. Sometimes I have to spray, some times I don't. I havent reached a conclusion yet, but the more I manage this way, the less it appears I have to spray.
 
Last edited by a moderator:
Looks great Doug. Always good to see practical ingenuity solve a problem. Are you using your conventional JD drill to drill your mixes into your rolled rye? Share more pictures please.
 
Yes, will use the JDVB with closing wheels. Rye was around 5' when I looked yesterday....anthesis stage or better. There should be legumes under that as well. After spraying we will spin on 100-150 lb ammonium sulfate and 100-150 lb potash. Then put up the proverbial e-fences.

Need to drill a test acre today to do final tweak on drill setting.
 
Impressive, Doug. Your wife must be extremely good looking, as I refuse to believe "Vanna" gets her good looks from you. Having 20 and 18 yr old girls myself, take one piece of advice from me. Lock up your guns and give your wife the key until she gets married. The temptation to shoot every boy that shows up to date your daughter is too strong to risk it.
 
Doug,

Are those just lag screws in the ends for "axles" ?
 
Left lag came out near the end of spraying....got too rapt in the whole process and forgot to check tightness....limped it back to it's spot in the equip lot. That is fine...it worked well which is all we needed to know.....no more foam markers....no more noisy cultipacker and overheated ATV....that is worth it right there.

Deer patch and I had a gray matter swap via email.....this is the design we came up with for bushinged axles....same principle as non-removable gate hinges...axle could be solid bar stock or pipe....pipe diameter is irrelevant. My steel yard contact will come over today and we'll go over the crude plan.
 
Some field shots from this week:

Clean field with mainly rye some pea and vetch and arrowleaf....nice pancake roll


Before and after in the same spot in a different field.....roll is a little more 'wooly' when weeds are present and/or the rye hasn't reached pollination....which is fine I made two spray passes there due to dock and western ironweed which can be tough to kill. That is the wet area of the plot....it is dry right now....so we may actually get a good stand of summer annuals there to choke out weeds. One thing you can do for weedy areas is plant 80-100 lb/ac of sorghum-sudan for a summer cover....the high density of SS will keep stalks thin and whippy so it could be rolled in fall.....nomal SS rate for hay is 30-60 lba....any of those rates will choke out weeds and use up the excess water.


Nice homebuild project Doug. The corner design that you have in your 3rd pic is pretty similar to what I came up with last fall when there was talk about the steel weld-free ATV cultipacker frame on the other forum. I hope to have a prototype ready to test in the coming weeks. I am having drawings and NC files made right away so I can mass produce them on our shop equipment if everything works out.
 
Corners are solid for sure. When the roller came loose on one side, the frame held solid. Need to brace up the boom supports with some flat plate metal. Vibrations loosened the 3" stainless deck screws.
 
1/4" thick flat plates screwed into the main frame and boom supports should hold just fine on the 2 side ones. The middle will be a bit more of a challenge, but a plate bent around the front edge of the frame and up the top might work. Angle iron might be good there too.
 
Top