This is a good article on using a variety of seeds in a drill. Some really good tips here for a drill owner. (I forget the university that put this out.).
Adjustments for proper planting depth
Forage and cover crop species differ in their recommended planting depth, so ensure that the drill is set up for the depth recommended in Table 1. Drill models will differ in their setup, but there are some planting depth adjustments that are fairly universal. On a no-till drill, one can adjust the planting depth by adjusting the cutting depth of the rolling coulter in the front of the drill. As a rule of thumb, the coulter should be cutting twice as deep as the planned seeding depth. So, if the desired planting depth is 1⁄2 in., then the coulter should make a 1-in. slice into the soil. This is usually adjusted by a “depth control” knob or hydraulic setup. On some models, the stroke of the hydraulics that lift and lower the drill into the soil can be modified by stroke limiters or stroke blocks. These limiters/blocks are sleeves of varying sizes that go around the hydraulic cylinder and can be used to prevent the cylinder from traveling further than desired.
Those who are unfamiliar with using a no-till drill may assume that turning the “depth control” knob or limiting the stroke of the hydraulic cylinder is the only adjustment that is needed. Unfortunately, this only sets the coulter depth. There are two other adjustments that are necessary, and those are similar between no-till and conventional drill designs.
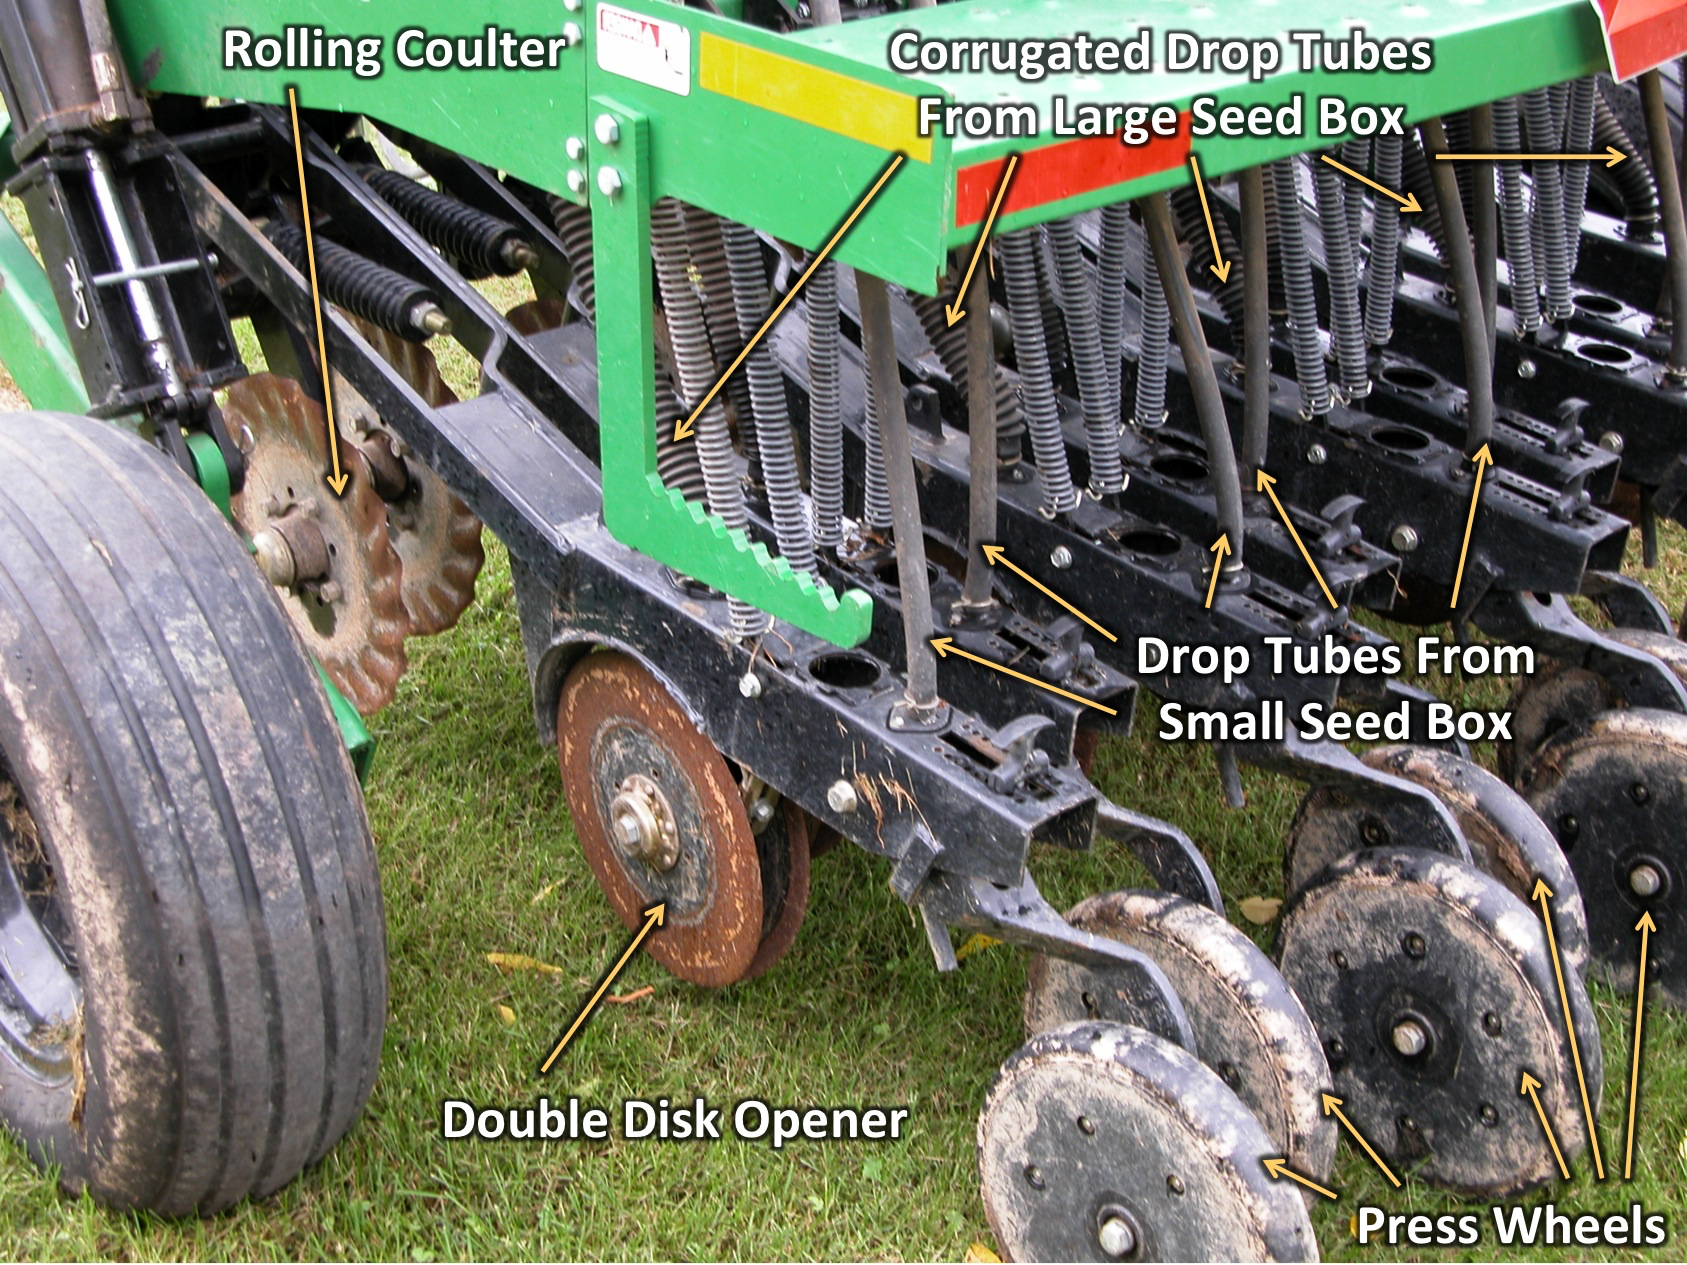
The depth of the double-disk opener is largely determined by the down pressure provided by the weight of the drill and the down pressure springs (Figure 10). Typically, there are one or two springs for each row unit that pushes the opener down. These may be placed on their lowest down pressure setting when shipped from the manufacturer. This may be sufficient down pressure, at least at the start. However, these springs may lose tension over time and may not provide enough down pressure. To create more down pressure, shorten the length of the spring’s travel according to the manufacturer’s instructions (usually by removing the “W” clip at the bottom of the spring and moving it to a higher hole in the rod that runs through the spring).
Figure 10. The labels pictured describe the parts of the drill that are important to ensuring proper seeding depth.
The final step, adjusting the press wheels correctly, is equally crucial to planting depth control. Most press wheels have a T-handle that can be adjusted forward (toward the tractor) allowing the depth to be shallower or backward (toward the press wheel) to enable a deeper seed placement. The press wheel adjustment allows the planting depth to be fine-tuned, but it operates in conjunction with the opener’s placement. The press wheels are designed to ensure that the openers are not pushed too deeply by the springs. The press wheels work in tandem with the springs to create what is called “reserve power.” In other words, as the properly adjusted press wheel traverses the rough terrain of pastures and hayfields, there is enough travel in the spring that the openers are always positioned at the right depth. On some drills, depth bands can be added to the double-disk openers to ensure that the coulters penetrate to the precise depth desired.
When checking depth, carefully scrape away the soil from the middle of the furrow outwards. Measure the depth relative to the soil surface. Note that the layer of thatch or residue is not included in the planting depth. Remember that conditions often vary within the field and will change throughout the day. Regularly check seeding depth and adjust the drill accordingly.
Pro tip: To more easily find the seed when initially adjusting planting depth, use a quart-sized bag full of seed that has been lightly sprayed with orange turf paint.
