You are using an out of date browser. It may not display this or other websites correctly.
You should upgrade or use an alternative browser.
You should upgrade or use an alternative browser.
Permanent Stand Pics
- Thread starter bowhunternw
- Start date
-
- Tags
- box blind tower stand

I made a defroster of sorts. Screwed some cheap door hinges in the corners and use a simple Coleman fan with the magnetic base. The hinge allows me to aim it at a couple different windows until they defrost or the fog goes away. Move it to a different hinge if other windows need it. Cracking a window lets the moisture escape. The fan uses one "D" battery. I just keep a couple extra in each shooting house.For those of you in cold climate, and run a heater, how do you prevent the windows from getting moisture on them, or freezing? Do you run a vent in the roof, or on the wall towards the ceiling? Any pictures of what you use? I have just left windows open in the past, but then it really doesnt pay to have windows there.
dod
Buck Fawn
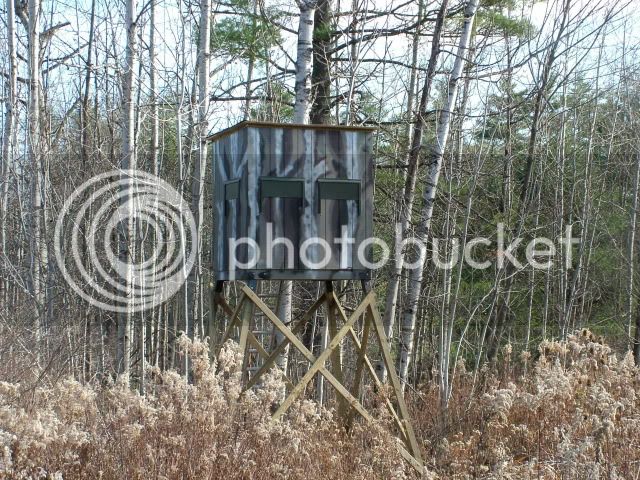
Been looking into one of these. How do you like it and do the Windows leak?View attachment 10507 View attachment 10507 View attachment 10508
Here is a Maverick blind on a platform.
scott44
5 year old buck +
View attachment 10507 View attachment 10507 View attachment 10508
Here is a Maverick blind on a platform.
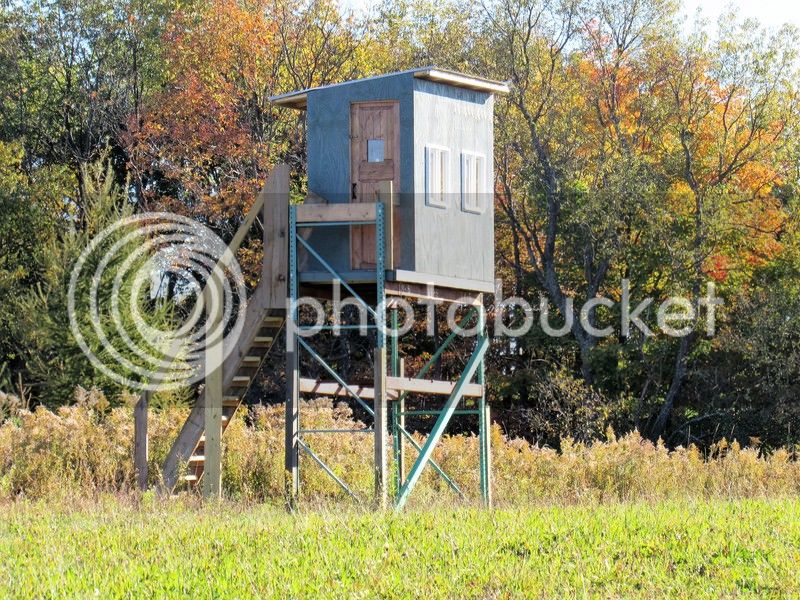
View attachment 11056 I built this one last year...a lot more work and money than I had anticipated. I would like to have a couple more but after this one I'm rethinking it.
Good looking set ups guys!
farmhunter
A good 3 year old buck
here's my most recent one - we built it all on the ground and took it apart - and sent it up pc by pc. I've got to say that I wouldn't want to build one every year though- it was not easy sending the sides up all built -
tooln
5 year old buck +
I have a little squeegee that I use to wipe the windows.For those of you in cold climate, and run a heater, how do you prevent the windows from getting moisture on them, or freezing? Do you run a vent in the roof, or on the wall towards the ceiling? Any pictures of what you use? I have just left windows open in the past, but then it really doesnt pay to have windows there.
View attachment 11056 I built this one last year...a lot more work and money than I had anticipated. I would like to have a couple more but after this one I'm rethinking it.
Really like how the awnings are enclosed on the bottom. Should help with the wasps.
Can you post up some photos of the inside layout and the window detail?
Also any dimensions and materials.
Want to build one similar to yours.
Thanks
Tree Spud
5 year old buck +
here's my most recent one - we built it all on the ground and took it apart - and sent it up pc by pc. I've got to say that I wouldn't want to build one every year though- it was not easy sending the sides up all built -
Interesting camo color ... :)
DrDirtNap
5 year old buck +
Really like how the awnings are enclosed on the bottom. Should help with the wasps.
Can you post up some photos of the inside layout and the window detail?
Also any dimensions and materials.
Want to build one similar to yours.
Thanks
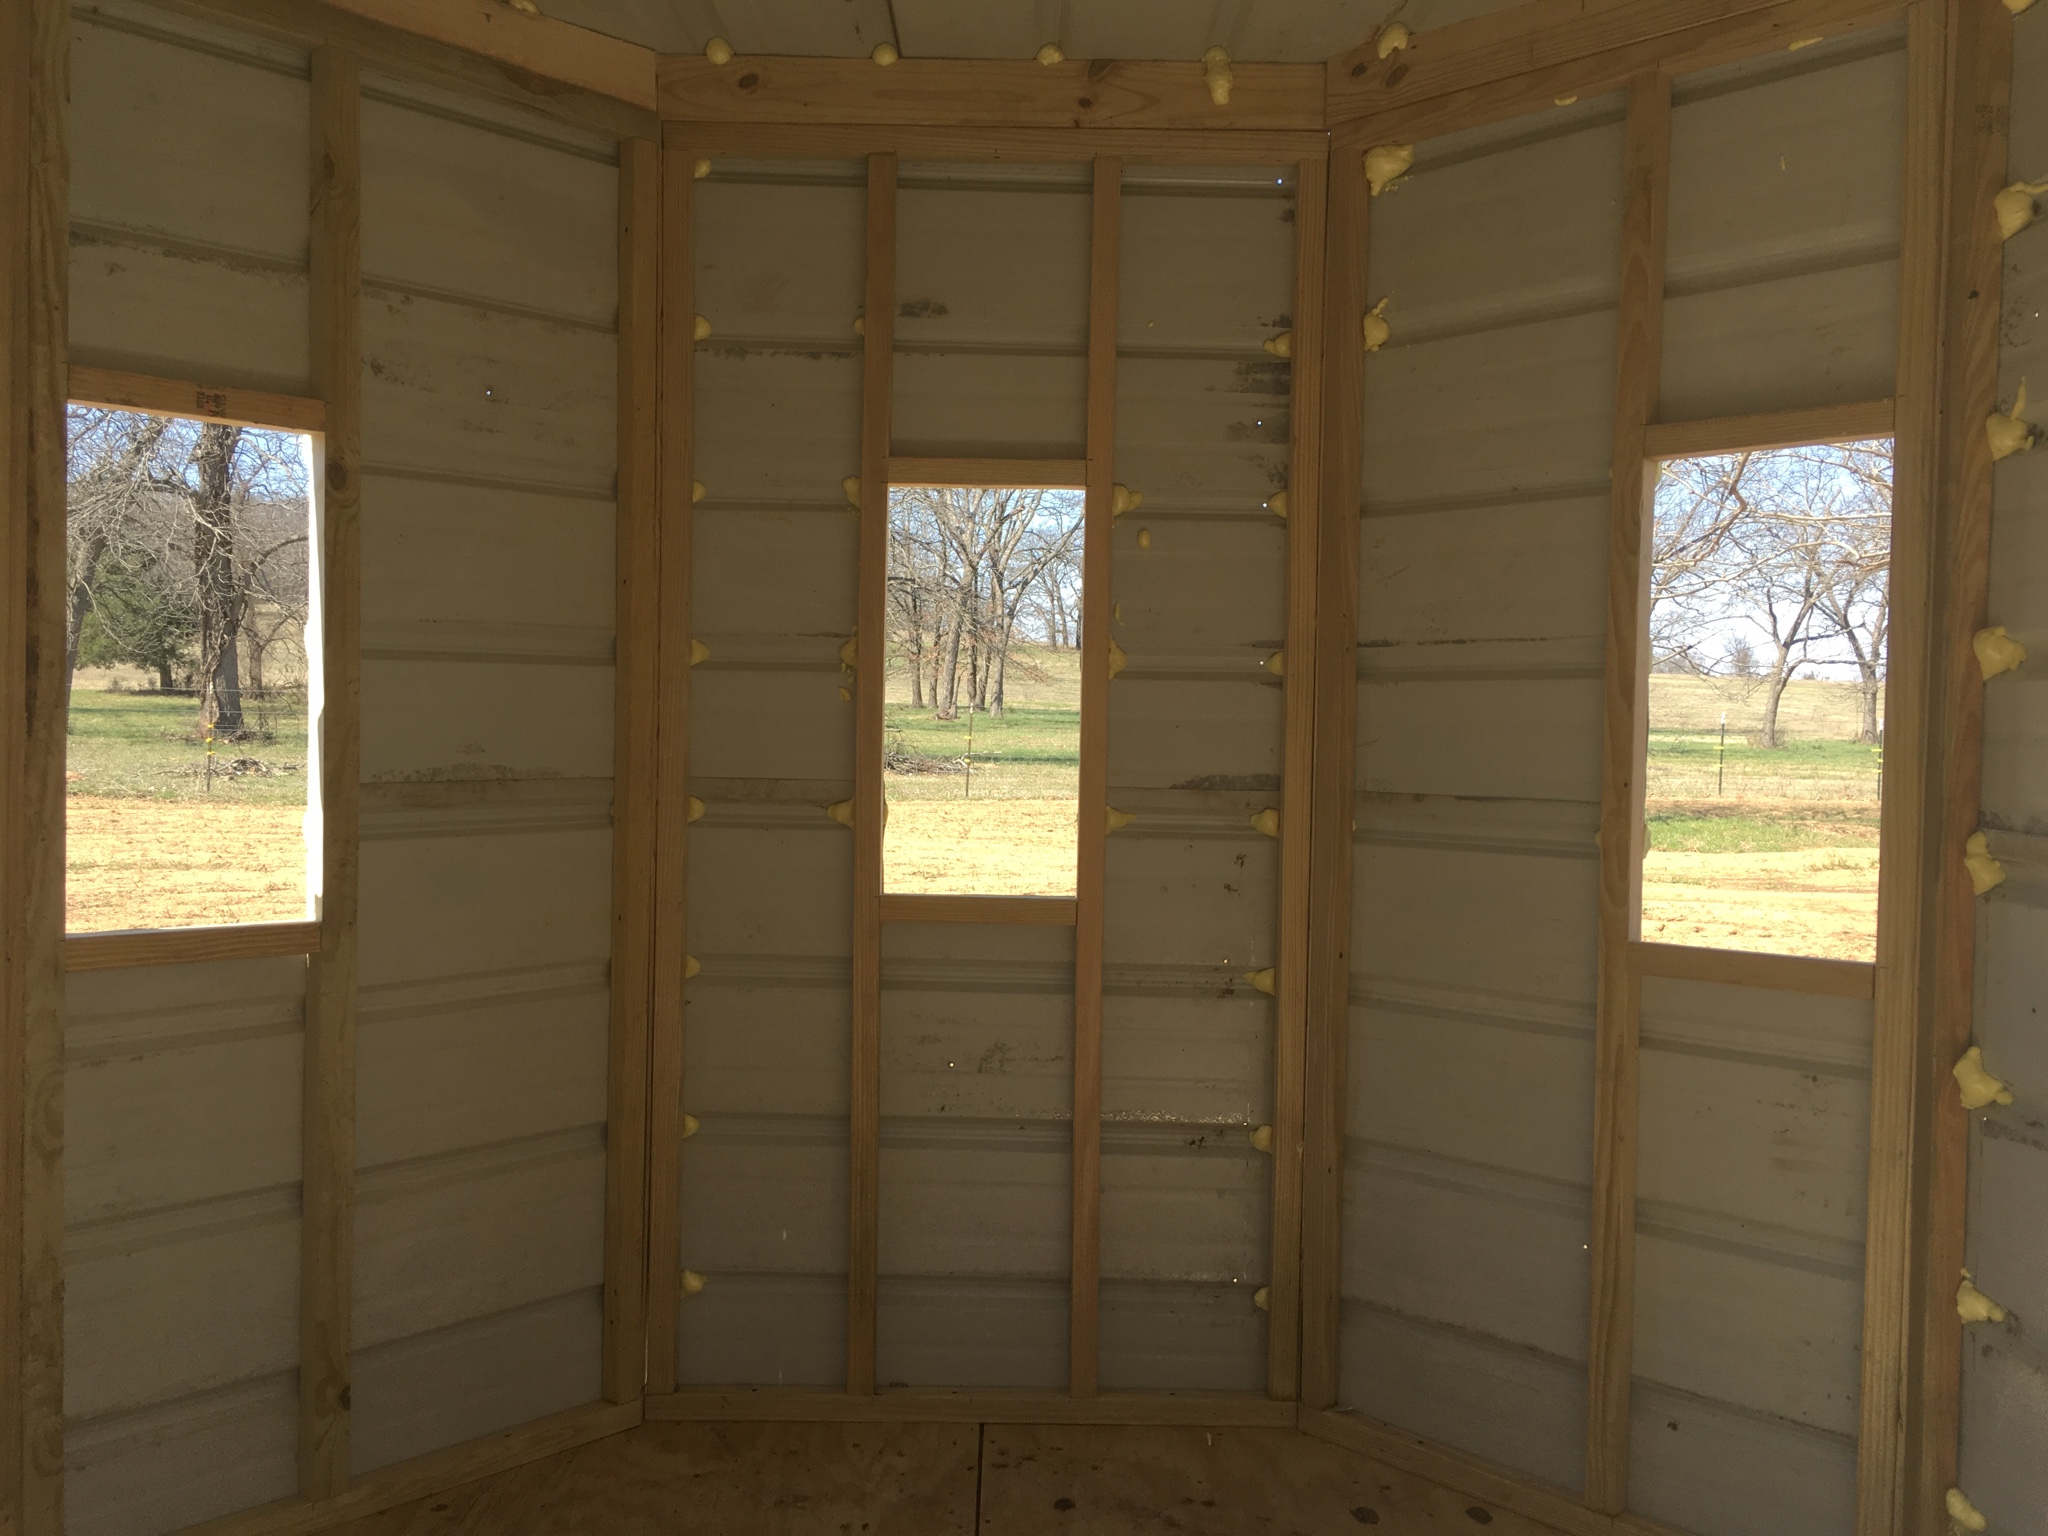
Here's some more pics. Dimensions are 6 X 8. Horizontal Windows are 24 X 12 and the vertical windows are 36 X 12. All the windows came from Deerview and they hinge to the inside. All wood is treated. I used 2 x 2s for all the framing. Everything is glued and screwed...and don't forget about the caulk.
I'm sorry the pictures are so dark.
Thanks

Sent from my iPhone using Tapatalk
chickenlittle
5 year old buck +
I need to build a few more of these over the next couple years. Lots of good ideas here. I am wondering what people's opinions are on window height. I have one that has repurposed old glass windows that I'd like to replace. I like the deerview windows and could close up the window opening some. Right now the windows are too low to rest the gun on and I made shooting rails for a rest while sitting on a stool. Not sure if higher is better and maybe stand with the rifle resting on window or lower where i now have the shooting rail for sitting.
Diesel5610
5 year old buck +
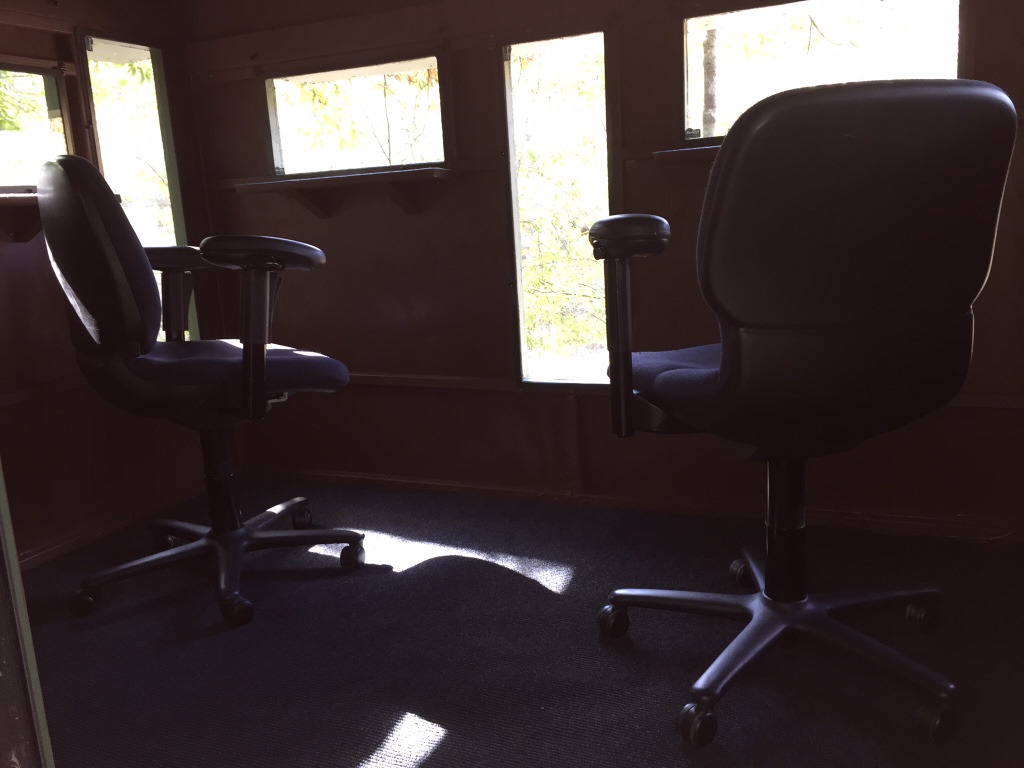
This one has been up since 2009, after the kids and I built it in the garage. Was disassembled, transported in the back of my pickup in pieces and it went up as 6 pieces. Base, 4 walls and roof. Only way to do it after being involved in over a dozen houses going up by several methods. This is 6x5 and very comfortable for two people in comfortable office chairs. I can't tell you how many hours this house been occupied by people we hunt with. You can access it without deer knowing and we have killed several good bucks from it and several truckloads of doe. Both my kids shot their first deer here and some day my ashes will be poured out one of those windows during a decent snow in deer season. I enjoy the place that much.

Last edited:
Black River Food Plots
Yearling... With promise
These are the last batch of custom stands I built for a customer two years ago. No longer had time to dedicate to building them, so I looked at a bunch of the commercial blinds on the market and became a dealer for Muddy Bull Blinds. These last blinds were 6'x8' octagons with DeerView camo windows, 3' landing, stairs with railings, insulated, vented, paneled on the inside, and heavy!


Big Snow Man
5 year old buck +
Wow Black River those must have been fun dragging through the woods and putting them up !
Been looking into one of these. How do you like it and do the Windows leak?
They are just so-so and nothing about yes, the windows do leak. The blinds do keep the elements off you and with a heater, they are plenty warm. Being non-insulated brings dripping condensation at times. The windows in all directions is nice. I do wish the windows came a little lower though.
I bought these for the price point and figured they lacked quality. They suffice for my purposes. I would never put them in any discussion with the big name blinds like Redneck.

IkemanTx
5 year old buck +
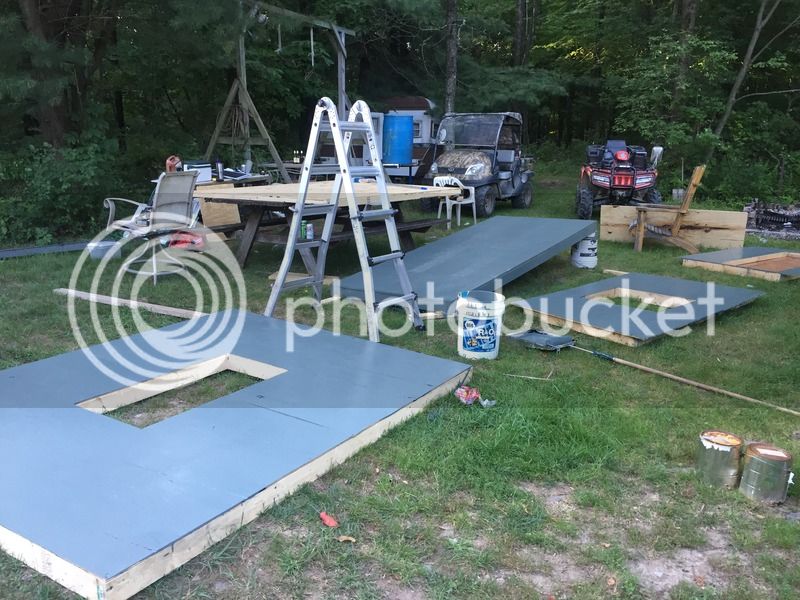
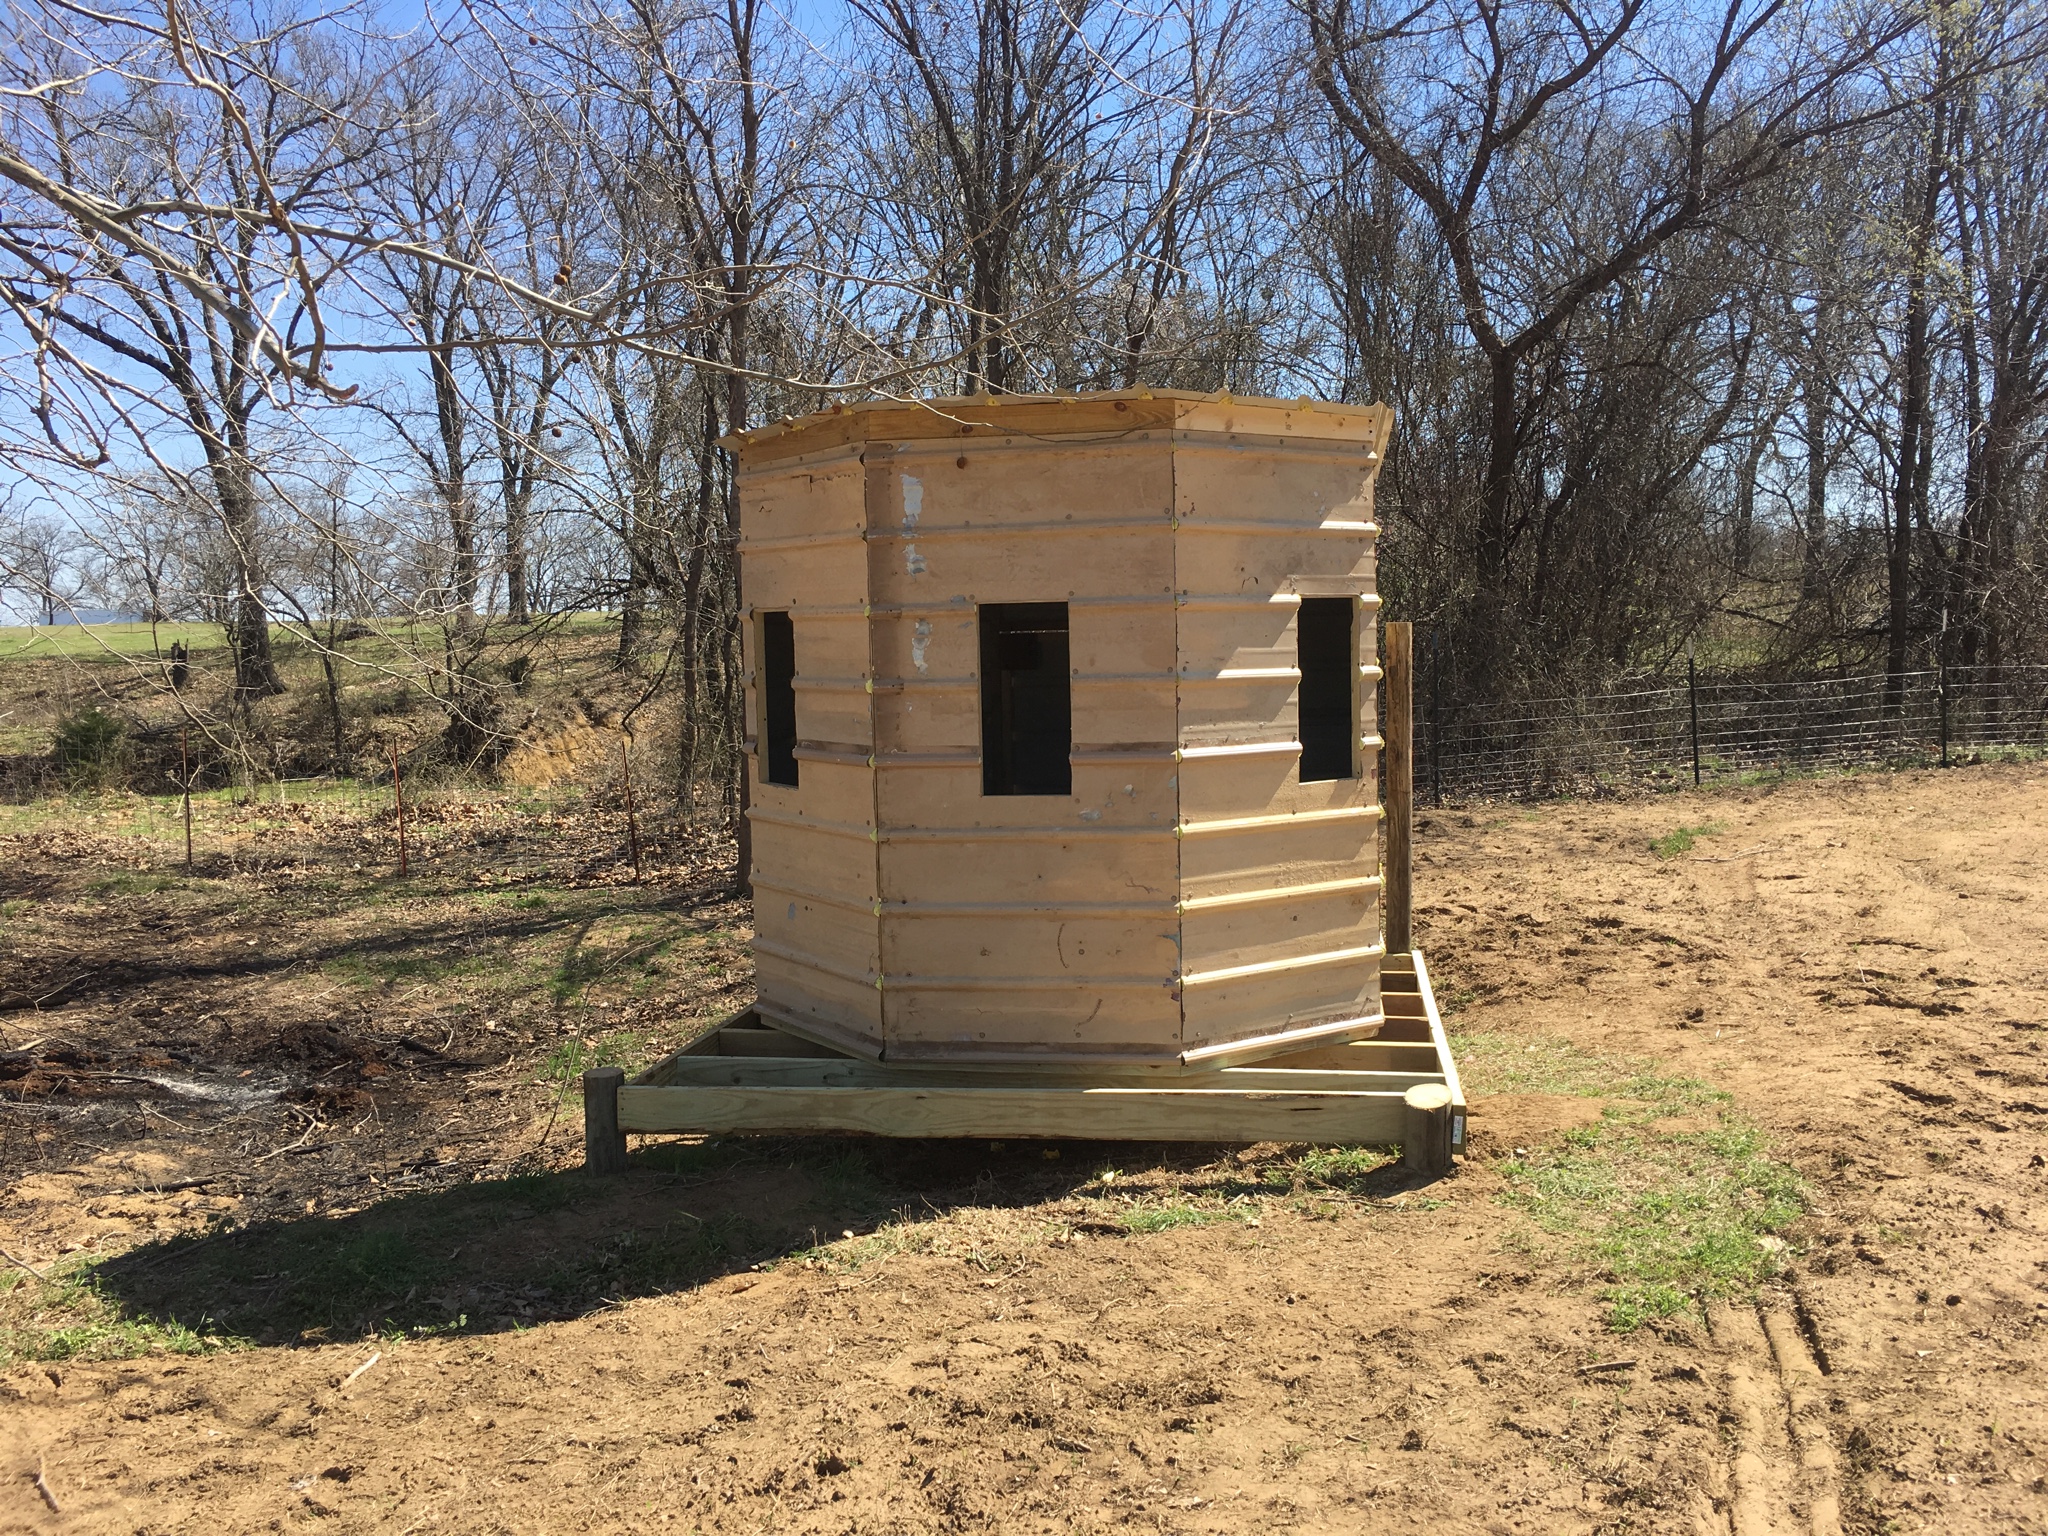
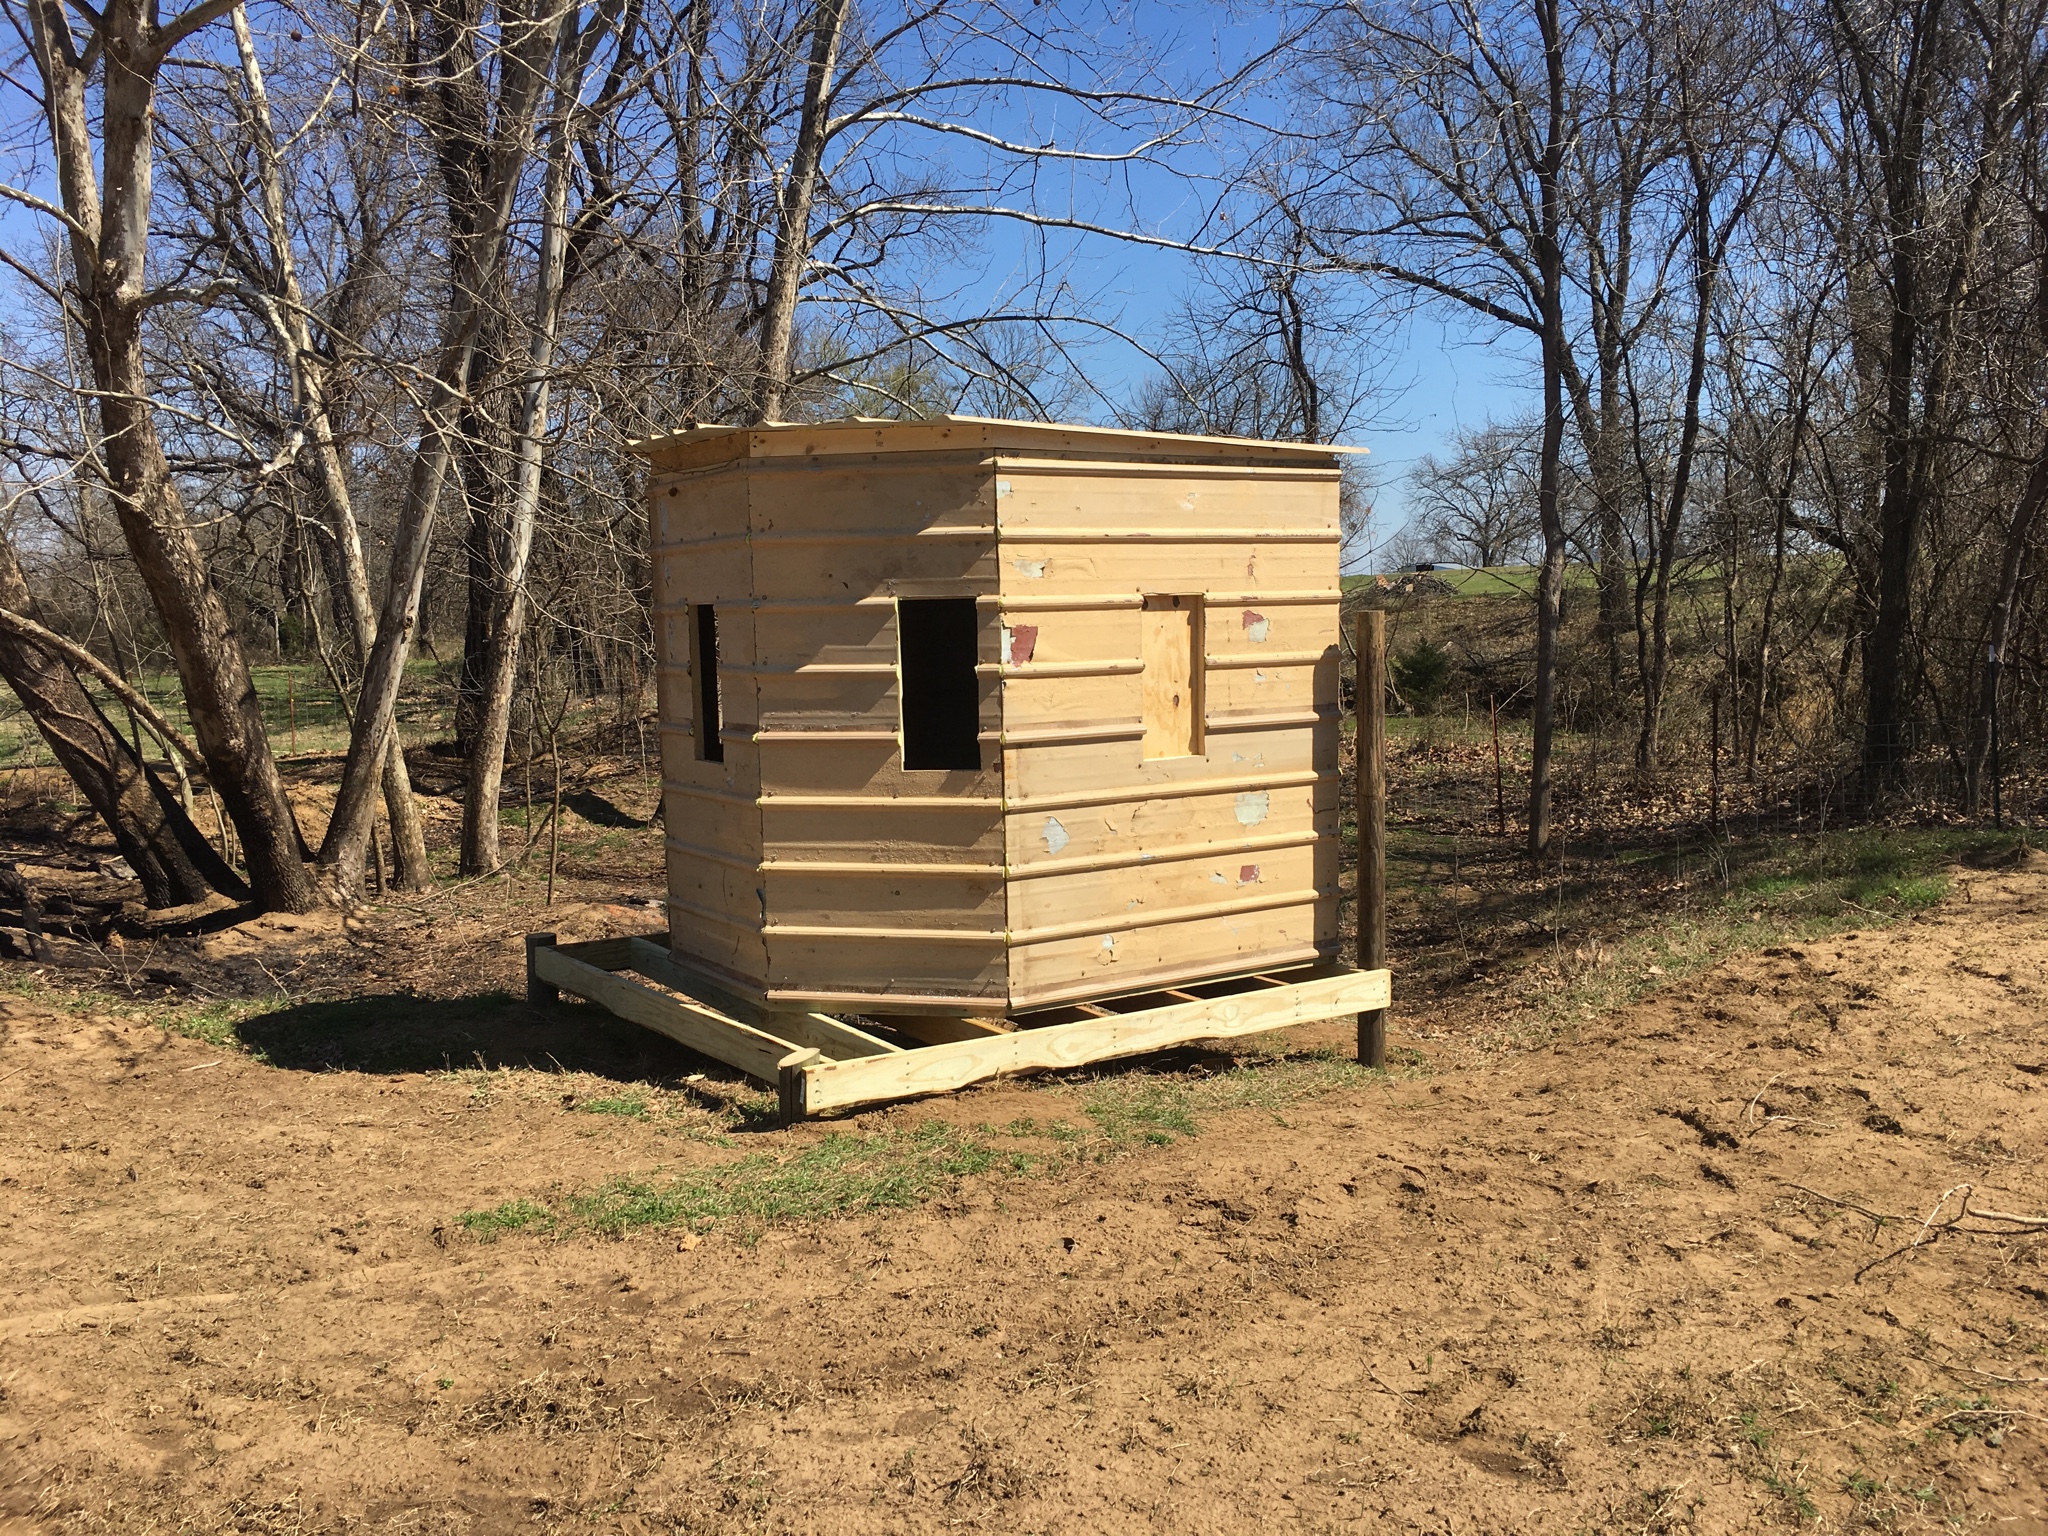
We build them modularly. Walls are 2X2 framing with metal roofing for siding. The walls are all framed as individual squared up pieces, and never get assembled until they are on the platform. Siding overlaps on corners are accounted for in the initial construction and they end up real tight. When built this way, they stack flat on a trailer for transport and don't cause a lot of drag. (5 hour trip one way)
Here is a 7X7 archery ground blind we assembled just today. Most of our boxes have gone on 10' metal towers. The platform it sits on is 8X8 because it was built before we really decided on the box layout.
The framing done last week
The floor is first, built in two pieces with the plywood from one side overlapping the other framing by half a 2X4
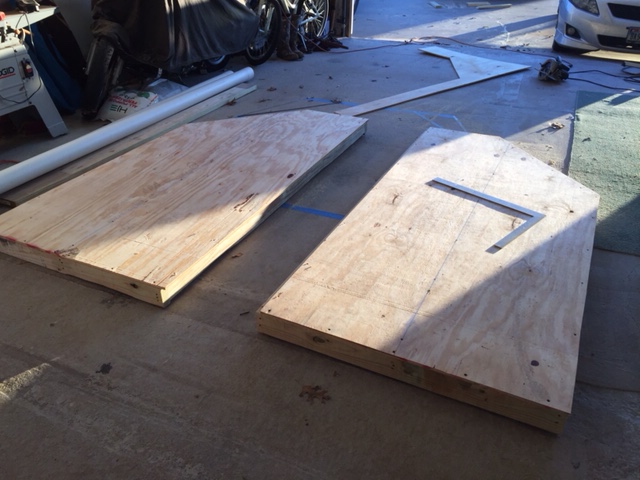
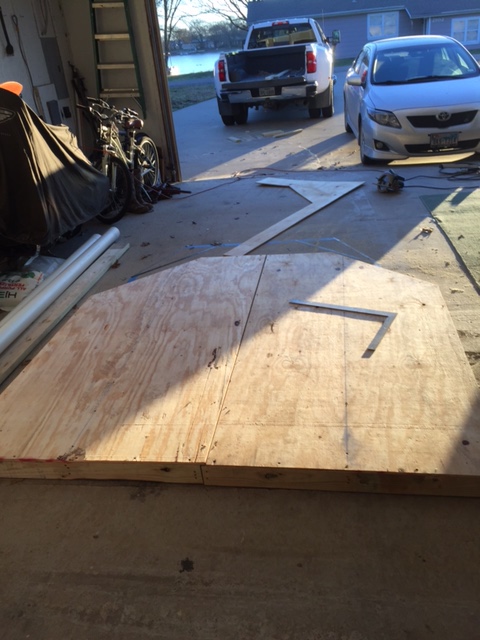
Then walls are framed based off of floor measurements.
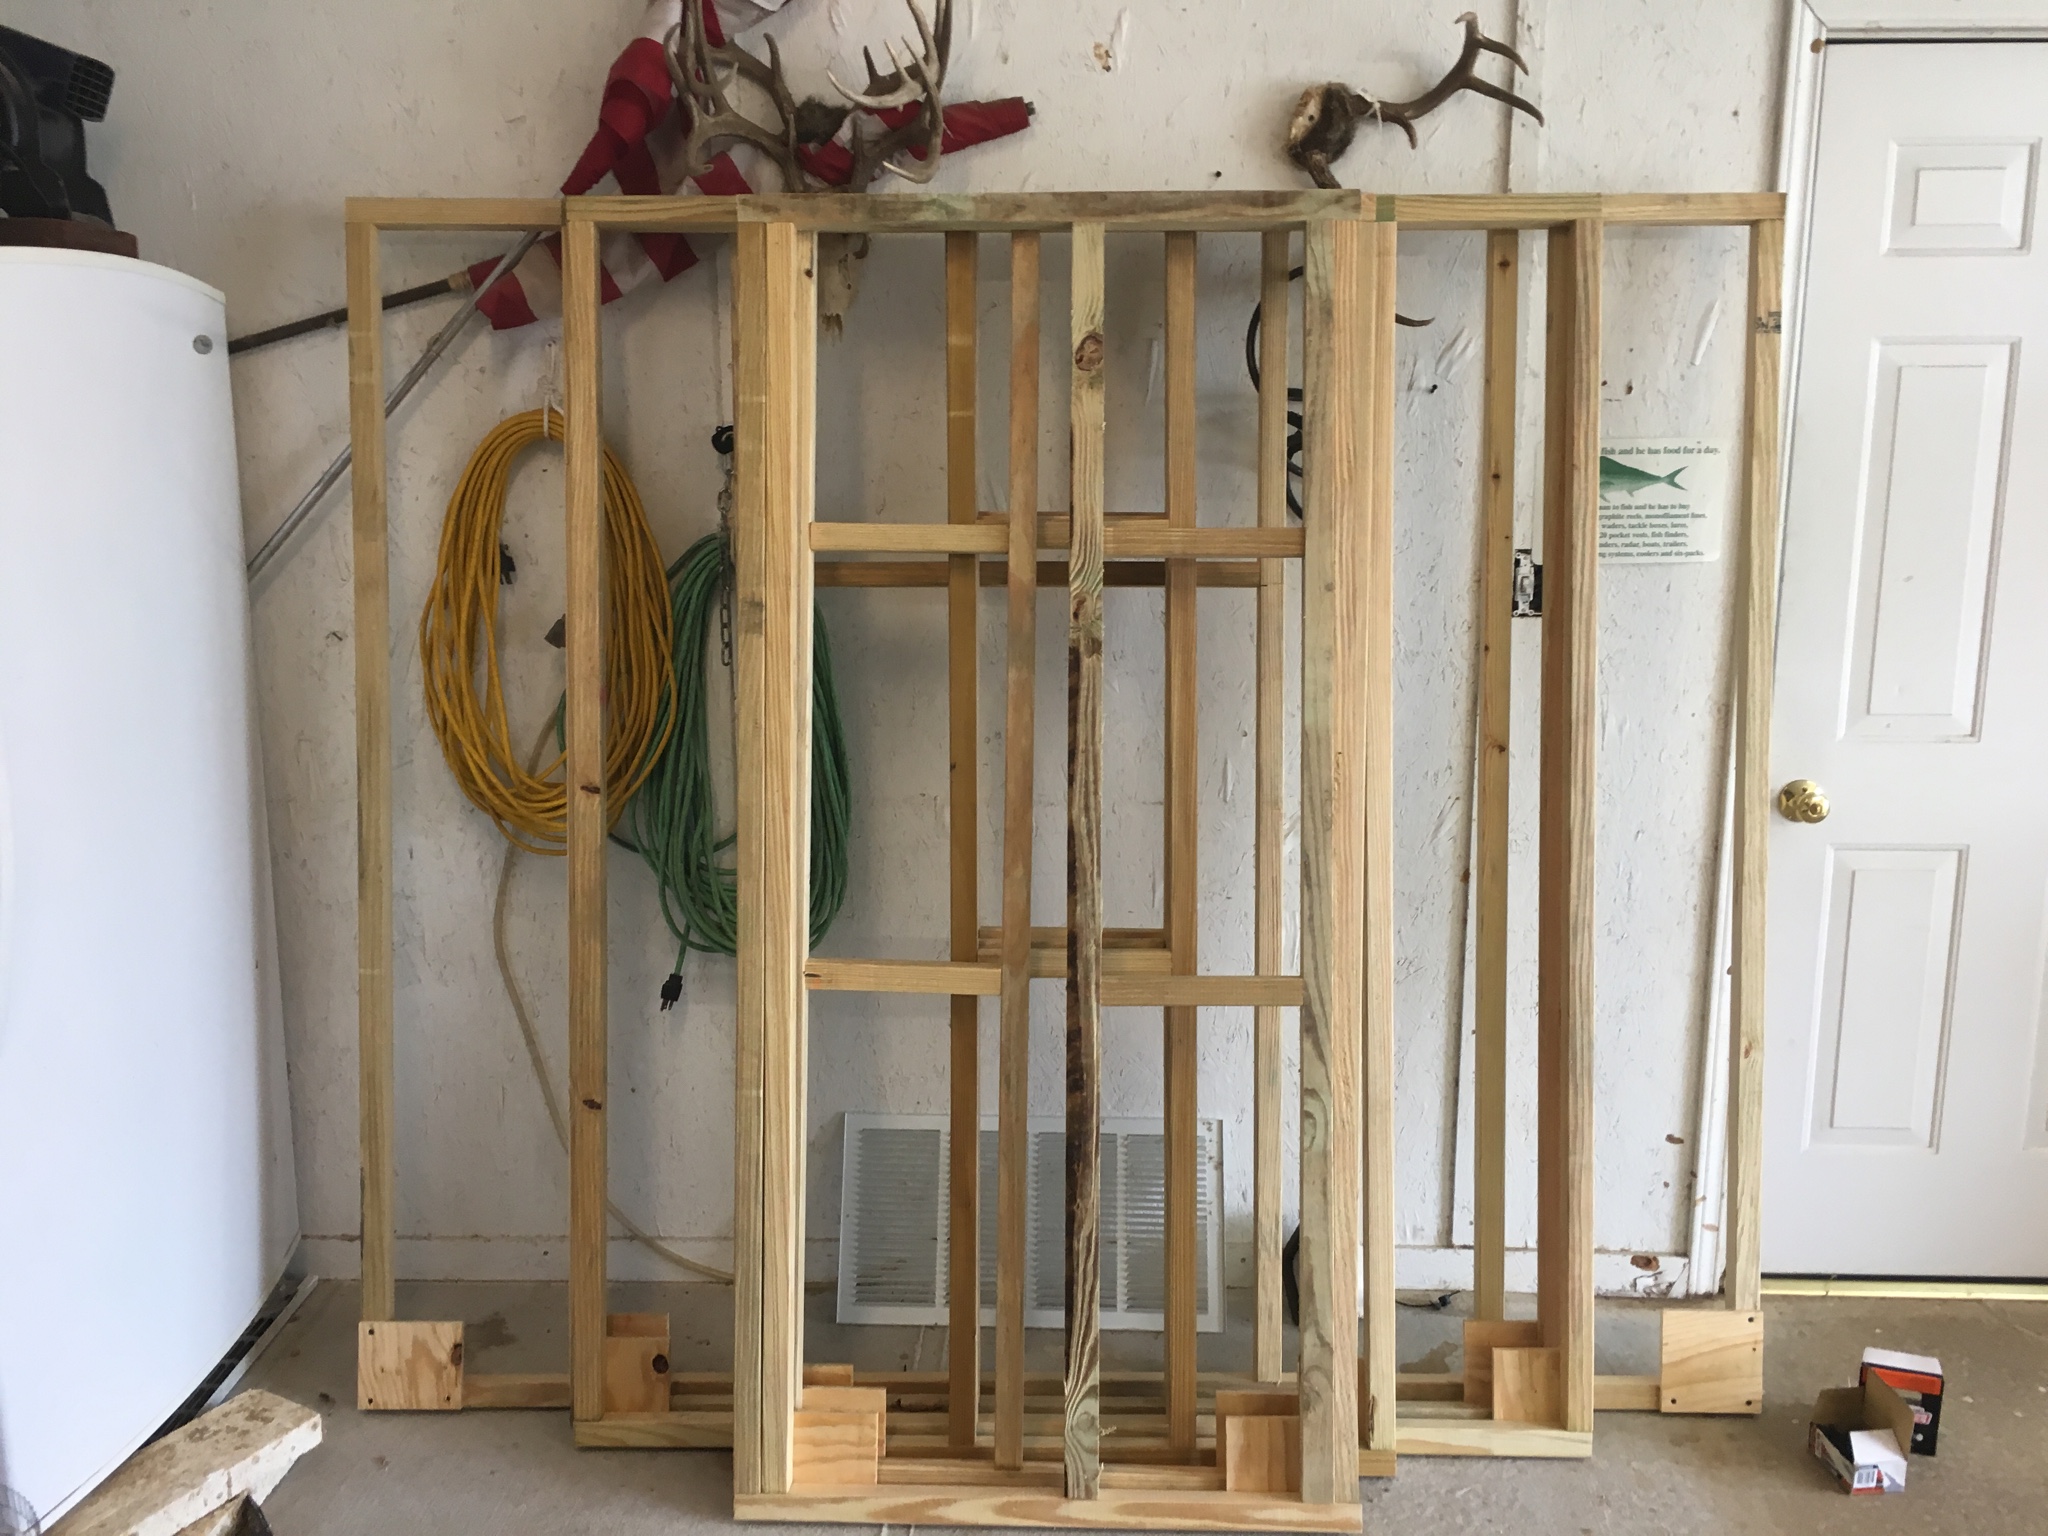
Then the individual sides were skinned with metal
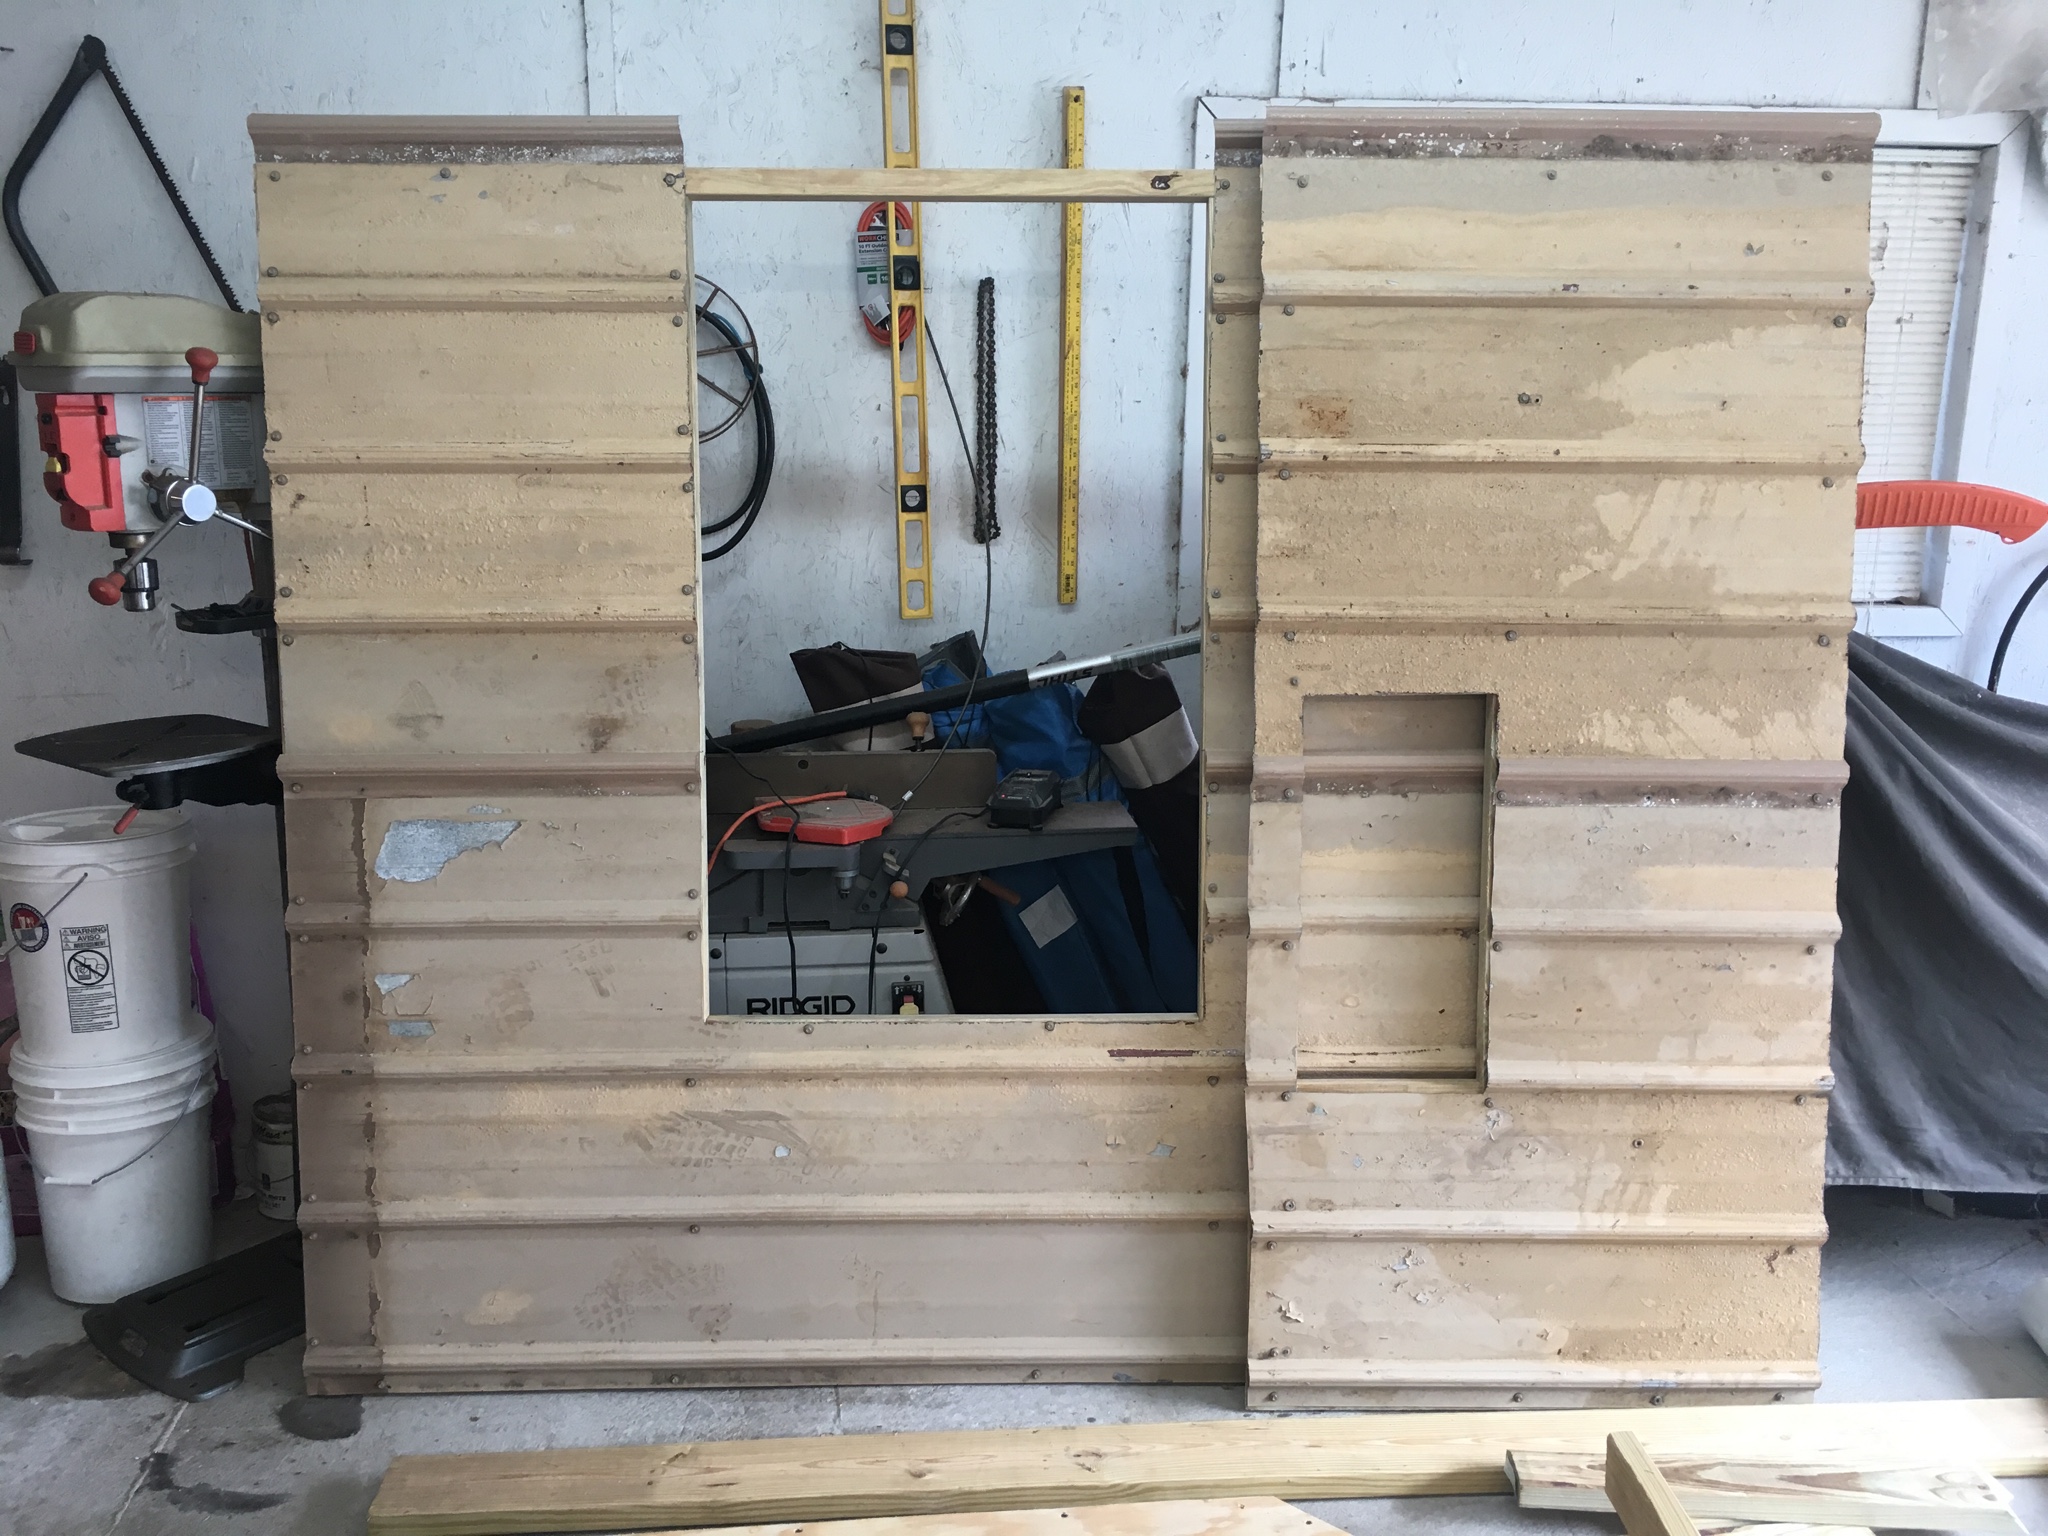
The roof is built laying right on top of the floor, 2X2 at back and 2X4 at front to get the slope.
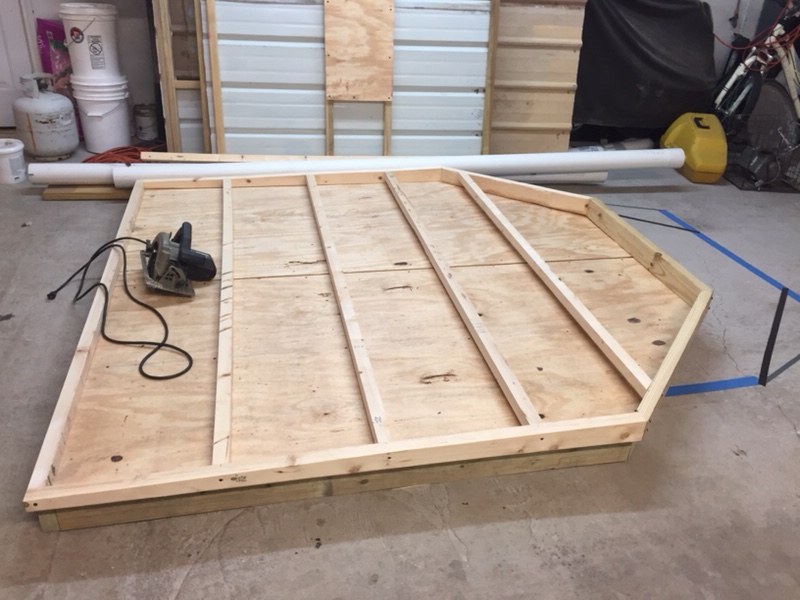
The assembly on site.
The back was the last piece on so that we could walk with the roof instead of trying to manhandle it onto the top.
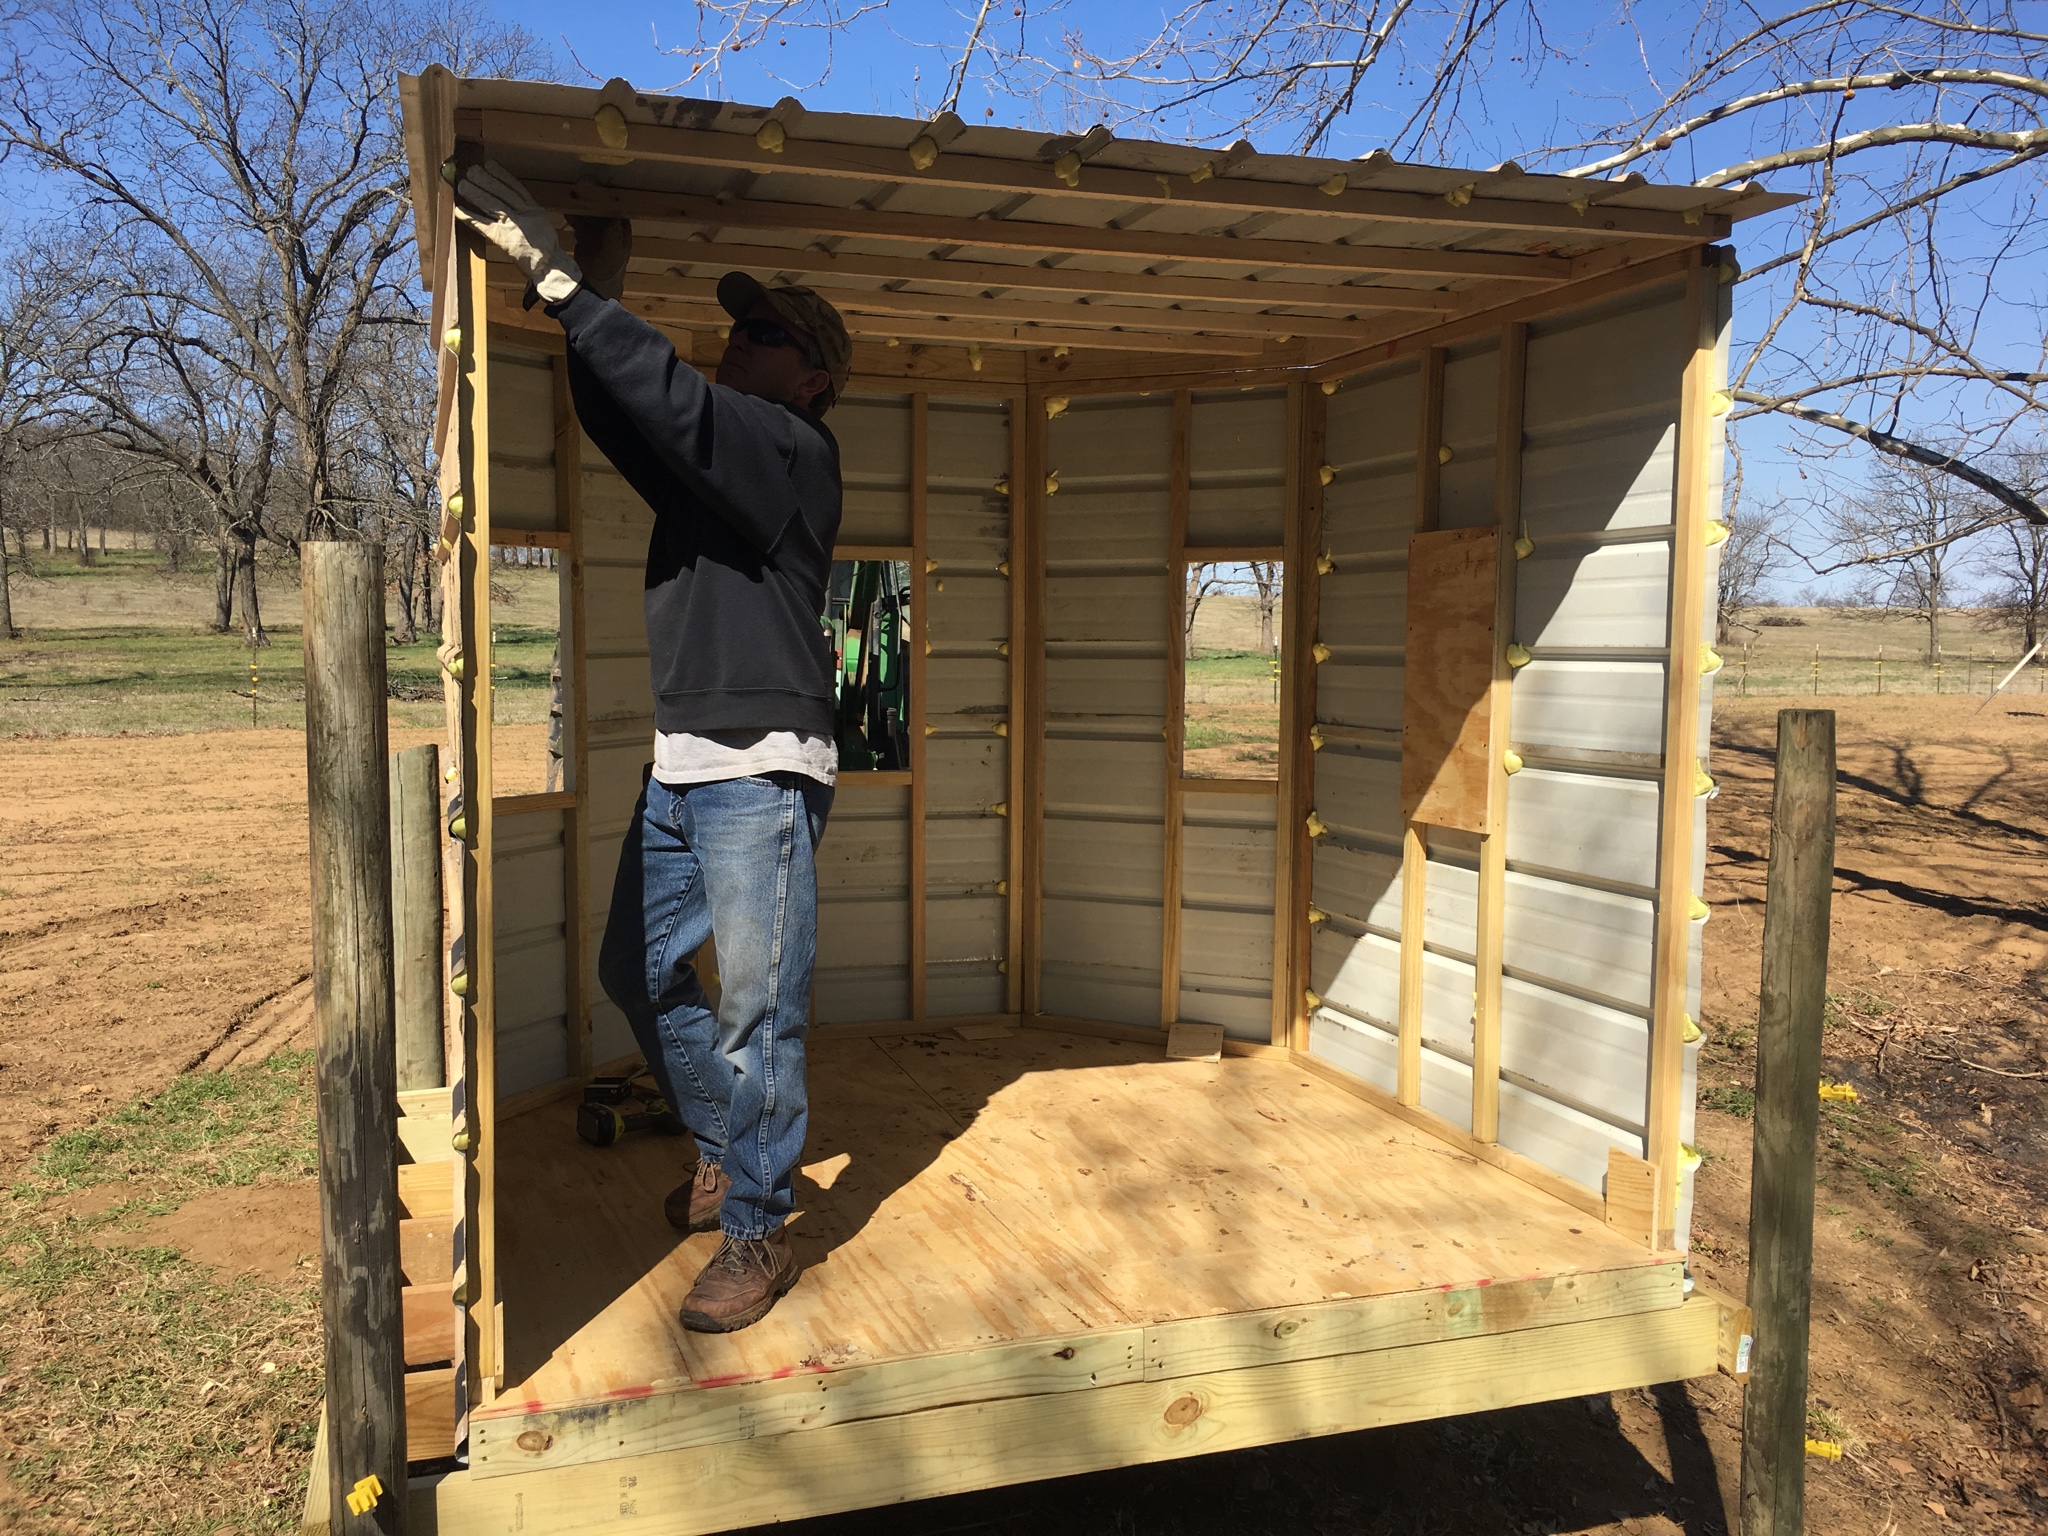
EDIT: added a few more pics of the process.
Sent from my iPhone using Tapatalk
Here is a 7X7 archery ground blind we assembled just today. Most of our boxes have gone on 10' metal towers. The platform it sits on is 8X8 because it was built before we really decided on the box layout.
The framing done last week
The floor is first, built in two pieces with the plywood from one side overlapping the other framing by half a 2X4
Then walls are framed based off of floor measurements.
Then the individual sides were skinned with metal
The roof is built laying right on top of the floor, 2X2 at back and 2X4 at front to get the slope.
The assembly on site.
The back was the last piece on so that we could walk with the roof instead of trying to manhandle it onto the top.
EDIT: added a few more pics of the process.
Sent from my iPhone using Tapatalk
Last edited:
Black River Food Plots
Yearling... With promise
Wow Black River those must have been fun dragging through the woods and putting them up !
Not a whole lot of fun at all, pure black soupy muck on the trails. It was one of those " I'm never doing this again " jobs.

northernpotter
5 year old buck +
Use 2x6` for the floor, 3/4 `` plywood .2x4`s to frame the sides , windows and door. Put slight angle on sides for roof to drain. put a piece of 3/4`` plywood wrapped in roofing paper , cover the top with tin. make windows wide enough in case you use a crossbow. for the sides use the barnsiding used on storage sheds. paint or stain it the way you want it.
northernpotter
5 year old buck +
almost forgot for the base use four 4x4`s for legs and 2x4`s for braces. the braces cut the ends at an angle and fasten in between the 4x4`s
Diesel5610
5 year old buck +
We build them modularly. Walls are 2X2 framing with metal roofing for siding. The walls are all framed as individual squared up pieces, and never get assembled until they are on the platform. Siding overlaps on corners are accounted for in the initial construction and they end up real tight. When built this way, they stack flat on a trailer for transport and don't cause a lot of drag. (5 hour trip one way)
Here is a 7X7 archery ground blind we assembled just today. Most of our boxes have gone on 10' metal towers. The platform it sits on is 8X8 because it was built before we really decided on the box layout.
The framing done last week
The floor is first, built in two pieces with the plywood from one side overlapping the other framing by half a 2X4
Then walls are framed based off of floor measurements.
Then the individual sides were skinned with metal
The roof is built laying right on top of the floor, 2X2 at back and 2X4 at front to get the slope.
The assembly on site.
The back was the last piece on so that we could walk with the roof instead of trying to manhandle it onto the top.
EDIT: added a few more pics of the process.
Sent from my iPhone using Tapatalk
This is exactly how we erect a shooting house. We build it at home and it goes up in the order you have documented here. By far the easiest war to do it IMO. Nice shooting house and pictures.
Similar threads
- Replies
- 17
- Views
- 1K