Assembling Rootmaker 1 Gallon Pots

yoderjac

5 year old buck +
I did a bunch of transplanting today and ran out of 5" roottrapper bags. So I opened my box of 1 gallon rootmaker posts. They are easy to assemble, but if you have not done it before, there are a few point that it is good to know before you start. I bought these wholesale so they did not come with any retail packaging or instructions, so this information may come with them if you buy them retail, but I thought I'd pass it on.
Here is the unassembled unit:
5dbda3a0-916d-4fce-976c-3d3729a68ee1.jpg

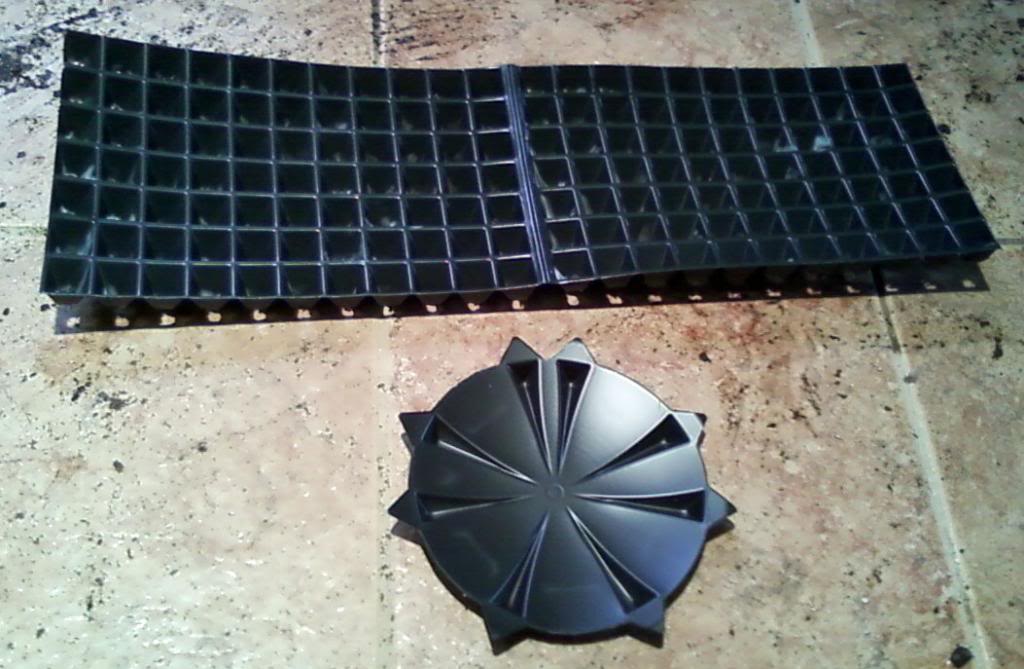
This my be different on other sized pots, but notice that the points on the bottom on the 1 gallon pot are not evenly spaced. Also note the seam that runs up and down the middle of the side of the pot.
Place the two closely spaced points on either side of the seam when you wrap the sides around the bottom. Be sure the side protrusions are angled downward toward the bottom.
When the sides are properly wrapped around the bottom, two columns of protrusions will overlap where the unit closes. Simply slide a cable tie through the lowest protrusion at the end of the overlap, reach inside the container and thread it back out through protrusion immediately above it and secure the cable tie. Do the same a the top of the pot.
dc5280af-4bb8-4e59-b8d3-ba758f953dba.jpg

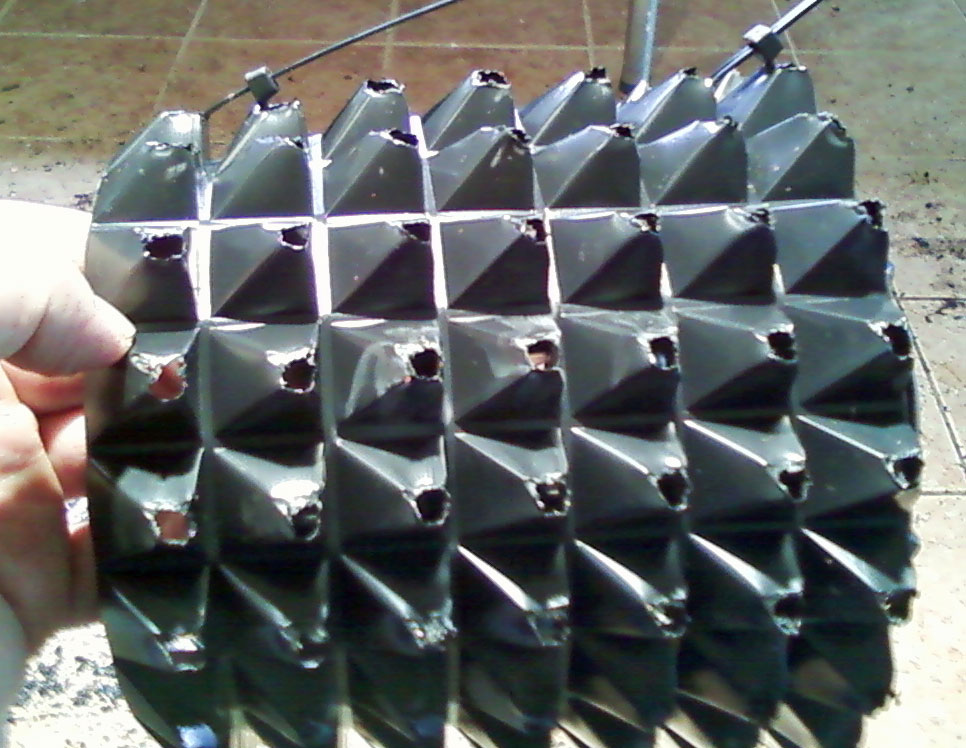
Finally clip the ends of the cable ties and you are done!
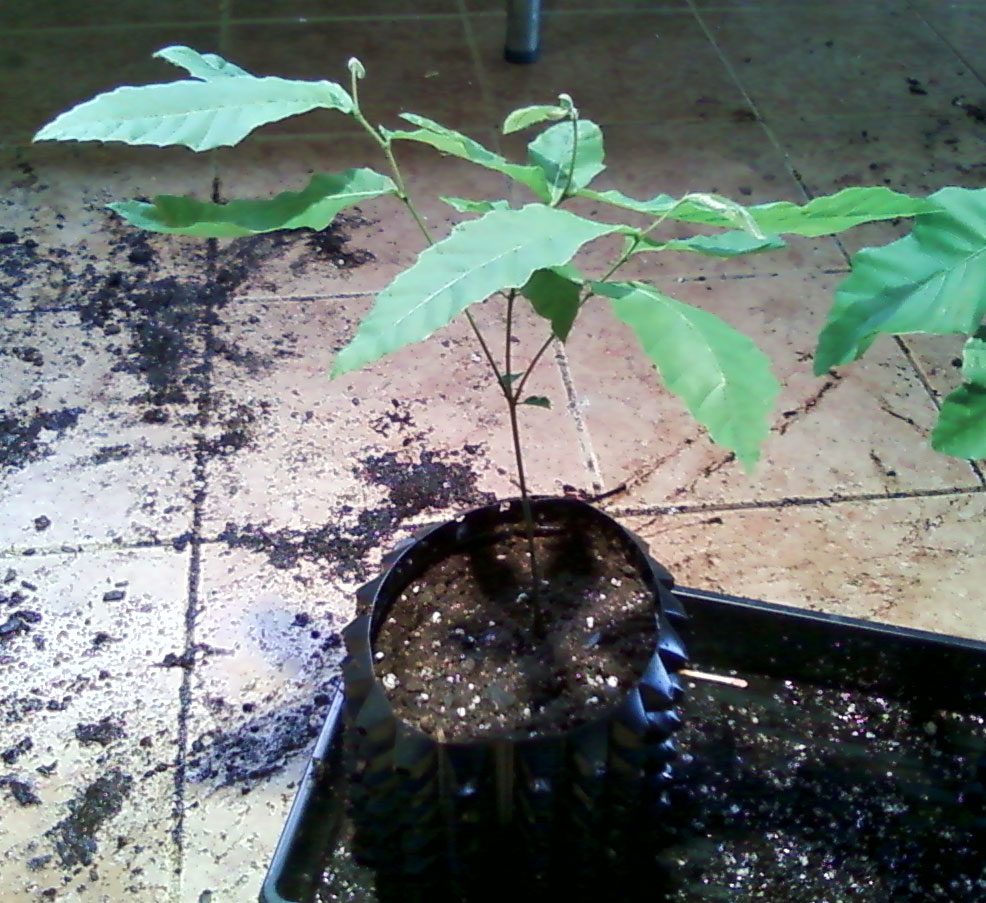
Here is an example of the finished pot with a Dunstan chestnut transplanted from an 18-cell tray.
ee0f1bef-216b-4783-a5ca-e131b80ea583.jpg
 
Last edited:
I have about 30 quart size ones I got for a good deal on clearance...except there was no bottom. I found some plastic mesh rain gutter screen and made bottoms and zip tied to the sides. Looks much easier to assemble with the real bottoms.
 
I think the quart size fill a bit of a niche role. John was kind enough to throw a couple free ones in on one of my orders a couple years ago. They don't prune tap roots as quickly or as the 18s, and when a seedling is ready to transplant from an 18, the 4" rule says the next size is somewhere between 1 and 2 gal. The seem to work for cuttings where there is no tap root to prune. You can put a cutting directly in one, but I actually like the 5" root trapper bags better for cuttings.

What do your use yours for?
 
I have used these quarts (and 18s) to start chestnuts and persimmons. I have never transplanted to larger pots. I figured the quarts would give a longer taproot and then fill out with roots so I'd have more roots when I planted out. My indoor success has been mixed with both 18s and these quarts. Trees from both pots have done ok after planting out to the field.
 
I've tried planting directly from 18s. My first approach was to overwhelm deer with volume. Planting from 18s was very easy since I could jam a dibble bar in the ground and rotate it 360 degrees. It carves out a hole just the size of an 18. I found that the root ball from an 18 is too small for field planting. I don't provide supplemental water in the field. While the dense root ball with many terminal root tips created by root pruning containers is much more efficient than a regular root system, it can only access what it can reach. In my area, the root ball of an 18 is simply not large enough to access enough water naturally. Watering a high volume of trees doesn't make sense for me. Many trees planted from 18s didn't survive and those that survived did not thrive. While planting from quarts would be slower than a dibble bar it may help with this.

The problem I see with using quarts in place of 18s is that it violates the 4" rule. Most of the secondary and tertiary roots only occur in the last 4" before the prune. This means you would end up with a longer tap root but less root branching up near the top.

After a few years of trial and error, I've changed my approach from trying to overwhelm deer with volume. I've gone to focusing on planting fewer larger trees with more in-field protection. Check out the thread on maximizing growth that I moved over from QDMA: http://www.habitat-talk.com/index.p...fered-from-qdma-forum.5556/page-3#post-108463 I'm now doing more culling and trying to plant fewer larger trees. I know I need volume to achieve my long-term objective but it simply isn't possible to get it in a short time frame.

Thanks,

Jack
 
I am about done growing chestnuts and persimmons so the point is moot for me. I have room for a row of a dozen or so chestnuts that I might direct seed next spring. I would only start more indoor if I can get some timber type hybrids. Bare root persimmons from MDC have done well for me so I'll probably order 50 of those next spring. Maybe start a few paw paw seeds. Otherwise my 18s will be used for apple seedlings for my Project W thread. Those will go straight to a nursery bed.
 
I am about done growing chestnuts and persimmons so the point is moot for me. I have room for a row of a dozen or so chestnuts that I might direct seed next spring. I would only start more indoor if I can get some timber type hybrids. Bare root persimmons from MDC have done well for me so I'll probably order 50 of those next spring. Maybe start a few paw paw seeds. Otherwise my 18s will be used for apple seedlings for my Project W thread. Those will go straight to a nursery bed.

I only planted a few persimmons because I have so many native trees I can graft. The only reason I planted those is that I wanted to test a particular hybrid (Nikita's Gift) and I couldn't seem to keep the scions from getting moldy. I never had that issue with full American persimmons. So, I grew some American persimmons from seed and woke them up early indoors. I then had the scions shipped when the trees were actively growing in my basement and grafted them while the scions were fresh. that worked and I now have some young Nikita's Gift in the field.
 
Top