Upgrading a Maverick XL Blind

This afternoon I was able to find a little time to work on the Maverick XL that will be deployed by an island of oaks overlooking our bean/corn rotation. After mounting the blind to the Nex-Level platform, I installed the carpeting. While carpet is questionable in a blind, I like that is insulates and deadens sound, so I went ahead and put down a traditional green outdoor carpet. The plan is raise the blind 8" (nearly 9’ with the Nex-Level mounts) and leave one side open to allow concealing the e-bike or side-by-side.
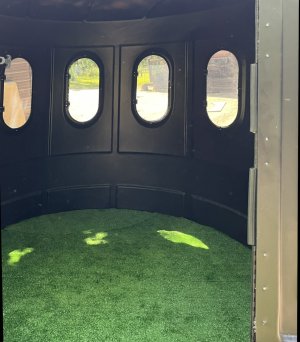
IMG_0705.jpeg
The Solar fan (which I noticed was on sale--I should have waited) has been installed. Installation could not have been easier, however, the usefulness of the small solar fan (with battery) is yet to be seen. I am hoping it will reduce fogging during rifle season which always necessitated opening a window. The fan can push or pull, but is not overly powerful.
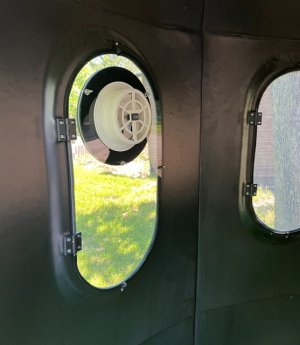
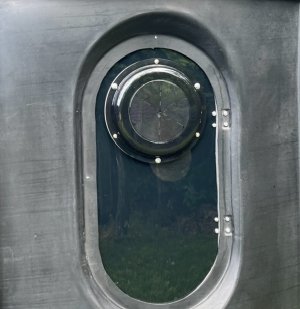
IMG_0703.jpeg

IMG_0704.jpeg
 
Last edited:
Let me know how the windows are and if you have to stand to shoot down say 10 yards out.I'm holding off until you give a review
Buckdeer1, I was doing some “dry runs” inside the blind and am pleased with the new windows. Opening sideways makes a huge difference, and I was able to open them with nary a sound. I believe I could get that 10 yard shot! With nine vertical 10”x22” side opening windows, the blind is well suited for archery.
 
Good deal,may have to check them out
 
  • Like
Reactions: 356
Today I built a couple of shelves and added a rifle holder and hangers for bows. On order from Amazon is an inexpensive 12v solar system with battery to power green lights, USB/USB-C ports, a lighter socket outlet and adhesive carpet/sound deadening panels. Once those are installed I will attach the 4x4s and brace the platform prior to moving the blind to its location. Once in place I’ll spray some sealer around the floors and where needed. I look forward to the right weather conditions to hunt the blind.
 
Last edited:
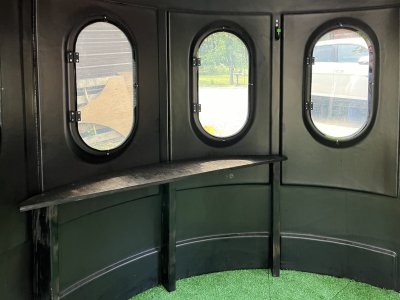
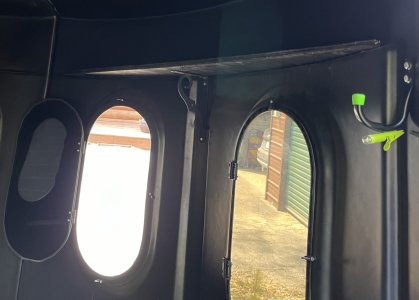
Here are a few pictures of the interior, to date:
Lower Shelf:
IMG_4834.jpeg

Upper Shelf:
IMG_4835.jpeg

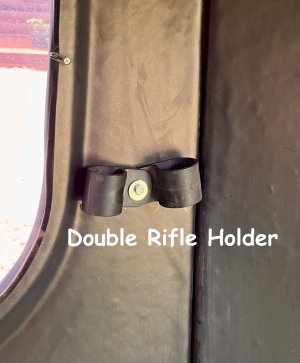
Rifle Holder for two long guns
IMG_4837.jpeg

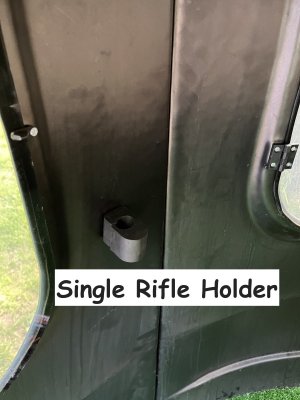
Rifle Holder for most AR style riles
IMG_4836.jpeg
 
Thanks for posting this. I’m following along.
 
Right after my previous post the Amazon delivery arrived with the parts needed for the solar lighting system. The system runs off a 12v battery charged by a 2W solar panel. While I will formally mount the system once it is in the field, I did the basic wiring today and tested it out. I chose three green lights for the floor (front and both sides) and will put add two red lights in the ceiling that will be on a separate switch by the door. It will be nice to keep the phone charged when hunting.

IMG_0716.jpeg
 
How do the windows open?The old maverick weren't good at all but your look better.Is the clear plastic also thicker
 
How do the windows open?The old maverick weren't good at all but your look better.Is the clear plastic also thicker
The windows on the XL have two hinges and open to the side. The other Maverick blinds have one hinge and open down. The tinted plexiglas seems fairly robust. The windows are secured with three clips. The same foam seal is used. I don’t really have many complaints about these windows. There are nine, and they provide a good field of view and seems to secure the blind adequately.

The original Maverick blinds were a lot cheaper, so hopefully some of the price increases have translated into better quality. Once I am done I believe I will have a fairly air-tight blind that provides comfort and concealment. Currently the only concern is the door, which I believe could be better. Final door adjustments will be made once the blind is in place.

Given I have hunted out of many blinds, I hope this build will help others make good blind decisions. Once set up, I’ll have about half of what a Redneck would cost. I’ve enjoyed doing the upgrades. For those who do not enjoy tinkering, going with a Redneck day one is the way to go.
 
Please update your fixes for the flimsy door. I’m currently in the process of putting together a Maverick xl also and I have enjoyed your suggestions.


Sent from my iPhone using Tapatalk
 
Please update your fixes for the flimsy door. I’m currently in the process of putting together a Maverick xl also and I have enjoyed your suggestions.


Sent from my iPhone using Tapatalk
First, don’t work on adjusting the doors until the blind is securely mounted on its base. Once the blind is securely mounted on the base, level the blind per the planned “field” position. I wanted mine at a very slight angle so water will run off the platform. Second, add an additional interior and exterior door hatch to “secure” the door in the position you desire. These are inexpensive ($4.99) and will secure the door much better than the single “interior latch” and two exterior latches. Mine had a gap at the bottom the extra latched fixed.

I look forward to hearing how you like your blind this coming season.
 
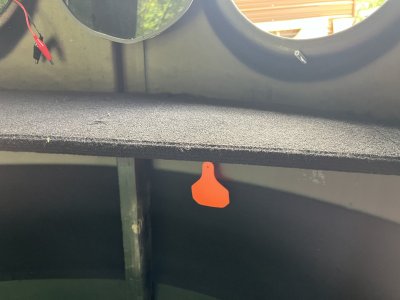
I spent a little more time on the blind today. A strip of self-adhesive carpeting on the lower portion of the wall makes a dramatic reduction in sound... with out this, a plastic blind can sound like an echo chamber. The strip of carpet can be seen below the shelf on the second picture.

Carpet on the shelves reduces the chances of a dropped cartridge, coffee cup or bino spooking every deer in a 100 yard area.

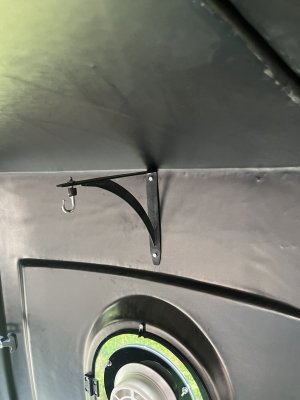
The bracket with swivel holder means I can face a hanging portable heater in the direction I want. For late season I may put in larger heater if needed.

IMG_4974.jpeg
One of four hangers. Two are for bows, this one is fora small propane heater and one is for a coat/jacket.

IMG_4972.jpeg
Carpet over the shelf will keep things quiet.

I have three permethrin tags (used for cattle) to reduce or eliminate bugs. I put these up after having to remove a mud dauber nest. The mounts are permanent, so all I have to do is put a new tag on each season (these run about $1/each and are worth every penny). I use these in our camper, and it dawned on me that these would be ideal for a deer blind. After that "epiphany" I saw where folks have been doing this for years.
 
Last edited:
Assembly update: when putting the carpet on the walls I noticed light coming through the "seams" of the blind where the two halves are bolted together. When I put the blind together it was quite cool (30s). Today is in the mid-90s and the plastic was a little more "pliable" so I tightened up the bolts considerably (without over-doing it). This eliminated the gaps, and no more light is coming through the seams.
 
I don’t think I’d have tightened the bolts in this weather… Hopefully when the plastic contracts it won’t break.
 
I don’t think I’d have tightened the bolts in this weather… Hopefully when the plastic contracts it won’t break.
I definitely did not over tighten. If I was putting a new blind together, I would have tighten the bolts to a similar tightness. There definitely should not be light coming through the seams or mud-duabers in a closed blind. These are robust blinds, so I can not imagine them breaking, but plastics can do funny things.
 
The legs are on and the blind has been moved from the house to the barn area...the next step will be a 1/2 miles trek to the SE portion of the farm. The 4x4 metal platform, handrails and steps/ladder will be installed on site.

Standing in the blind really highlights the extra size the XL offers over the 6' version. While final tweaking will take place after the blind is in place, it seems pretty tight all the way around.

IMG_5061.jpeg

IMG_5063.jpeg
 
Last edited:
How are fastening to ground?
 
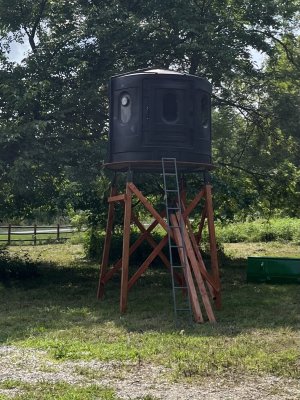
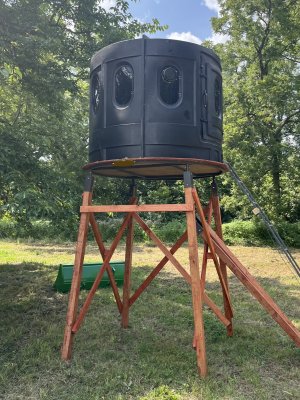
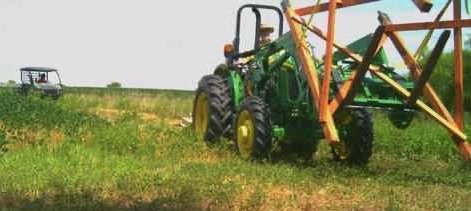
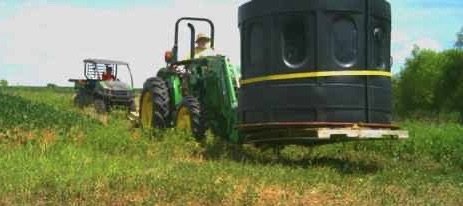
With the help of my son, the tractor and a free afternoon, we moved the blind the island of oaks on the SE end of our property. I still have some finish work, but the blind is set and level. It is currently attached to the ground with 7' T-posts placed 3' into the ground and 1000# ratchet straps.


IMG_0815.jpeg
Moving the stand

IMG_0816.jpeg
Next comes the blind and base.

IMG_2894.jpeg
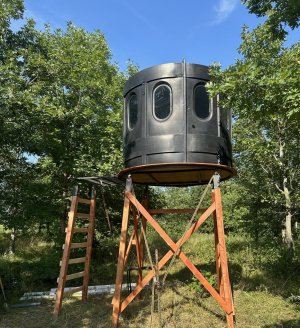
Almost finished....I hope to add the handrails; stain the ladder (helps deter carpenter bees and wasps); add one additional "auger" style anchor and trim two shooting lanes, from which I will use the cuttings to brush in the blind. The open side of the stand in back allows room to park the e-bike out of sight (or 60% of the UTV). The location is about 10 yards into an oak island and overlooks a soy/corn row crop location to the west and a small plot 30 yards to the east.
 
Last edited:
The blind is finished and ready for the season. Of course, I forgot my phone so there are no pictures....but it looks something like this (LOL):
1722894775290.png

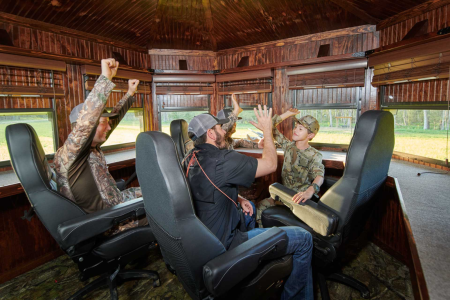
Returning to reality, the Maverick XL is a nice large blind. It will easily accommodate three hunters in comfort (or two plus a camera man). The carpet on the floor and sides made a significant improvement in sound deadening. The DIY solar/battery green lighting and USB power system will be nice. I already have enjoyed using a USB fan in the blind while setting it up. The nine 10"x22" vertical windows provide a great view and are easy to open and quiet. Eventually, pictures will follow!
 
Last edited:
While walking the property looking for doves, I stopped by the blind and took a few pictures.
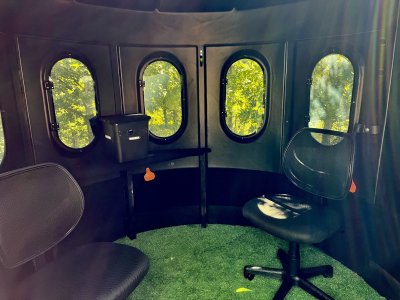
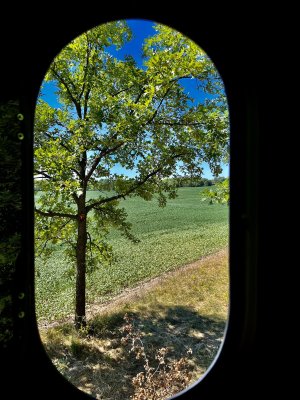
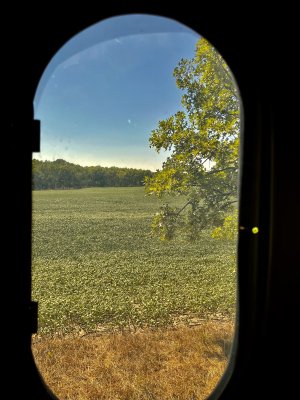
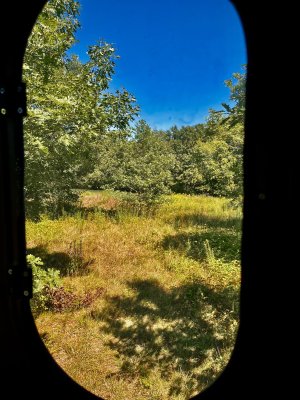
Here is the interior of Maverick XL blind and a few views from the windows:

IMG_5178.jpeg

West: Overlooking the soy/corn rotation.
IMG_5176.jpeg

Northwest: More corn/soybean rotation views:
IMG_5175.jpeg

East: Bedding to acorns "island" and row-crops.
IMG_5174.jpeg

Interior: Plenty of room for two or three hunters.
IMG_5178.jpeg

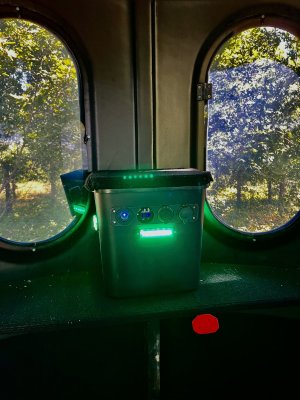
The solar charged power station and lights. During season it will be on the floor and double as a mini-table to put coffee cups!
Options for USB, USB-C and "Cigarette" plug while make this nice for "grandkid sits" and early season when a fan is nice.
The solar powered vent (earlier post) seems to be working, as the blind was not "stuffy" when I entered.
IMG_5177.jpeg
 
Back
Top