Biosolid and Biochar increasing tree growth article - Transferred from QDMA Forums

yoderjac

5 year old buck +
Stumbled across this article while researching improving soil for growing trees..
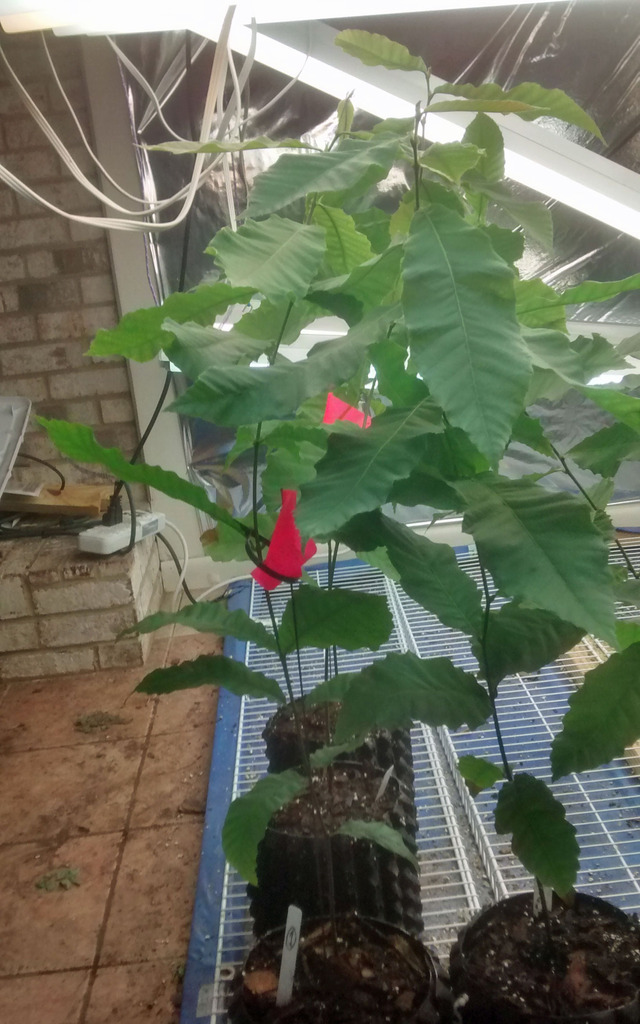
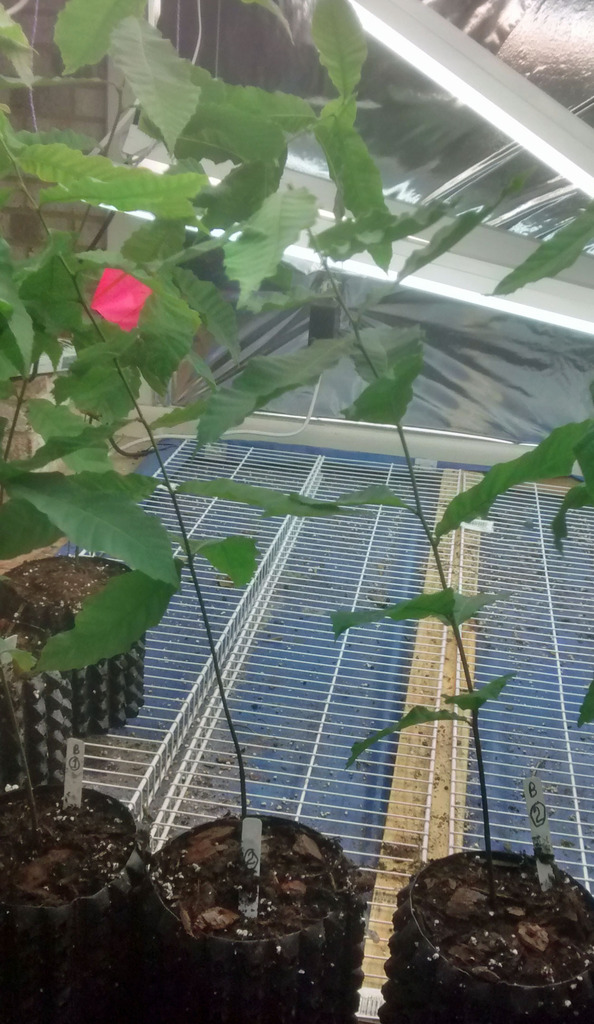
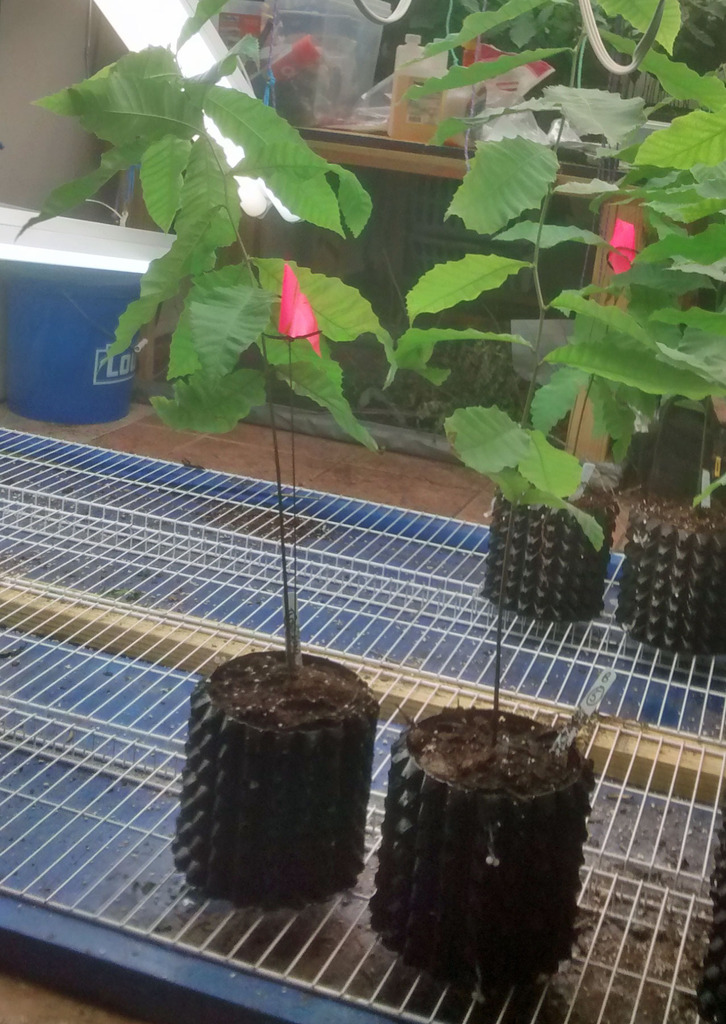
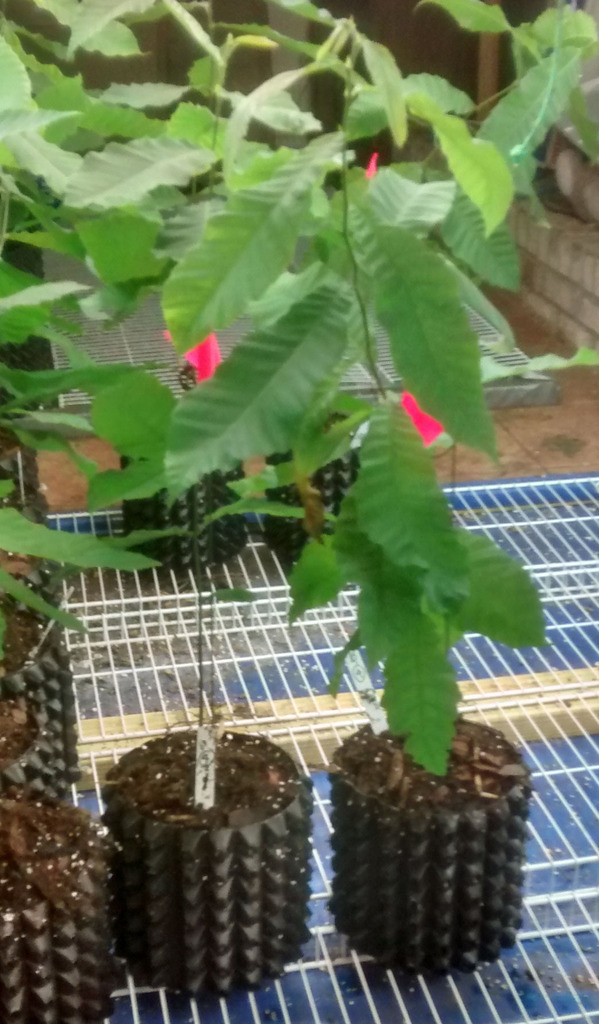
Most of the data is way over my head, but take home for me is biosolids are an effective means of improving soil for increased tree growth compared to compost, mulching, and other soil enhancement methods. I started applying milorganite to my container oaks and top dressing around oaks in my yard this summer primarily b/c it seemed like a "safe play" with more upside than risk if I got carried away and overdid it..... Seems like milorganite was effective for both my container trees and oaks I had spaded and transplanted around my home...
Hoping DGallow will translate this articles data for me (us) when he has time!
http://www.isa-arbor.com/events/conf...nbroch_eta.pdf
That was one of the articles I read when I started looking into biochar. I found it very interesting. Last month I noticed a tree crew working on one of neighbors trees. I asked the crew to dump the chipped debris in my back yard.
I have a line on used 55 gal drums I can use to make a kiln. All I need now is time...which ain't gonna happen during hunting season...
Thanks,
Jack
Jack, always appreciate your comments! Good grab on the free wood chips. I'd like to reach out to a tree trimming operation to see if I could provide them a free spot to dump their waste.
I'll be very interested if future research supports this published studies findings for both Biosolid (BS) and Biochar (BC) affecting tree growth performance. I'm floored there's only one article regarding BS available on the Reforestation, Nurseries, and Genetic Research website. There's a grand total of 5 BC article on RNGR website which I assume is a result of the it being such a new development in the science world.
Regardless, BS makes a lot of intuitive sense to me despite the fact that the "professional tree growing" community doesn't seem as intrigued at the poo option as I am. I'm on the fence at the sensibility of BC as it relates to its true value from an ROI perspective as it relates to time and equipment required. I guess if I'm going to roll the dice at this stage of the game, I'll take my chances with a $15 bag of milorganite vs building a kiln and trucking in wood chips to make BC.
^^^should be able to get milorganite for $6-$8 if you watch the sales at big box stores.
Is there 'life' in milorganite?
Is there life in biosolids?
Is there aerobic life in fresh fungal compost?
Biochar is lifeless...sterilized by pyrolysis....but provides structure for future soil life....mix something living (fresh fungal compost) with biochar....then you have something to enhance soil quality, soil life, and tree growth.
Does your soil already have good structure to ample depth? Answer that before using char....first question to answer.
What types of soil life are missing in your soil?....the second question to answer IMO....land management history and current plant community dynamics provide good clues.....microscopy of soil provides a more detailed answer.
+
Good read, great way to recycle waste to help amend the soil.
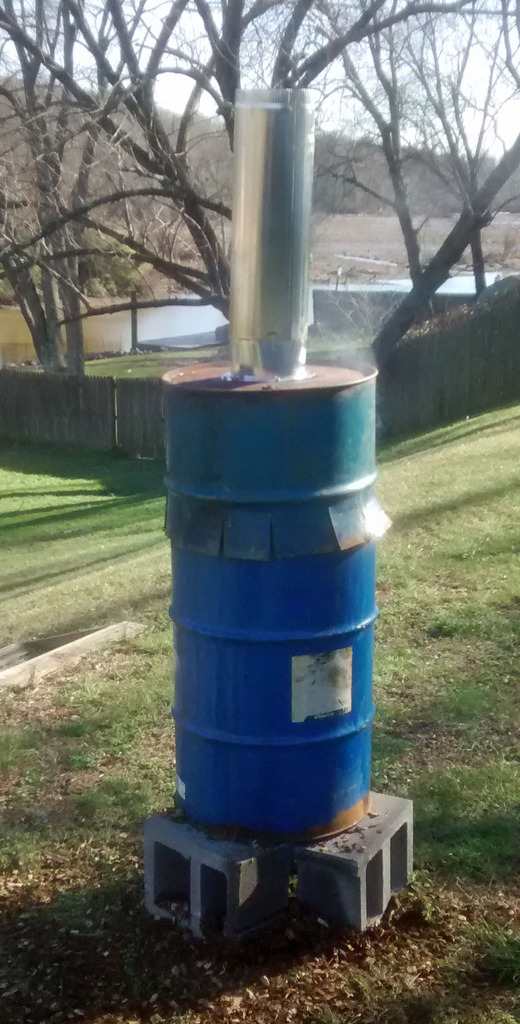
Well, I finally found the time to make a TLUD Kiln. I'm lit it up for the first time today. The wood chips were wet, so I'm not sure how well it will work, but the purpose of this first burn is to season the unit and burn off any paint or chemical residue left in the drums.
9575508b-9061-494f-a883-6ef7d6912aed.jpg

Thanks,
Jack
Well, things didn't work out great. I knew I was going to have an issue because my wood chips were wet. I wasn't quite sure what effect that would have. The kiln didn't get hot enough to deal with the wet chips.
The initial top light went well. When I added the top section with chimney things seemed to work as expected. When I checked it an hour later, things had cooled down quite a bit and I could see the chips weren't being consumed. I added more top fire and put the top back on. It heated up again. Several hours later I checked it.
The paint had burned off the top section. The barrel was still hot at the fire line but it was not raging. Only the top 6 inches of chips were consumed. My guess is that it will die over night. I'll check it in the morning and see what happened.
Worst case, I'll try drying the chips and starting again. I'm guessing that with the wet chips, I'll need a real hot fire and I think the wetness is inhibiting some of the updraft.
Thanks,
Jack
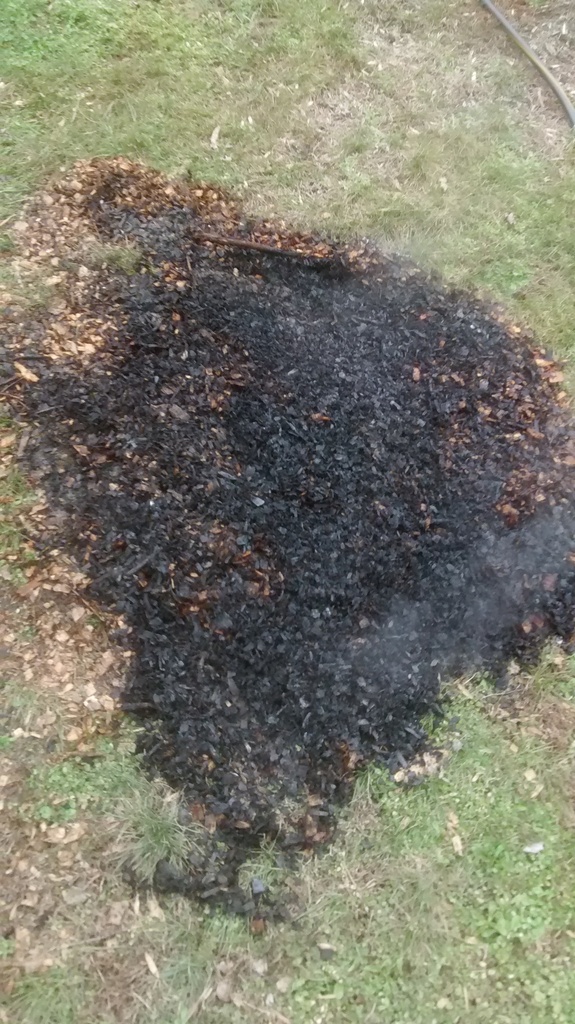
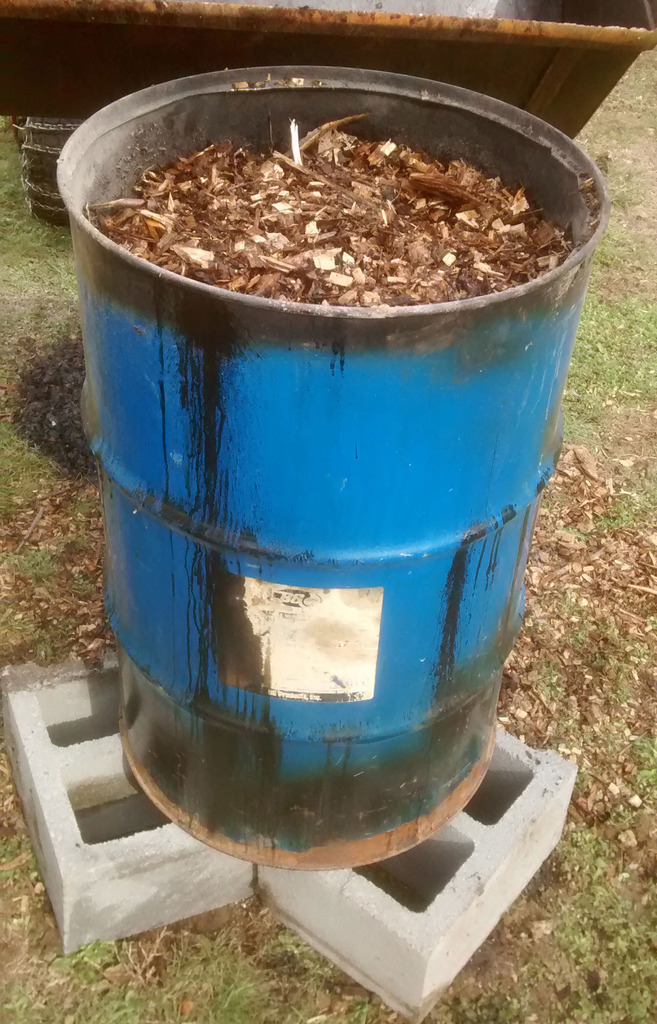
Unexpectedly things worked better than I thought. This morning I checked the unit. I expected to see it half burned at best. Instead, I found it had all burned down. Here is the resulting bichar produced:
229fb11f-c824-48f4-9dcb-71719608948a.jpg

There was not much, but I attribute that to the fact that the material was wet and allowed to burn so long. I think if the chips were dry and I snuffed out the fire after about an hour or so I would have ended up with much more. I'm happy with what I got.
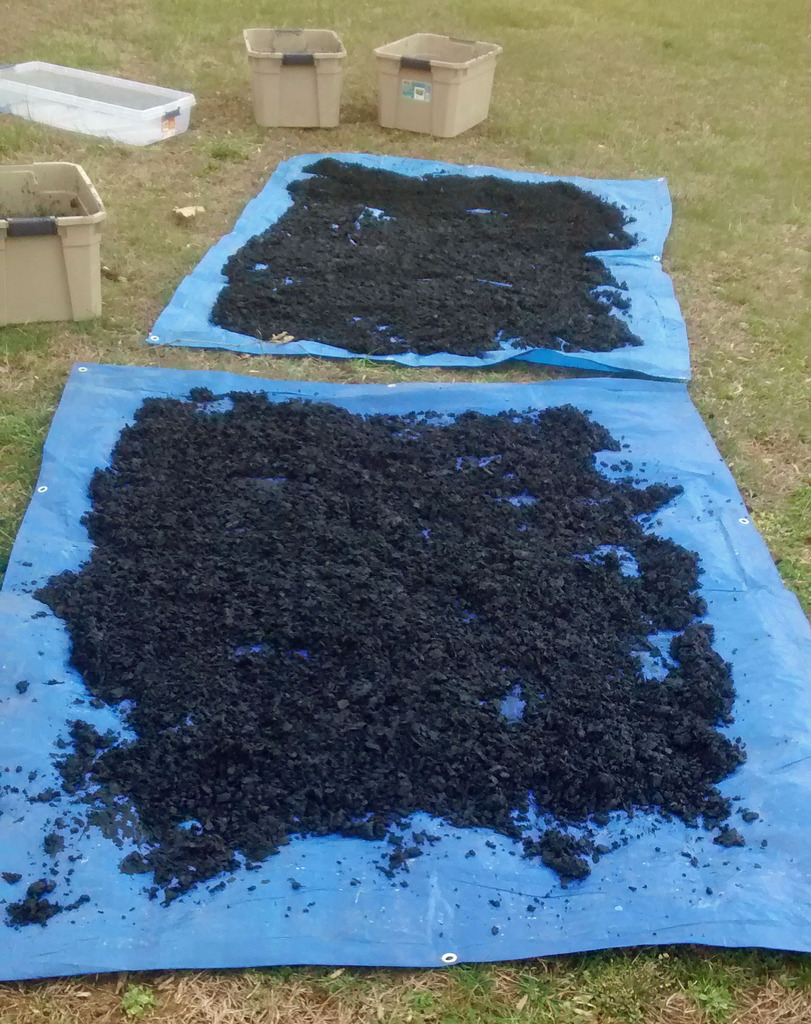
I decided to try another burn with the wet chips. This time I took some pictures as I loaded it. My first step was to turn the cement blocks on their sides. I think the solid tops were blocking too many of the holes on the bottom of the can reducing the updraft. I then loaded it with more chips:
42c24bb0-3797-46b0-b53a-e04171591c18.jpg

I then added some paper, cardboard, and wood scraps from the garage to get some coals started on top.
d92591c1-db8a-4363-941c-8b1c4d186a98.jpg

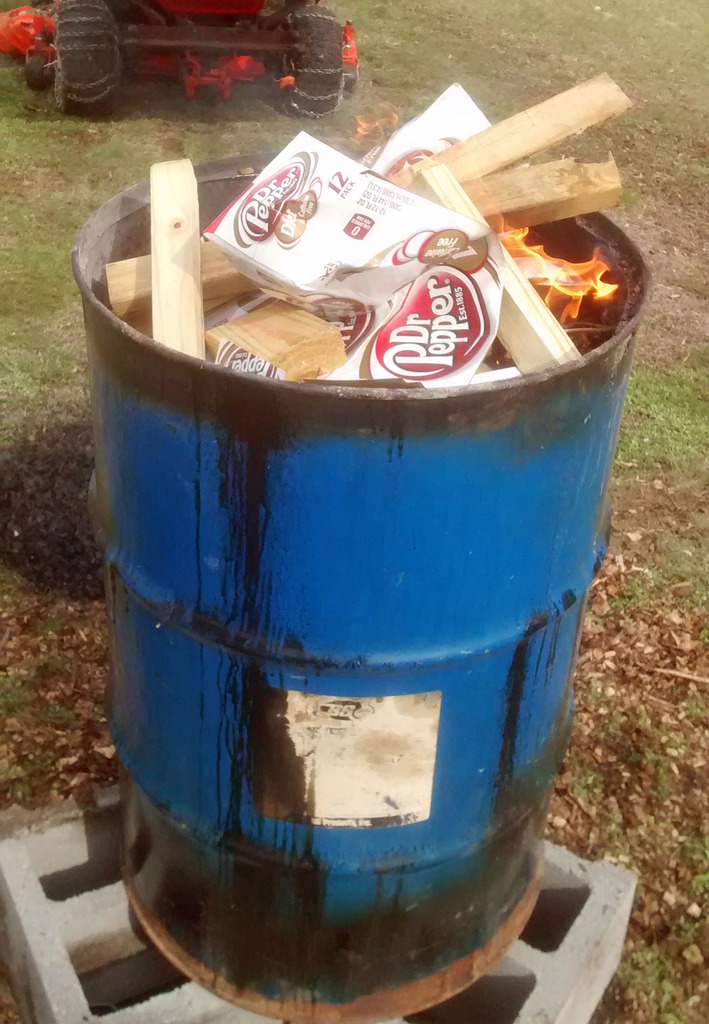
I then fired it back up. While I let the top fire get going, I used the FEL to spread some chips out on the ground. I'm hoping they will dry in the sun before I burn my next load.
96e2a8fa-7842-47bf-86d4-b773e309f345.jpg

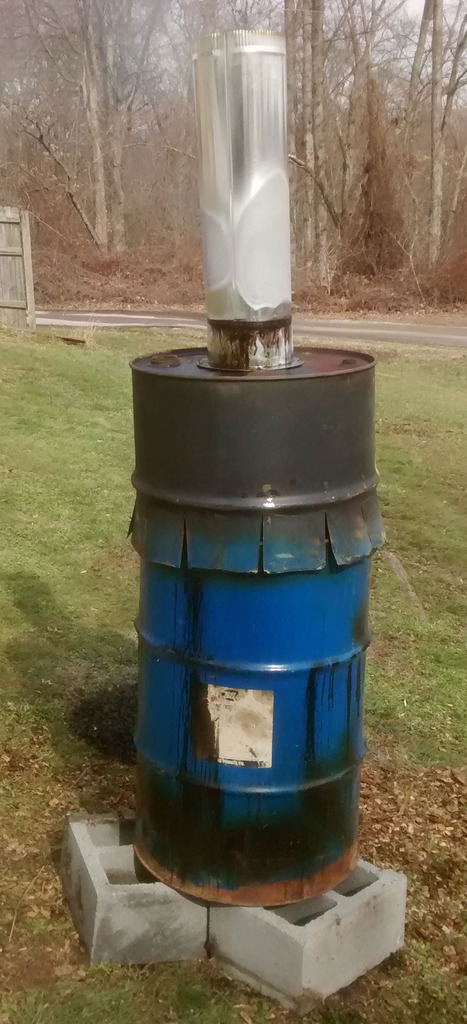
One interesting note. If you look at the original picture of the kiln from the previous post, you will see the afterburner is blue. The first burn got it hot enough to burn off the paint, but it was not hot enough to burn the paint off the middle of the barrel section.
Thanks,
Jack
Biosolids should provide a little microbial action in the soil. The nutrients will be slowly available so you are most likely not going to see an immediate reaction to a treatment. It isnt really organic but has some of the same benefits.Some people think it has heavy metals, possibly pathogens and is a source of high phosphorus in ground water. lately we have been seeing it used as a filler in fertilizer blends because it can be cheaper than limestone and is more beneficial.
If it's available I prefer poultry manure. It can be OMRI certified as a true organic and it would not have the perceived risks of Biosolids and they are basically the same cost per ton.
I have a saying I like to use when trying to sell the Poultry against Biosolids.
"Do you know the difference between Houactinite and Milorganite? Milorganite is higher in cheese and beer, Houactinite Is higher in jalapeno." (INTERNAL IMAGE LIKE EMOTICON REMOVED)
 
Last edited:
Quote:
==================================
Originally Posted by Cap'n
Biosolids should provide a little microbial action in the soil. The nutrients will be slowly available so you are most likely not going to see an immediate reaction to a treatment. It isnt really organic but has some of the same benefits.Some people think it has heavy metals, possibly pathogens and is a source of high phosphorus in ground water. lately we have been seeing it used as a filler in fertilizer blends because it can be cheaper than limestone and is more beneficial.
If it's available I prefer poultry manure. It can be OMRI certified as a true organic and it would not have the perceived risks of Biosolids and they are basically the same cost per ton.
I have a saying I like to use when trying to sell the Poultry against Biosolids.
"Do you know the difference between Houactinite and Milorganite? Milorganite is higher in cheese and beer, Houactinite Is higher in jalapeno." (INTERNAL IMAGE LIKE EMOTICON REMOVED)
==================================
Biochar is not the same as biosolids. Biochar is essentially sterilized at creation through pyrolysis. It provides the structure for micro organisms. It can be charged in a wide variety of ways. That is where the nutrients and microbiology is introduced. That could come from poultry manure, compost tea, worm castings, or a wide variety of sources.
There are a lot of potential uses. My intention is to use it as part of the amendment when planting trees. I'd love to introduce it to my clay soils for food plots, but that kind of volume is not practical for me.
Thanks,
Jack
This is an interesting thread... Thanks for sharing your experiments Jack. Im a landscaper by trade and last summer I had 20 tons of wood chips dumped in my field to use for mulching spruce trees. I wasn't overly pleased with the quality of the mulch so the pile sit for a while and I wasn't real sure what to use it for... By accident the pile began to burn as it was right next to a brush pile we were burning. I just let it smolder for a few weeks and it eventually reduced the pile to maybe 1/10th of what it was. Would this be an effective way to make bio char or would this method cook the chips down too fine?
Quote:
==================================
Originally Posted by JamieE
This is an interesting thread... Thanks for sharing your experiments Jack. Im a landscaper by trade and last summer I had 20 tons of wood chips dumped in my field to use for mulching spruce trees. I wasn't overly pleased with the quality of the mulch so the pile sit for a while and I wasn't real sure what to use it for... By accident the pile began to burn as it was right next to a brush pile we were burning. I just let it smolder for a few weeks and it eventually reduced the pile to maybe 1/10th of what it was. Would this be an effective way to make bio char or would this method cook the chips down too fine?
==================================
The key to biochar is pyrolysis. That is burning it in a hot low oxygen environment. There are all kind of different ways to produce it and lot of kiln designs. Here is the video I'm using as a starting point for my experiments: <
So far, my problem is terminating it at the right time. The video shows it done with dry chips and it only takes an hour. With my wet chips it ran over night. The first load did OK and you can see in the picture above. The second load burned faster (not sure why). I started it at about 10:30 AM. I checked it about 7:00 PM and it had burned about 3/4 of the way down. When I checked it this morning, I got very little biochar and mostly ash.
If the material were dry, I could burn it in an hour or two and terminate it at the right time. I just can't watch it for 12+ hours and terminate it when needed.
I've also seen some designs where a pit is dug in the ground and filled with chips and then top lit. I think the idea with both of these designs is that the top lit fire burning down limits the amount of O2 that the fire gets.
When spring rolls around and we get warmer weather, I'm thinking of drying the chips in the driveway first and then giving it a try.
Thanks,
Jack
I plan to try my third batch tonight. I loaded it this afternoon, but I'm going to wait until late tonight to ignite it. The chips are still wet. I plan to check it tomorrow morning. I think if I can figure out the timing, things will work better.
Thanks,
Jack
Well, this time it wasn't long enough. I started it about 10pm and checked it about 9am. It was only about 1/3 consumed. I'll check it again when I get home around 4pm. It may take a while to narrow down the timing with wet chips. I'm glad I got luck on the first attempt and I wish I had timed it. It wasn't perfect, but it was the best so far.
It worked better than I expected this time. I went from 10pm to 4pm the next day which is 18 hours. It was not quite done so there was a slight bit of unburned chips, but I got the most biochar with this load. I'm guessing the right timing with this level of dampness would have been about 20 hours.
3580c382-06bd-4196-ad15-d79735d446ca.jpg

We have snow accumulation in the forecast tonight, so I'll be shutting down for a few days.
Thanks,
Jack
Are you getting much smoke steam coming out of the stack? Since the chips are wet Im guessing maybe you are. I know you probably want to keep it simple as possible, but have you considered adding a source of air flow at ground level. Id think you may be able to speed things up with added air flow and get a more consistent burn with a hotter fire. Just tossing it out there...
I experimented with a kiln exactly like the one you made quite a bit last year. I had the best char results using 2x4's and other wood pieces from contractor sites or from a local furniture maker. If they were too big I cut them on a table saw. I used the same wood for fuel also. I would surround the sides of the barrel with 1x1&quot;s or what ever would fit then cover the top with same. It burned like a jet engine.
I would let it burn till all fuel was gone usually 6-8 hours and made perfect char every time. Then I would run it thru my chipper which ground it up into small very usable material. Like pea gravel.
I didn't like using chips or bark or other such material. Mostly turned to ash . Dried wood worked best for me. I never opened the kiln till the following day to see results. Just let it go.
The problem for me with that size kiln is getting enough biochar. Even having made more than a dozen loads it wasn't enough to make an impact in my vegetable garden. That said I'm not sure I could tell any difference where I put the char vs. not. I ' amended' it by drenching it in fish emulsion, worm castings and various other potions before going into the ground.
I like the idea of biochar but haven't solved the riddle of effective scale. Anxious to see your continued results.
 
Last edited:
Actually, looking closer at your picture my kiln may have been a bit different. I had a 35 gl drum inside a 55 gl drum. Air holes drilled in bottom of 35 gl drum, with tight lid.
Quote:
==================================
Originally Posted by JamieE
Are you getting much smoke steam coming out of the stack? Since the chips are wet Im guessing maybe you are. I know you probably want to keep it simple as possible, but have you considered adding a source of air flow at ground level. Id think you may be able to speed things up with added air flow and get a more consistent burn with a hotter fire. Just tossing it out there...
==================================
You are absolutely right. The chips should be dry and the fire hotter and there would be no smoke/steam. In my case, I'm making due given the time of year and what I can do.
The bottom of the can has holes in it and it is sitting up on blocks to make sure there is good airflow. The unit is called a TLUD or Top Lit Updraft kiln. Once the fire is going on top and you add the afterburner section, it sucks air through those bottom holes.
So, you are thinking along the right lines, but it is already there. I could increase the airflow by adding more holes, but I think the limitation is the wet chips, not the lack of air. When I first add the afterburner with the initial fire on top burning dry starter material, flames shoot through the top of the chimney and there is zero smoke. When the flames first die, you can see the heated air displacement coming out of the chimney. This tells me that when the material is dry, it is sucking a good updraft of air. The issues occur after the starter fire starts burning the wet chips below.
I am getting good pyrolysis, and I wonder if the wet material may even be helping there. I would think that it would further deprive the fire of oxygen which is the purpose of the kiln.
I think if I can get the timing worked out, this will work even with wet material.
Thanks,
Jack
 
Quote:
==================================
Originally Posted by baker
I experimented with a kiln exactly like the one you made quite a bit last year. I had the best char results using 2x4's and other wood pieces from contractor sites or from a local furniture maker. If they were too big I cut them on a table saw. I used the same wood for fuel also. I would surround the sides of the barrel with 1x1&quot;s or what ever would fit then cover the top with same. It burned like a jet engine.
I would let it burn till all fuel was gone usually 6-8 hours and made perfect char every time. Then I would run it thru my chipper which ground it up into small very usable material. Like pea gravel.
I didn't like using chips or bark or other such material. Mostly turned to ash . Dried wood worked best for me. I never opened the kiln till the following day to see results. Just let it go.
The problem for me with that size kiln is getting enough biochar. Even having made more than a dozen loads it wasn't enough to make an impact in my vegetable garden. That said I'm not sure I could tell any difference where I put the char vs. not. I ' amended' it by drenching it in fish emulsion, worm castings and various other potions before going into the ground.
I like the idea of biochar but haven't solved the riddle of effective scale. Anxious to see your continued results.
==================================
Great post and I was following some of your posts on this. I'm using chips cause they are free. I think if one had a good source for scrap wood that would work well given a chipper is available.
As far as scale goes, I agree. I can't see this as practical for food plots, but I'm thinking about using it as part of my tree program. If I can get charged biochar as part of the soil amendments when planting trees, I'm hoping it can be a source for microbial life in my clay soil under a tree. It will take time for me to see if this is really effective.
Thanks,
Jack
Well, I now have a 19 gal tub full of biochar and it is time to charge it. I did a little reading and decide to use human urine to charge it. Most of the issues related to using human urine that I found center around the collection method. Most are larger scale projects trying to collect it from sewage systems and such. Human urine is essentially sterile when it leaves the body, but it is a perfect media to promote bacterial growth once exposed to bacteria.
So, I decided to use a couple 1 gal Open Pit barbeque sauce containers for collection. They are perfect. They have a large mouth, lid, and sturdy integrated handle. It is easy to collect in them and easy to keep it clean until applied.
I just started collecting and then dumped the urine into the container containing the biochar. After a few days, I decided it would be best to do the math. I found out I need to drink a lot more beer!
The formula is Ingredient A volume x C:N of A ratio plus Ingredient B volume x C:N of B divided by the total volume.
The C:N for the wood chip biochar I'm making is 100:1.
The C:N for humane urine is 1:1.
The target C:N for composting biochar is 25:1 to 35:1 but when you directly amend soil a target of 20:1 is the goal so there are sufficient nutrients for immediate benefit.
So, I figure that 19 gal tub has about 15 gal of biochar in it. If I did the math right, I need to add 60 gal of urine to the 19 gal tub to achieve a 20:1 C:N ratio.
Right now, my urine factory is producing about 1/2 gal per day and that is on the best days when I'm around the house and the collection system is readily available.
Obviously, 15 gal of bichar can't immediately hold 60 gal of urine. So, I'll have to add it every day or two and keep track and allow the water to evaporate.
Does my math seem right or am I missing something? Also, other than drinking more beer, does anyone have any other bright ideas.
After dealing with a kidney stone last year, my urologist is going to love the increased fluid intake approach! (INTERNAL IMAGE LIKE EMOTICON REMOVED)
Thanks,
Jack
Have a keg party, and place a 55 gallon drum in the outhouse
Quote:
==================================
Originally Posted by 4wanderingeyes
Have a keg party, and place a 55 gallon drum in the outhouse
==================================
Good thought, but the main issue with using human urine is fecal contamination during collection. Since I'm not pasteurizing mine, I need a collection method that doesn't involve a drunk guy accidently or otherwise dropping a duce and contaminating my supply.
Thanks,
Jack
Just thought I'd provide an update. I now have 3 tubs with 15 gal of biochar each. The first tub I've been trying to balance the C:N using urine. This has been my lease favorite method but least expensive method. It is slow because it takes 30 gal of urine to balance 15 gal of biochar. This also causes a problem because of the volume of liquid. At least at this time of year it takes a long time for the liquid to evaporate from the biochar. I've added a box fan on top of the tub to speed evaporation.
With the second two batches I disolved AMS in water and added it to the biochar. The total water added was around 5 gal to disolve 1.8 gal of AMS. Those are drying out much better.
And I thought I functioned on the fringe! Just catching up here. Must confess using human urine never occurred to me to inoculate the bio char. Do I pee on my compost pile? Yes all the time. Will make special trips just to do so. But never thought that for my bio char. Kudoos to you and your self sufficient approach.
While we are all busy 'marking our territory' as the wild canine instincts dictate, here is a point to ponder...considering recent interest in 'farming deer as a food source' (in the nontraditional context of livestock).
Quote:
==================================
The USEPA requires a 30-d interval between application of biosolid and hay harvest or grazing to minimize the potential for direct ingestion of the biosolids and any pathogens present in the material (USEPA, 1994).
==================================
http://www.nrcs.usda.gov/Internet/FS...rdb1080496.pdf
You may want to consider that....right along with the observation that a deer is just as apt to drink from a nearby 'skanky waterhole' as he is from your 'hygene friendly deer tank'....such has been the nature of the animal for eons!
+
To be honest, the urine thing is more of a curiosity and experiment that pretty much failed. That is not to say it is not providing the N necessary, I'm sure it is. It is simply the time involved to collect and apply and wait for the liquid to evaporate isn't worth the cost savings over other N sources.
My next step will be to introduce microbes. I have another tread on brewing worm casting tea that I plan to use for that step.
Thanks,
jack
 
Time for a quick update. I balanced 2 containers of biochar by diluting water soluble AMS in water and pouring in over the biochar. Every few days I've inverted the biochar to be sure the nitrogen is distributed well. Meanwhile, I've been slowly adding urine to the third container of biochar for the N balance.
Originally I hoped that after the N was distributed, the water would just evaporate. Unfortunately, that is going to take way too long to be practical.
So today, I started trying to remove fluid from the two bins I balanced with AMS. I strained the biochar and collected the fluid in a 5 gal bucket. Next I took a propane burner (like you use for a fish fry) and an old pot and started boiling the fluid. I'm concerned that if I discard it completely I'll be losing the N.
I did a little digging and found that the guy who discovered urea did so by boiling urine. That gave me the confidence that the N will largely remain as the water boils off.
I basically slowly added fluid from the bucket to the pot letting it boil down until the amount of fluid remaining was a small fraction of what I started with. I then reapplied that fluid to the biochar. With the volume of fluid significantly reduced, I'm hoping I can dry the biochar much faster.
The second thing I started today was brewing my first batch of worm casting tea. I'll put the details in the other thread. The reason I decided to boil the fluid off now is that I'm only dealing with C:N ratio right now and no life. Once I use the worm casting tea, I'll be introducing microbes and boiling to reduce fluid won't help since it will kill any microbes. So, I want to reduce the moisture content as much as possible before I add that. Fluid from the tea will need to evaporate.
So far, I got much of the fluid reduced from one batch and got started on the second batch. Hopefully I'll finish that tomorrow and then start on the urine based batch.
Thanks,
Jack
Hey guys, thanks for posting about Biochar. I'm hoping to learn more about the process and how to apply to growing trees. Here is my cooker. It is a 30 gallon drum inside a 55 gallon drum loaded with dry wood from a cabinet shop next door.

When its done cooking I take it out, tamp it and apply to my compost pile of horse and rabbit manure.

Not sure how long it takes to load but most of it has been made since last summer and I'm now working on a new pile as I find time. I planted some walnut and fruit trees and hazelnuts this year and applied a shovel of this to each hole before I planted the tree. Time will tell if it makes a difference. I made sure to leave some out for comparison.

Outstanding! Thanks for the pics. I think that is the kind of kiln that Baker used which is different from the design I used. I have found that charging it has been the most challenging part of the process. Did you add yours to compost for charging? I didn't have enough green to do that since bichar is 1:100 C:N and I didn't want to wait that long. I'm finding that removing the liquid I used to distribute the N is my biggest issue but I'm slowly resolving it.
Thanks,
jack
Jack,
My thoughts are to make it and throw it on the compost so that when it rains the tea will load it. I'm not sure how long it takes but that's what in doing.
When I start growing seeds this summer I'm planning on using some mixed with my pots to see if it helps.
I will try and post results if I see them.
Erik
Quote:
==================================
Originally Posted by erik metzger
Jack,
My thoughts are to make it and throw it on the compost so that when it rains the tea will load it. I'm not sure how long it takes but that's what in doing.
When I start growing seeds this summer I'm planning on using some mixed with my pots to see if it helps.
I will try and post results if I see them.
Erik
==================================
Erik,
I'm new at this, so don't take what I say at face value. My understanding is that &quot;charging&quot; biochar has two parts (whether they are done in steps or simultaneously), balancing C:N and introducing microbial life.
When creating compost, the idea is to balance C:N by mixing green and brown at appropriate ratios. This balance encourages fermentation type decomposition verses putrefaction. The starting C:N of biochar depends on the C:N of the biomass used. With the wood chips I used, I estimate it to be 100:1. So, if I was using it in carbon, I would need to add a lot of green to make a balance. If I did this, over time microbial life would be drawn to it and populate the mix. This would be the 1 step approach. I didn't have enough green for this.
So, I'm trying a 2 step process. I'm try to balance the C:N first. I'm trying urine with one batch and AMS dissolved in water the two other batches. Once I have it balanced, I plan to add worm casting tea to provide the microbial component. I could have used compost tea just as easily.
It will be interesting to learn from your experience. I'm slowly trying to compost the wood chips as well, but without enough N from grass clippings or something, decomposition is slow. By next year I may have some composting.
Keep us posted on your progress!
Thanks,
jack
Jack, You are a lot more methodical and studied here than me. I'm confused. I understand the bio char needs to be 'inoculated' . I can be a ready fire aim person sometimes. My approach to inoculation was to take the bio char out of the chipper where as mentioned it looks like angular pebbles. Put them in a wheel barrow and simply soak them in a mixture of fish emulsion, worm castings, and a soil charger with molasses. Mix this around for a few minutes and assume mission accomplished.
I have put a load or two directly to the compost pile but I assumed this was a long term option vs. my slurry.
I let this soak for a bit then apply to garden. I get the impression from you it is a bit more complicated than this. I assumed all that needed to happen was for my secret sauce to soak the pores and voila. What am I missing?
 
Quote:
==================================
Originally Posted by baker
Jack, You are a lot more methodical and studied here than me. I'm confused. I understand the bio char needs to be 'inoculated' . I can be a ready fire aim person sometimes. My approach to inoculation was to take the bio char out of the chipper where as mentioned it looks like angular pebbles. Put them in a wheel barrow and simply soak them in a mixture of fish emulsion, worm castings, and a soil charger with molasses. Mix this around for a few minutes and assume mission accomplished.
I have put a load or two directly to the compost pile but I assumed this was a long term option vs. my slurry.
I let this soak for a bit then apply to garden. I get the impression from you it is a bit more complicated than this. I assumed all that needed to happen was for my secret sauce to soak the pores and voila. What am I missing?
==================================
Baker,
I'm new to this too and feeling my way. When I did my background reading, it seems like microbial life want to have a range of C:N ratio to thrive. The reading talked about fermentation verses putrefaction. When making compost, the idea is to achieve a C:N ratio range between 25:1 and 35:1. They suggest that if you are adding biochar directly as a soil amendment you should shoot for 20:1 so it doesn't tie up N for the first few years. Here is the paper I used as my reference: <Biochar Article
I don't think there is anything wrong with your approach if you are going to mix it with compost and then amend soil.
Once the C:N ratio is right, you need to get microbial life seeded in the biochar. I believe you did just that when using compost tea. It may take a longer time for that microbial life to flourish if the C: ratio is off if there is insufficient N to compensate for the C in the biochar. I'm sure time will cure all when it comes to decomposition.
So, my approach is to add N to the biochar to try to get the C:N ratio right before I introduce microbial life. I'm not mixing mine with compost. I want to add it directly as a soil amendment so I'm shooting for a 20:1 ratio.
I could have used compost tea to introduce the microbial life, but I don't have a mature compost pile yet, so I decided to use worm casting tea.
The article describes what I'm trying to do, but I'm not sure how things will work with this first attempt. It may be that you can take lots of shortcuts and still get good results.
Thanks,
Jack
Well, I've now boiled off the excess fluid from the two bins adjusted with AMS. There was a lot less fluid than the urine batch. I put them out to dry today:
8c0df4bb-666d-407c-90ca-d7ab22289ffc.jpg

Thanks,
Jack
The biochar laid out on the tarps was well dry by this afternoon, so I loaded it back in the two tubs. My worm tea was done as well. I divided it in 3 equal portions and poured one portion into each of the two tubs to seed the biochar with life. I'm still working to boil off the excess liquid from the urine batch. I hope to finish that later this weekend or early next week and seed that final batch.
Do you only use chipped wood? I already have a spare 55 gal drum I used to hold spare play sand for the kids that is now empty I could use and more branches than I could ever burn, but no chipper. Would it be possible to make the char with only branches? I could probably try mixing the char with my regular compost to dry it out a little and add some different material to it. 90% of it was green matter. I could add leaves too, but currently out of room unless I take it out of my tub and just start a nice big pile next to the garden.
Quote:
==================================
Originally Posted by Sparkynutz
Do you only use chipped wood? I already have a spare 55 gal drum I used to hold spare play sand for the kids that is now empty I could use and more branches than I could ever burn, but no chipper. Would it be possible to make the char with only branches? I could probably try mixing the char with my regular compost to dry it out a little and add some different material to it. 90% of it was green matter. I could add leaves too, but currently out of room unless I take it out of my tub and just start a nice big pile next to the garden.
==================================
I think there are lots of different kinds of biomass that can be used. With the kiln design I used, I think it is important that the biomass is fairly uniform. If you cut the branches so they were fairly uniform it might work. If you use the kiln design that Baker or Erik used I don't think the uniformity of the biomass is as important. Basically whatever you can fit in the inner can should turn to char.
Thanks,
Jack
 
Last edited:
Quote:
==================================
Originally Posted by yoderj@cox.net
I think there are lots of different kinds of biomass that can be used. With the kiln design I used, I think it is important that the biomass is fairly uniform. If you cut the branches so they were fairly uniform it might work. If you use the kiln design that Baker or Erik used I don't think the uniformity of the biomass is as important. Basically whatever you can fit in the inner can should turn to char.
Thanks,
Jack
==================================
How is the interior drum supported? What are hole locations on it? What's better about that design? If I understand correctly, the whole idea is draw air from bottom through the material and almost smoke it?I can get a 35 gallon drum no problem, but would take more work cramming sticks into it than a larger 55 gallon.
Quote:
==================================
Originally Posted by Sparkynutz
How is the interior drum supported? What are hole locations on it? What's better about that design? If I understand correctly, the whole idea is draw air from bottom through the material and almost smoke it?I can get a 35 gallon drum no problem, but would take more work cramming sticks into it than a larger 55 gallon.
==================================
I think they are both forms of TLUD. The one I used is a basic TLUD. It is top lit and the burning layer is on top. Below that is the oxygen deprived layer and below that is unburned biomass.
The design baker and Erik are using is a Retort TLUD. The inner drum is know as a Retort chamber. It contains the biomass that is converted to biochar. It has holes in the bottom and a single small hole in the top so water vapor can escape. I don't believe it is supported. You just put fuel (your branches are fine) below, around, and above the Retort chamber and top light it. Just like mine, after it gets going you add the afterburner on top. The fuel around the retort chamber provides the heat. The retort chamber further reduces the oxygen for the biomass inside the chamber.
My guess is that the Retort design is probably more biomass efficient (you get a higher percentage of biochar from the biomass). Pretty much everything in the retort chamber turns to biochar. With my kiln, some will turn to ash if you don't catch things right. The problem with that design for me was that I didn't have access to a 30 gal drum with a removable lid and I don't have a chipper to chip the biochar. Since I have wood chips to start, I don't need to chip my biochar after the fact.
If you google biochar TLUD you will get some videos that show how different designs are used. I just picked one that fit my situation.
Thanks,
Jack
The time has come to stop making biochar and start using it. My first use will be with pawpaws. Since my current practices are providing a lot of what trees need, I'm not expecting the degree of results that I would expect using biochar in poor soils. This this is a great opportunity for a fairly controlled experiment.
I plan to start with 4 or 5 pairs of trees. I'm selecting pawpaws that are roughly the same height and caliper to start and pairing them. Here is an example:
cc886db4-92e6-4c94-a913-709e6b03ea25.jpg

Both trees were started from seed and have one growing season under their belts. They spent that first season in 1 gal RB2 containers and I did not transplant them intentionally regardless of size. My intent was to overwinter them in a cold room and give them a second season in a shaded environment and then to plant them from 3 gal RB2s this fall or next spring. Both were grown in the same 50/50 mix (by volume) of Promix Bx and mini pine bark nuggets.
I just transplanted both to the 3 gal RB2s. The one on the left uses the same mix as last season. The one on the right has about 15% (by volume)charged biochar added to the mix. Keep in mind that I did not disturb the root ball from the 1 gal RB2s except to do the normal flairing of the bottom root star before transplanting. Plant containers are nominally sized and a 1 gal container doesn't necessarily hold 1 gal. So, I did some sizing and found the 3 gal RB2s hold about 5 times the volume of mix as a 1 gal RB2. So, the transplanted biochar tree container has closer to 12% actual biochar by volume.
It was easy to find pairs of trees the same size. I have one large pawpaw that had nothing close in size, and I used biochar on it. Right now, I have 4 pairs like the one above transplanted. They are marked as a pair and one is marked as the biochar partner. I'll probably partner 1 or 2 more and then use biochar for the rest.
I may do this with some of the other kinds of trees when they are ready to go from 18s to 1 gal RB2s.
Thanks,
Jack
very cool. look forward to watching your experiment.
todd
I decided to transplant a few of my chestnuts today for the biochar experiment. I picked pairs of trees that are almost identical in size. Where there was a slight difference in size between the pair, I always put the smaller tree of the pair in the biochar amended mix. I'm intentionally disadvantaging biochar. It takes a lot of time to make and charge, so if it has a positive impact, it really needs to be significant for it to be worth making. So, if biochar trees show improved growth, there is no chance the trees in biochar had a starting advantage.
73301eaf-a6e0-4365-bb2c-13e9dd39fd53.jpg

97ea8603-f4d0-42ed-b9f3-b5be724f0562.jpg

e9cf4c8d-4a50-45d8-a139-353eff5410dd.jpg

More on the next post...
fc9f86f8-0920-42d2-b591-454df335776e.jpg

d780e862-1760-461c-b61c-c0d24dd0c6cc.jpg

Note that these trees were started early enough that a few are slightly lanky. I used the marking flags as stakes that will flex in the breeze when they go outside.
They are now calling for cold weather from Sunday through Tuesday, so it looks like I'll be pulling all the trees in again. (INTERNAL IMAGE LIKE EMOTICON REMOVED)
What size do you call those pots? They look smaller than the ones I've seen. Much closer to my popcorn bucket size.
Quote:
==================================
Originally Posted by Sparkynutz
What size do you call those pots? They look smaller than the ones I've seen. Much closer to my popcorn bucket size.
==================================
Those are 1 gal Rootbuilder II containers. Keep in mind in the container industry the size is nominal. A one gal container doesn't really hold a gal. For example, I use my Rootbuilder II containers making my mix. The 3 gal Rootbuilder II containers hold about 5 times the volume of a 1 gal Rootbuilder II container.
These are good for 1 growing season after the 18s in my area but I can get a little extra growth if I transplant from these to 3 gal rootbuilder 2s in the first season. If I waited until spring to start my trees I couldn't get any advantage from the second transplant.
I don't think the size of your popcorn bucket is an issue for the second stage. The question is whether it will effectively prune roots.
Thanks,
Jack
 
Last edited:
My idea would be go straight to those rootbuilders and skip the 18s saving some cash in process. I like the idea of a longer tap root on my oaks. They won't prune and spread as quickly sure, but tap roots on oaks shoot down quick so I bet it won't slow them too much. Any good deals on them? What are dimensions?
Thanks
Quote:
==================================
Originally Posted by Sparkynutz
My idea would be go straight to those rootbuilders and skip the 18s saving some cash in process. I like the idea of a longer tap root on my oaks. They won't prune and spread as quickly sure, but tap roots on oaks shoot down quick so I bet it won't slow them too much. Any good deals on them? What are dimensions?
Thanks
==================================
Why not use the 18s you already have. I'd suggest making your own express trays. This would be an easy project for you. Take heavy duty scissors and cut your cells apart. Be sure to leave a lip around the cells. Take an old laundry basket or something similar that has good air flow and turn it upside down. Cut square holes so the cells fit in the holes and are supported by the lip. This will let you reorganize the cells you have as the trees grow. The individual cells don't crack as easily when separated and the trees are easier to remove from an individual cell since you can invert it.
With you ingenuity, I'm sure you can find something laying around you could make into a tray.
Now that you have the first stage, just go to the 1 gals. The dimensions are 7&quot; tall and 6.5&quot; in diameter. I think retail is about $5.25 a piece. I've seen them under $4 in cases of 25 retail.
In your case where you have a small property at home and you can provide supplemental water as needed, I would go from your 18s to 1 gal RB2s and when these become hard to water (probably sometime in late summer or early fall) go plant them. This is a good cost compromise. In my case, when I plant trees at my farm, I can't provide supplemental water, so I want the trees a large as possible when I plant. That is why I use the 3rd stage.
Thanks,
Jack
Well, I think I've killed a bunch of trees with biochar!
It took we a while to figure out what happened. I'm still not 100% sure, but here is what it is starting to look like.
When I amended the biochar, I made a bunch of estimates regarding carbon and nitrogen. The biochar I've been using so far was amended with AMS. I targeted a 20:1 ratio. I did this because it is what they recommended for directly amending soil.
After thinking about this, I realized that the reason they make that recommendation is because the biochar will suck up nutrients for a few years, so the extra N offsets this.
Since I was making estimates, I may have used too much AMS and got an even more rich nitrogen mix.
It is looking to me as though many (but not all) of the trees I added biochar to appear to be suffering from nitrogen shock. Some may make it but many will likely die.
When I started noticing the trend, I started cutting back the percentage of the biochar in the mix. The last few I transplanted have not shown any signs of N shock yet.
Lesson learned, but it was an expensive lesson!
Thanks,
Jack
What were the symptoms of the trees or how did it affect them?
Quote:
==================================
Originally Posted by Sparkynutz
What were the symptoms of the trees or how did it affect them?
==================================
An over exposure to N will cause leaf curl or clamping, drooping, dry-out, and eventual browning. The symptoms can look similar watering symptoms. However since most of my control seedlings don't show these issues, I think it is the excess N.
My pawpaws which had a full growing season under their belts were effected as well, but not as badly. I think the root systems were more mature and could better handle the shock. Chestnuts were the most effected. Time will tell how many I lose.
Once I began to notice issues, I thought this might be the case and started cutting back on the biochar. The last few I transplanted I only used a few percent biochar (and thus less N) and they seem to be doing well so far.
Thanks,
Jack
 
END TRANSFER FROM QDMA FORUMS
 
Updated Picture Links
 
Top