Worm Casting Tea Brewing - For Seedlings - Transferred from QDMA Forums

yoderjac

5 year old buck +
My Application:
I'm exploring Biochar. I'm documenting progress on this thread: <https://www.qdma.com/forums/showthread.php?t=71623 Biochar is not a rich nutrition source in and of itself. It is mostly a carbon structure that has a huge amount of surface area that can provide a home for microbial life. The first step in using biochar is to balance the C:N ratio just like compost. This makes it amenable to microbial life. The next step is to add the microbes. My application for worm casting tea is to introduce microbial life to biochar that I plan to experiment with on my tree seedlings. However, folks use worm casting tea for other plant applications, so I thought I'd start a new thread on my brewer.
The brewer:
You can buy a brewer for worm casting tea, but after watching a few videos and looking at a couple designs, I decided to build my own using a 5 gal bucket I already had and $20 in plumbing parts from lowes.
Many designs use air stones as diffusers and aquarium pumps to provide air. I already have 5 gal buckets and a regular air compressor in the garage that I use for air tools and such. I decided to use that as my air source.
I make a PVC diffuser that fits into a 5 gal bucket:
IMG_20160222_155518519Crop_zpseiitq2mt.jpg

It is just 1/2&quot; PVC pipe and some fittings with an adapter hooked to a quick connect. You will also notice the T at the top. The only reason I used a T to connect the quick connect is to provide a place to hook a bungy cord to secure the unit to the bucket.
IMG_20160222_155548309_HDRC_zpsz43upxf9.jpg

On the bottom side I simply used a tiny drill bit and drilled holes through the PVC pipe. I didn't thing you could see them on the picture so I used a marker and drew black lines along where I drilled the holes. If you notice I put an elbow on the ends of the cross members and a short length of pipe and endcap. These act as feet to keep the unit stable.
Here is the diffuser simply placed in the 5 gal bucket:
IMG_20160222_155620003Crop_zpszp7e0ini.jpg

The final picture is the unit in the first test operation. I cranked the output pressure on the compressor down to 20 psi and connected it to the quick-connect. It fired up just fine. I'm not sure I really needed it, but you can see how the bungy goes over the T to secure the diffuser in the bucket.
IMG_20160222_155005738Cro_zpspotnvpbb.jpg

The next step is to get some worm castings. I think I found a local source.
Thanks,
Jack
i see worm castings for sale at walmart and home depot in the garden section. not sure how 'fresh' they would be
Jack,
The word diffuser gives me a shaky feeling.
Beside the regular pvc fittings and the brass fitting for air compressor, are there any special items.
I see crosses, tees, pipe lengths and some caps. Am I missing anything.
My questions is poorly worded because I am without any experience.
Wayne,
A diffuser is simply something that distributes (air in this case) in tiny bubbles. There is nothing special. It was a 5' section of 1/2&quot; schedule 40 pipe (with some left over). There is a T at the bottom and two small sections of pipe and the end caps. There is a small section of pipe that connects the T to the cross. The cross sits at 90 degrees to the T at the bottom. Two small sections of pipe go out of each side of the cross into elbows. Two more small sections of pipe go from the elbows to the end caps which sit on the bottom of the bucket.
I didn't provide measurements for each of the sections of pipe because I'm not sure all 5 gal buckets have the exact same internal diameter. I just measured as I went.
Coming vertically out of the cross is one more section of pipe that extends well above the top of the bucket. There is another cross there. 2 sides of that cross (top and one side) are just capped with small sections of pipe. The serve no functions other than for something to keep the bungee cord from sliding. The third section goes to a 1/2&quot; PVC threaded adapter. It has a 1/2&quot; slip connection on one end and male threads on the other. Next is a brass adapter. It has 1/2&quot; female on one side (where you screw in the PVC) and a 1/4&quot; female on the other side (where you screw in the quick-connect). That was what I used, but any combination of male/female that get you to the quick-connect works.
By the way, the pressures are so low that I didn't even glue the PVC parts. If I find any issues, I will glue them, but I won't bother unless I have to. That way I can always take it apart if I feel like I need to for cleaning.
Thanks,
Jack
Quote:
==================================
Originally Posted by jaximus
i see worm castings for sale at walmart and home depot in the garden section. not sure how 'fresh' they would be
==================================
I'm looking for as much microbial activity as possible. I think there is a small family farm near my farm that sells fresh work castings. That is my first option.
So far I'm only 8 gallons into the 30 gallons of urine required to balance the C:N of my first batch, so it will be a while before I need to make my first brew. I've got time to work it out.
Thanks,
Jack
The explanation cleared it up for me.
I believe I see two rows of holes drilled in each pvc section on the bottom.
Was size hole did you drill? They appear small to me 1/8 or 1/16 inch holes.
Spacing appears about 1/2 to 5/8 inches apart on the black line.
Thanks
Quote:
==================================
Originally Posted by wbpdeer
The explanation cleared it up for me.
I believe I see two rows of holes drilled in each pvc section on the bottom.
Was size hole did you drill?
Thanks
==================================
Some of the designs I saw said to use 1/8&quot;, but I just grabbed the smallest bit I could find. It is probably smaller than 1/8&quot;. My eyes weren't good enough to read the size on the bit.
You are right, there are 2 rows on each cross piece. I think each row had about 5 on the lower sections. The upper sections were shorter so I think I used 4 per row. I also put 3 holes in the legs that go from the elbows to the feet.
I'm not sure how critical all this is. The key is that the air pressure is high enough so that all the holes are putting out air. The larger and more numerous the holes, the more pressure that is required.
I cranked my compressor from it's normal 90 psi output down to about 20 psi and it worked pretty well. The compressor needs to be oilless. Mine is just an inexpensive Harbor Freight model. I think the tank is about 8 gal. It keeps up very easily and doesn't run constantly.
Thanks,
Jack
 
You can accomplish more than enough aeration by using a small aquarium pump and some ceramic stones or a flexible diffuser tube from the pet store or Walmart, probably cost you lest than $15 total....and less than 1 minute to set up.
Microbes need almost no oxygen at all for aerobic activity (compared to fish), so just a little is more than enough. The goal is to just gently roll the water around, not agitate it to the point it is splashing around like in the picture. Smaller bubbles are more efficient at pulling water (more surface area), so you need less air than if you have large bubbles like you currently have.
MThompson,
What you just posted agrees with what I heard on YouTube a number of times last night. After Jack started this thread, I had some time available so I got into the info on YouTube.
Would you spray the brewed tea compost spray directly on young seedlings that are maybe 8 weeks old?
If you were watering the growing media the seedlings are in, how often would you give them this compost tea?
If had brewed / aerated a 4 1/2 gallon batch, how much would you dilute the brew. I am think 1 part tea to 3 parts water.
Thanks for your contributions.
Quote:
==================================
Originally Posted by wbpdeer
Would you spray the brewed tea compost spray directly on young seedlings that are maybe 8 weeks old?
==================================
Young, tender seedlings might not like a full-strength spraying on their leave, but full-strength soil-drench is fine. This also, isn't necessarily an &quot;every watering&quot; treatment. Just once in a while, to add nutrients that are being used up, and replace microbes as they die off....and it's more than just bacteria and fungi, there will be a lot of protozoans and nematodes in there.
Quote:
==================================
Originally Posted by wbpdeer
If you were watering the growing media the seedlings are in, how often would you give them this compost tea?
==================================
Maybe every 3rd watering when they are young, and up to every time when they are older, and vigorously growing.
Quote:
==================================
Originally Posted by wbpdeer
If had brewed / aerated a 4 1/2 gallon batch, how much would you dilute the brew. I am think 1 part tea to 3 parts water.
==================================
Some people say undilluted, other say 5gal per ACRE!! (which would need some serious dilution for even coverage)
But, I think it depends on how much worm castings or other stuff you put in the brew.
For UNdilluted use....I'd use a part of an old white t-shirt as a satchel, and put maybe<ul><li>2-3 cups castings in there,</li><li>4 gallons of un-chlorinated water,</li><li>a Tbsp or 2 of unsulphated Molasses.</li><li>Brew for 24-48 hrs,</li><li>Then, use this directly</li></ul>
Or, for dilluted use, you can add a bit more castings, <ul><li>AND kelp or seaweed emulsion/meal,</li><li>some fish emulsion or sardines/herring/mackerel (mashed up a bit),</li><li>some alfalfa pellets (rabbit food),</li><li>and soybean meal.... </li><li>add all to the bucket (no satchel),</li><li>4 gallons of un-chlorinated water,</li><li>brew for maybe 3-4 days (outside and AWAY from any significant other's nose!!!)...
</li><li>Then strain this through a t-shirt</li><li>Finally, dilute at 1-2 cups tea per gallon of water.</li></ul>
None of this stuff is a really really high concentration of nutrients, so exacting dilutions and ratios are not required. If you were going to run a small, controlled experiment, then I'd pay more attention to the ingredients and dilution.
Hope that helps.
I currently have probably 60# of worm castings built up over the winter from just food scraps in the kitchen....I need to get another bin going on top to get the worms moved out of the finished castings before Spring hits. At $3/lbs at the garden center, that's a pretty serious savings and I'm more likely to use it more often.
Quote:
==================================
Originally Posted by mthompson
You can accomplish more than enough aeration by using a small aquarium pump and some ceramic stones or a flexible diffuser tube from the pet store or Walmart, probably cost you lest than $15 total....and less than 1 minute to set up.
Microbes need almost no oxygen at all for aerobic activity (compared to fish), so just a little is more than enough. The goal is to just gently roll the water around, not agitate it to the point it is splashing around like in the picture. Smaller bubbles are more efficient at pulling water (more surface area), so you need less air than if you have large bubbles like you currently have.
==================================
You can't get too much O2 but you can get too little. I looked at the aquarium pump designs. I found some of the better systems are quite agitated. Some use vortex method. In the range of designs, the PVC diffuser with a compressor hit the sweet spot for me. Take a look at some of the commercial designs. I checked out quite a few designs including the OSU design. Most of the commercial units use much more water movement wither through bubble agitation or through pumping water.
Also, keep in mind that the amount of agitation can be controlled by simply adjusting the compressor. The picture you are looking at came from the test run where I was trying to make sure all the holes were clear of debris.
Another design I considered was using a soaker hose as the aerator. I abandoned that idea due to cleaning issues (we are dealing with microbes here).
Thanks,
Jack
Yep, too much Oxygen just means wasted energy really, and at this small scale is piddly.
Most of the large system you see need more agitation because they are deeper vessels, and air-lift only works to a point. Plus, when you really get into the oxygen budgets on highly productive and densely populated systems, you need more turnover because the biochemical oxygen demand is much higher. Vortexing alone is the best way to insure optimum population growth and reproductive rates of microbes...this is how labs and breweries (and myself for homebrew) do it for bacteria and fungi.
Some of NYC's Parks (I know Battery for sure) use a huge system for compost tea, and applies this to all the grass. I guess it has proven to help the grasses hold up to high traffic and impact uses much better than without the tea.
Wayne,
My approach is not going to be to use the tea on the seedling directly. That is sort of a &quot;fertilizer&quot; approach where one adds nutrients over time making them available to the plant.
My concept here comes from a lot of Doug's (Dgallow) posts on soil health. He talks about how living soil forms a symbiosis with plants. This discussion is all in the context of food plots.
So, the approach I'm taking is to try to improve soil health by using biochar (I have heavy clay soils with low OM). I can't find a way to make biochar make sense economically for food plots at this point. So, for now, I'm going to see what impact it has on trees.
For grins and giggles, I plan to add biochar to some of my containerized trees. Keep in mind that promix is a great growing medium but probably has little microbial life. My guess is that promix alone has enough capacity to hold the microbial life without the biochar (but my soils don't). My real test will be watching the effect on amending the holes with biochar when I plant trees.
So, for you, trying to improve seedlings in containers and not using biochar, the question I would ask is &quot;Do you really need tea?&quot;. The reason I'm using tea is to introduce microbial life to biochar. Biochar has a huge amount of surface area to support microbial life. The tea increases the microbial life and the water helps transport it and distribute it through the bichar.
For your situation, why not just use the worm castings directly? I'd consider mixing some percentage (maybe 25% to start) of worm casting directly with your promix. Use some varying percentages to see what works best. Once your media is supporting a microbiome, it should stabilize and grow on its own. I don't see the need to concentrate it and add it periodically.
Just a thought....
Jack
 
Quote:
==================================
Originally Posted by mthompson
Yep, too much Oxygen just means wasted energy really, and at this small scale is piddly.
Most of the large system you see need more agitation because they are deeper vessels, and air-lift only works to a point. Plus, when you really get into the oxygen budgets on highly productive and densely populated systems, you need more turnover because the biochemical oxygen demand is much higher. Vortexing alone is the best way to insure optimum population growth and reproductive rates of microbes...this is how labs and breweries (and myself for homebrew) do it for bacteria and fungi.
Some of NYC's Parks (I know Battery for sure) use a huge system for compost tea, and applies this to all the grass. I guess it has proven to help the grasses hold up to high traffic and impact uses much better than without the tea.
==================================
This is another reason I chose this kind of diffuser and didn't glue anything. Today it is a 5 gal bucket. If I scale up, all the parts are reusable. I just pop them apart, replace the pipe sections with longer ones, and I'm ready for a 32 gal garbage can, 50 gal barrel, or whatever. The same compressor has more than enough overhead to drive any of these.
Thanks,
Jack
I use the tea to spray mostly my vegetable garden. I add lots of compost, manure, and organics over the season, so nutrients are not an issue for me. I just like to keep up with anything that can help the health of the plants overall (a huge flush of active beneficial microbes). For my garden, I focus tremendously on soil health....no mechanized tilling (I built a nice broadfork for turning soils and incorporating amendments), no chemicals and fertilizer, only walk on designated paths (no compaction), etc...lots of stuff to help the land, which in turn helps everything on or in it.
A dressing of the worm castings would not make any difference in there, but I will be mixing it in when I pot up my trees into the 1 gal rootbuilders II's.
For overall soil and land health stuff, you should see if your Library has a copy of Aldo Leopold's &quot;For the Health of the Land&quot;. It is a series of articles directed at private landowners and farmers on how they can be more effective stewards of their land and the wildlife that use it.
Quote:
==================================
Originally Posted by mthompson
...
A dressing of the worm castings would not make any difference in there, but I will be mixing it in when I pot up my trees into the 1 gal rootbuilders II's.
...
==================================
Which is what I was suggesting to Wayne for his application. What percentage do you use when you add it to your professional mix or do you make your own mix?
Quote:
==================================
Originally Posted by yoderj@cox.net
What percentage do you use when you add it to your professional mix or do you make your own mix?
==================================
I usually use 33% or 25%, depending on what I'm mixing it for and how much of the supplies I have on hand.
33% mix: 1 part Castings, 1 part Peat Moss, 1 Part Perlite.
25% mix: 1 part castings, 2 parts Peat Moss, 1 part Perlite.
I use a hard plastic cup for measuring most of the time, as I make only enough for what I am doing at the time, mixing in a small rubbermaid and getting it most with water during mixing.
For the trees this year I just used some potting mix and add some castings to that (I didn't have peat moss on hand)...but for trees I throw in some 8-9 month Oscmocote as well.
For vegetable seed starting, I generally omit the Perlite or filter some with window screen and use a bit of the finer sizes. And I'll add some Vermiculite if I have it, or think of it.
MThompson,
You have experience with the compost tea procedures. I planted 46 Chinese chestnuts &amp; Dunstans in late April of 2015.
Tell me how to treat / apply the compost tree to these seedlings this spring to help my trees out.
Some are 2 1/2 feet tall and some are 4 feet tall. They have landscape fabric around them and I put moisture miser in the hole when I planted them. I planted 47 but 46 survived. I water them during the hot stressful times. I like landscape fabric for moisture conservation.
The less you assume - probably the better off I will be.
Thanks
Quote:
==================================
Originally Posted by wbpdeer
MThompson,
You have experience with the compost tea procedures. I planted 46 Chinese chestnuts &amp; Dunstans in late April of 2015.
Tell me how to treat / apply the compost tree to these seedlings this spring to help my trees out.
Some are 2 1/2 feet tall and some are 4 feet tall. They have landscape fabric around them and I put moisture miser in the hole when I planted them. I planted 47 but 46 survived. I water them during the hot stressful times. I like landscape fabric for moisture conservation.
The less you assume - probably the better off I will be.
Thanks
==================================
Sure thing. My version is pretty basic, but some versions use a lot of amendments like rock dust, humic acid, bat/bird guano, etc.
Supplies needed:<ul><li>5gal bucket with lid</li><li>Aquarium air pump (for 20gal tanks is big enough)</li><li>air tubing</li><li>Diffuser(s) or diffuser tubing</li><li>Satchel (burlap, t-shirt, paint strainer, etc.)
OR</li><li>a way to strain the tea before use (if you are using a sprayer)</li><li>Stones or nuts/washers or something non-toxic to hold the satchel underwater</li></ul><ul><li>4gal of clean, de-chlorinated water</li><li>1-3 lbs freshest Worm Castings you can get</li><li>1/4 cup Molasses (un-sulphated)</li><li>1 Tbsp or so of fish emulsion</li><li>And any of the other additives you have or want to add</li></ul>
Add all the ingredients to the bucket, and turn the aerator on. Let it brew for 24-48 hours....you'll see bubbles forming and that means the bacteria are fermenting and growing (along with everything else).
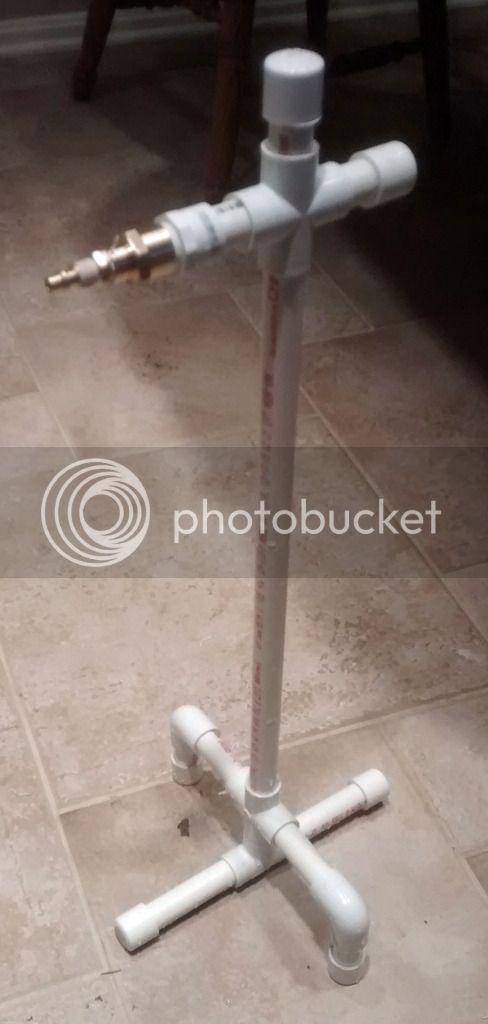
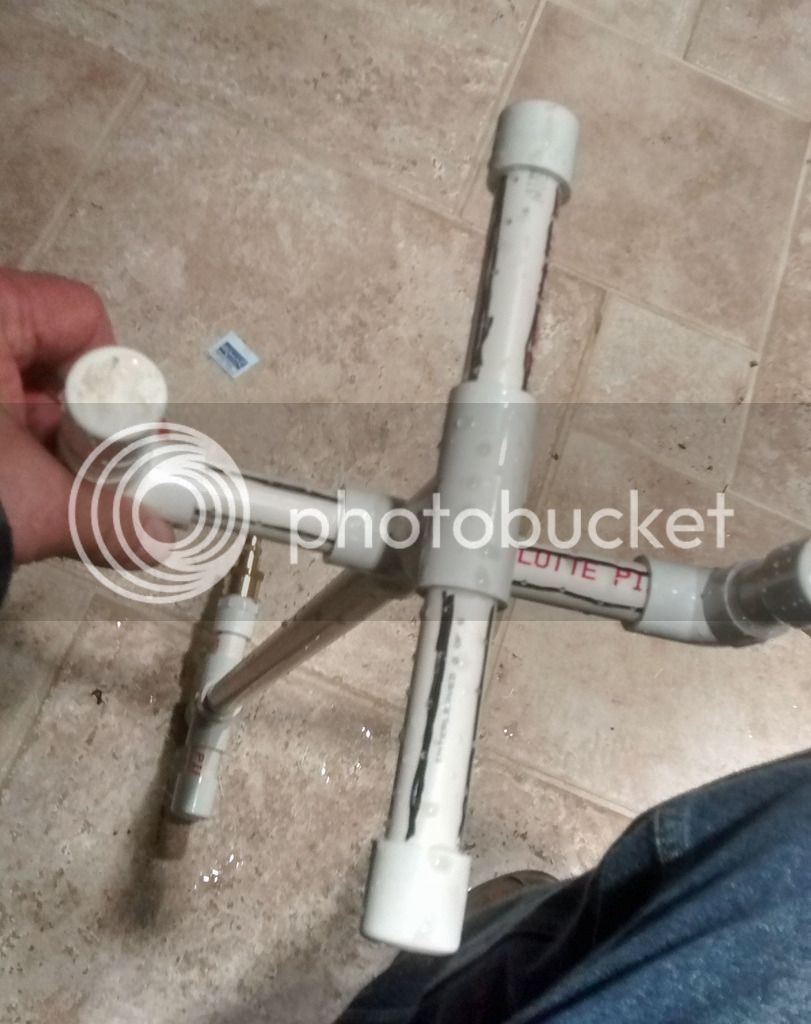
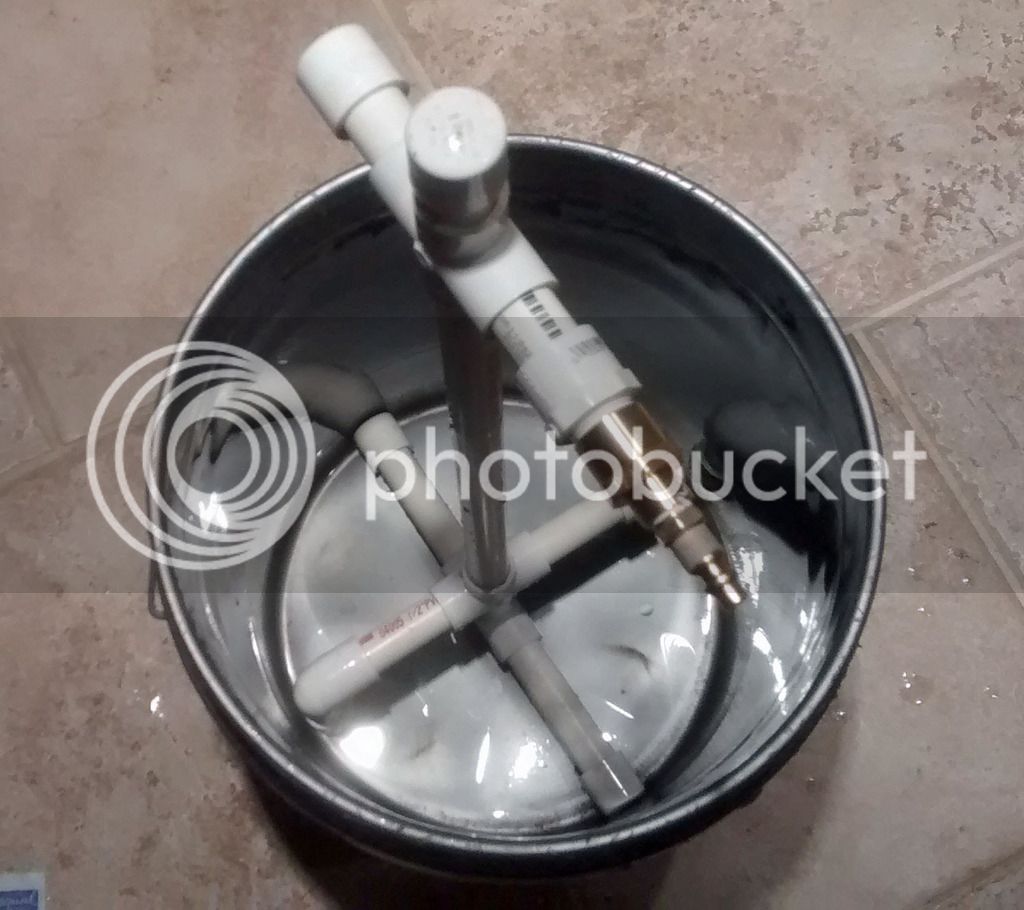
This is basically how I set it up, brew it and spray it on my veggies...<
If you are going to be soaking the ground, you can dilute it about at 1/2 cup per gallon or so OR build a bigger system and brew a larger batch.
For watering really spaced out trees with it, I'd make a bunch of &quot;soaker buckets&quot;...basically a pail with a small hole or two in the bottom. Melt the holes in with a finishing nail, and you are aiming for about 1-2 hour to drain 5 gallons....so small holes are key. Set the buckets by the tree maybe 6&quot; from the trunk, fill with diluted tea and go to the next one and repeat....if you make 10 soaker buckets, it will take you 5 hours to water 50 trees.
The soaker buckets let the water slowly soak into the ground just like drip irrigation. This is much much better that just dumping it on all at once. Your trees will thank you for this, especially any new transplants.
Or, depending on how your trees are laid out and where they are located, you can make a simple gravity-fed drip irrigation system. I have a couple 55gal drip systems set up for some stuff that is away from my main garden. Works like a charm. I would really look into this if you have rows of trees and have any slope to the land at all....One system for each row, up to about 100ft or so. Or, if you can get an IBC and build a stand for it, you can get more head pressure and work with the slope to get further out. (<this video is almost exactly how I have mine set up, and I just found this video today....except I don't use drip tap, just poly pipe and emitters where I need them.)
This is getting into a different thread and conversation now...
I started my first batch of tea today. I was able to pick up worm castings for about $1/lb. For my 1st batch, I started up the diffuser with the 5 gal bucket about 3/4 full of water. Next, I diluted about 1/4 cup of molasses with water and added it to the bucket. Finally I sprinkled about 3 lbs of worm castings into the bucket.
Unfortunately, my garage is well below 70 degrees so the process will be slower than normal. The high tomorrow is supposed to be in the low 70s here. I started the batch about noon. When I last checked it at 6:00 pm, there was no foam yet. I timed the compressor. It is running at about a 15% duty cycle.
Thanks,
Jack
 
Quote:
==================================
Originally Posted by yoderj@cox.net
I started my first batch of tea today. I was able to pick up worm castings for about $1/lb. For my 1st batch, I started up the diffuser with the 5 gal bucket about 3/4 full of water. Next, I diluted about 1/4 cup of molasses with water and added it to the bucket. Finally I sprinkled about 3 lbs of worm castings into the bucket.
Unfortunately, my garage is well below 70 degrees so the process will be slower than normal. The high tomorrow is supposed to be in the low 70s here. I started the batch about noon. When I last checked it at 6:00 pm, there was no foam yet. I timed the compressor. It is running at about a 15% duty cycle.
Thanks,
Jack
==================================
You could throw in a small fish tank heater from Walmart (~$10-15). Or just give it 3-4 days in the bucket.
MThompson,
I watched your YouTube videos and found them helpful. What is temperature you want the water to be when you brew the tea?
If your water temperature is lower than the target temp - what impact does this have on your brew?
My goal is to brew for 24 hours. I started this morning at 7 AM local time. I took some photos and will post this evening.
Thanks
Quote:
==================================
Originally Posted by wbpdeer
MThompson,
I watched your YouTube videos and found them helpful. What is temperature you want the water to be when you brew the tea?
If your water temperature is lower than the target temp - what impact does this have on your brew?
My goal is to brew for 24 hours. I started this morning at 7 AM local time. I took some photos and will post this evening.
Thanks
==================================
Minimum temperature for a 24hr time frame is probably 70°F, but 80°F would be better....keep it under 90°F, or you could have problems with low oxygen. Warmer water holds less oxygen - max dissolved oxygen (DO) at 70° is ~9 mg/L, 80° is 8 mg/L and 90° is 7 mg/L. All of these level are probably fine for bacteria and most microorganisms, but no need to try to push it. 80°F is good enough and will get them growing plenty fast.
MThompson,
Thanks for the temperature information. Time for me to find a heater.
Wally world - here I come.
Just wanted to throw this out there. Would the smell of worm possibly attract any unwanted critters to your seedlings? I'm thinking maybe possums, armadillos and possibly racoons. I used fish emulsion as my main fertilizer last year and every seedling I put out got hit and dug up and I'm convinced it was because of the residual fishy smell. These seedlings were placed in a area where the tubes were already present and had been for two years. All I did was simply pull up the dead seedlings and replace it with ones I grew last year and replace the tube. As far as the critters were concerned everything should have looked exactly the same as before so I don't think it was a case of curiosity. Also, there are established trees here too and they didn't hit them. The only ones they hit were the newly planted ones. Just something to think about.
Matt
Quote:
==================================
Originally Posted by mthompson
You could throw in a small fish tank heater from Walmart (~$10-15). Or just give it 3-4 days in the bucket.
==================================
I have one that I used for my cloning machine. Good Idea, I'll throw it in. I was also thinking of getting it off the garage floor and setting a heating pad on a board under it.
Quote:
==================================
Originally Posted by mattpatt
Just wanted to throw this out there. Would the smell of worm possibly attract any unwanted critters to your seedlings? I'm thinking maybe possums, armadillos and possibly racoons. I used fish emulsion as my main fertilizer last year and every seedling I put out got hit and dug up and I'm convinced it was because of the residual fishy smell. These seedlings were placed in a area where the tubes were already present and had been for two years. All I did was simply pull up the dead seedlings and replace it with ones I grew last year and replace the tube. As far as the critters were concerned everything should have looked exactly the same as before so I don't think it was a case of curiosity. Also, there are established trees here too and they didn't hit them. The only ones they hit were the newly planted ones. Just something to think about.
Matt
==================================
Matt,
There is no smell of worm in worm castings. They simply smell like fresh black soil. I understand how the fish emulsion could cause an issue, but worm castings wont.
After I make the tea, the smell will be from the bacteria that colonize it. In my case, the tea will be used to charge the biochar.
Thanks,
Jack
Oh well see that shows you how much I know about worm tea.(INTERNAL IMAGE LIKE EMOTICON REMOVED)
Matt
Quote:
==================================
Originally Posted by mattpatt
Oh well see that shows you how much I know about worm tea.(INTERNAL IMAGE LIKE EMOTICON REMOVED)
Matt
==================================
Matt,
It is actually worm casting tea. Worm castings are basically worm poop. Worms are a faster way to break organic material down than composting. Lots of gardeners make their own. You can actually do it in a tub in the house with kitchen scraps. There are a few large commercial operations who produce castings, bag it, and sell it to garden centers. When I was scooping up castings from the bag with my hand to measure out 3 lbs, it smelled like what my mom used to call &quot;woods dirt&quot;. She would go into a wood lot behind our house and get humus.
Thanks,
jack
I have some important trees planted on the farm. I am very motivated to help them thrive.
I got all of the resources together to brew some compost tea. YouTube and this forum gave me the confidence to jump in.
I purchased a ten gallon container, an air pump, got four air stones, a heater, and six ingredients.
The attached photo shows it brewing at 7:15 AM this morning. The molasses turns the water very dark. Two air stones are large and two are small.
I am using 6 ingredients in the compost tea. I am using 9 gallons of water.
1. Worm Castings (mine are dark rich) - 2 lbs
2. Epson Salt - 1/4 cup
3. Fish Bone Meal - 1/2 cup
4. Molasses with no Sulfur - 1/2 cup
5. Fish Emulsion Liquid Fertilizer - Use 3 little white caps from jug top
6. Kelp Liquid - Used 6 little white caps from jug top
I purchased two large paint strainers to put the worm castings in as it brews.
I will check it at 24 hours. Hopefully I have a good foam head on the brew, if not, I would run at least 6 more hours.
This photo shows the last three ingredients.
I purchased some of these items from the Mid TN Hydroponics Store in Murfreesboro, TN. The owner is extremely helpful and knowledgeable.
When my compost tea is finished brewing - I will use one part compost tea and four parts water. I will be watering trees plant in the spring of 2015. I am glad this thread was here to help me and others.
 
Wayne,
Thanks! When yours forms a foam head take a pic an post it. I checked mine and did not have a foam head after 24 hours, but I did not provide heat. Today, I put a heating pad on a plastic box and set the bucket on it. I then put a oil filled electric heater next to the bucket and put a moving blanket over it.
I checked it at 6:00 PM tonight and still no foam. We will see what it looks like in the morning.
Thanks,
jack
I checked the brew last evening at 11 PM and it looked just like it did in the first photo.
I checked it at 6 AM this morning, which is 23 hours of brewing time and we have a good head of foam. I will watch it closely to see if this head of foam increases in size.
What this foam tells me if that my worm castings were more than adequate to help produce the bacteria I was hoping for.
Here is the 23 hour photo.
Thanks to Jack for this thread and thanks to MThompson for answering my questions and his YouTube videos. I added a heater to this brew at about 3 1/2 hours into the brewing.
Kelp and Alfa Alfa teas are cheaper and generally just as effective as an &quot;Aact&quot;. I personally would just top dress with EWC and water in with a kelp tea. 1/4 cup per 4 gallons of water, bubble 14+ hours and water in, don't worry about straining out the kelp. Sourcing local wormcastings or starting your own wormbin using a large fabric pot would be the best option.
Derek
Mulching with any kind of straw helps keep the soil moist which helps keep micro activity high also, look into Seed start teas and top dressing with powdered malted barely, both cheap and effective.
Quote:
==================================
Originally Posted by wbpdeer
I checked the brew last evening at 11 PM and it looked just like it did in the first photo.
I checked it at 6 AM this morning, which is 23 hours of brewing time and we have a good head of foam. I will watch it closely to see if this head of foam increases in size.
What this foam tells me if that my worm castings were more than adequate to help produce the bacteria I was hoping for.
Here is the 23 hour photo.
Thanks to Jack for this thread and thanks to MThompson for answering my questions and his YouTube videos. I added a heater to this brew at about 3 1/2 hours into the brewing.
==================================
Wayne,
Thanks. I'm behind you because I did not add heat unit day 2. When I checked mine this afternoon I could see a little foam just starting. I'm hoping by morning it is full.
Thanks,
Jack
Quote:
==================================
Originally Posted by Sycamore Grove
Kelp and Alfa Alfa teas are cheaper and generally just as effective as an &quot;Aact&quot;. I personally would just top dress with EWC and water in with a kelp tea. 1/4 cup per 4 gallons of water, bubble 14+ hours and water in, don't worry about straining out the kelp. Sourcing local wormcastings or starting your own wormbin using a large fabric pot would be the best option.
Derek
Mulching with any kind of straw helps keep the soil moist which helps keep micro activity high also, look into Seed start teas and top dressing with powdered malted barely, both cheap and effective.
==================================
How much cheaper can you get. Worm casting cost me $1/lb and I used 3 lbs. I added a quarter cup of unsulfured molasses for food. That is all I spent.
Thanks,
jack
Jack,
I just watered 12 new shrubs that were planted on Saturday and Sunday. The water heater works - the temperature of the water was about 78 - it felt warm.
I went to Walmart and purchased the smallest heater in the fish tank isle.
I got everything I need now. I will know by September if I made a good call.
Quote:
==================================
Originally Posted by yoderj@cox.net
How much cheaper can you get. Worm casting cost me $1/lb and I used 3 lbs. I added a quarter cup of unsulfured molasses for food. That is all I spent.
Thanks,
jack
==================================
I can get 50lb sack of Alfalfa meal for around 20 bucks, if you want to go th even cheaper route get a bale of Alfalfa and cut/grind it your self.
Quote:
==================================
Originally Posted by wbpdeer
Jack,
I just watered 12 new shrubs that were planted on Saturday and Sunday. The water heater works - the temperature of the water was about 78 - it felt warm.
I went to Walmart and purchased the smallest heater in the fish tank isle.
I got everything I need now. I will know by September if I made a good call.
==================================
I have a fish tank heater somewhere that I used with my cloning machine, but I haven't been able to find it. I'm sure the heating pad and space heater will be enough.
I'm in no rush. Right now, I'm trying to remove all the fluid from my bins of biochar. I'm the burner from a fish fryer (can't figure out why my wife won't let me use the kitchen stove) and an old pot to boil off the water. I'm basically draining all the fluid from the biochar, boiling 90% of the water off and then reapplying what is left to the biochar. After that, I'm spreading it out very thin to let it air dry. I want to get the fluid level down as low as possible before adding the worm tea. Once I add it, I won't be able to use heat or sun to remove the moisture.
I've just finished the first two bins of biochar fluid boiling. I'm now in the air dry phase for them. The third bin was charged with urine. That one has a huge amount of fluid. It will take me a long time to boil that one down.
Thanks,
jack
I'm not trying to come off argumentative, and apologize if I came off that way, just trying to add to the discussion. Neem meal is another option for use as an N source, I've had friends use a simple neem/kelp teas to charge bio char. Where are you sourcing your biochar Jack?
Derek
 
Quote:
==================================
Originally Posted by Sycamore Grove
I'm not trying to come off argumentative, and apologize if I came off that way, just trying to add to the discussion. Neem meal is another option for use as an N source, I've had friends use a simple neem/kelp teas to charge bio char. Where are you sourcing your biochar Jack?
Derek
==================================
Derek,
I didn't take you as argumentative at all. It is just when the cost drops below $5 it is hard for me to worry about cost. I forget that others are using this different than I am an may have an ongoing cost. I'm using it to charge biochar not to spray for foliar application.
I'm producing the biochar myself. Here is the thread that I'm using to document that: <https://www.qdma.com/forums/showthread.php?t=71623
Thanks,
Jack
I finished up the worm casting tea today. Everything seemed to work as planned. I used it to charge two of the three tubs of biochar and hope to charge the third soon.
Thanks,
jack
Very interesting read. Does all this extra work have much affect on seedlings or trees? Has anyone monitored growth results from untreated vs treated batches of same trees or seedlings?
The land I purchased had a large cast iron tub left from the house that burned down there 40 years or so ago. Over the last two years I've been filling it with veggie scraps from home turning it over here and there with a shovel. I had to cover it with metal fence because racoons were digging through it frequently. The tub is completely full to the brim and I've been trying to decide what I should do with it. I moved it about 10 ft from my garden before I started filling it with plans to just shovel it and till into the garden this year, but starting to think maybe I should use some for trees somehow.
What do you guys think?
Sparky,
Gardeners are the experts on composting. I brew my first batch of compost tea. I have an air pump and water heater purchased in the fish department at Walmart.
Composting is something I have not started but I am committed to the compost tea for my trees planted in 2015.
Three things I have researched on YouTube in the last month: 1) compost tea, 2) composting and 3) how to build a worm farm.
Worms get it done rather fast based upon what I have seen. The worm castings have great organic value. I imagine I will skip the composting but I expect 2 out of 3 will be good for me.
My 2 cents...
Quote:
==================================
Originally Posted by Sparkynutz
Very interesting read. Does all this extra work have much affect on seedlings or trees? Has anyone monitored growth results from untreated vs treated batches of same trees or seedlings?
The land I purchased had a large cast iron tub left from the house that burned down there 40 years or so ago. Over the last two years I've been filling it with veggie scraps from home turning it over here and there with a shovel. I had to cover it with metal fence because racoons were digging through it frequently. The tub is completely full to the brim and I've been trying to decide what I should do with it. I moved it about 10 ft from my garden before I started filling it with plans to just shovel it and till into the garden this year, but starting to think maybe I should use some for trees somehow.
What do you guys think?
==================================
Spark,
It is probably not worth the extra work. It was a lot more work than I realized when I started. However, I'm doing it as much for the learning experience. I don't know what the results will be and that is why I'm experimenting with it.
This all started with food plots and me trying to learn about soils. My soil is heavy clay with low pH. The good news is that lime moves very slowly through the clay, so while the initial application of lime takes a lot, maintenance lime isn't needed for several years.
On the downside, my soil has very low Organic Matter. Fertile soils are much higher in OM. I'm learning that beyond soil chemistry, there is a symbiotic relationship between the microorganisms that decompose OM and fungi and plants. Living soil improves fertility. While Doug can be hard to follow sometimes, I've learned a lot from reading his posts. He is a soils guy and talks a lot about mixing or rotating legumes and grasses. This is all to achieve a carbon to nitrogen ratio (C:N) conducive to living soil.
Biochar is simply charcoal used to amend soil. It is created when biomass (woodchips in my case) are burned at high heat in a low oxygen environment. By itself, it is mostly just carbon. The key is the cellular lattice that remains. It has a huge amount of surface area and is an ideal place for microorganisms to grow. So, my initial thought was to amend my food plots with it to improve the long-term fertility of my soil. Folks with sandy soil would also benefit from it because it retains moisture and nutrients that move quickly through sandy soil. Folks with fertile loam soil may not benefit at all from it.
When I started to work through the math, it became apparent than unless you live very close to some commercial facility that produces biochar, it really isn't economically feasible for food plots today. However, folks are experimenting with it as a byproduct for energy production amending soil with it may be a method of carbon sequestration. So, it may become more abundant in the future.
So, I wanted to learn about it and experiment with it. I'll be doing two experiments with it. The first is adding it to my mix for seedlings. Others have shown substantial effects of using it in containerized plants. Second, I want to amend the hole below the tree when I plant my seedlings in the field. In both cases, I'll do some trees with it and some without and compare the results. I don't intend this as an actual test, but I'm just trying to decided if the improvement I get (if any) is worth the effort.
I considered just buying biochar but I wanted the experience of making it myself.
As for the worm casting tea, it is just one method for introducing beneficial microbes to the biocahr. It is called charging it.
Others like Wayne and many gardeners use it to fertilize plants directly with a sprayer. That is not my purpose but it is probably how it is most used. Others mix biochar with compost and apply the combination.
It sounds like what you are doing is composting. If you don't have worms in that cast iron tub, I would introduce some. You might want to do a little reading on composting. The key again is balancing &quot;green&quot; and &quot;brown&quot; (nitrogen and carbon). If you get the right ration (25:1 to 30:1) you will get good fermentation type decomposition verses putrefaction.
Good compost would be a great addition to your mix. I would try adding 10%-20% fully composted material to your mix. I would not do this with 18s, on 1 gal and larger containers.
Thanks,
Jack
 
Thanks for the input jack. I look forward to any further input from your future results. I understand your reasoning for charging the biochar vs just fertilizing the plants. I was always hesitant of direct fertilizing from experiencing my grandpa killing way too many trees he's planted when he always over fertilizer them with no prior soil test or knowing what his trees need. My top soil is anywhere from 1-3ft thick very black and very fertile from experience. I'm not sure what it's missing yet. I plan to do a soil test this spring if I can find a good one somewhere. Under that is really dense tan wet clay. I wish i had truckloads of sand to help it drain better. Most of last year my compost tub was a wet soupy mess. It doesnt hardly drain even tho theres no drain in the hole and a large crack all the way through it. Im afraid any worms would just drown and die. Its not ideal for composting im sure. I did read up on it quite a bit last year when i started saving all our compostable scraps. I have another compost pile that I initially intended as a deep hole dug for a fire pit I was always burning my leaves and small sticks in. Mostly just ashes, leaves and all the hard chunks raked out of the garden along with all the leftover rotten squash and pumpkins we had. Where I planted my chestnut apple, and cherry trees last year I rototilled the heck out of the area, added another half yard of black dirt from in town, two wheelbarrows full of sand and about a cu.ft. of peat per tree in a decent sized mound and tilled again then planted in the nice loose soil. . 90% of the land is considered dnr wetland and in floodplain. I planted the apple trees at very highest spots, cherry next and chestnuts after. I'm hoping with the mounds and high enough area they stay dry enough. The water table there was about 6-8ft below the level of the Chestnut trees today. Typically in wet spring it raises to max about 2 ft higher than it currently is with rest of year much lower.
I cut down lots and lots of poplar trees trying to give more sun to my more favorable trees. I plan on burning at least a couple cords worth of it this summer. Would the regular ashes be good to amend soil with or what's the best thing to do with it? I burned a lot last year, there's a pretty good pile already started I could use. I probably won't go out of my way to make char or tea, but if I can use what I have in a beneficial way with little effort, I might as well.
Quote:
==================================
Originally Posted by Sparkynutz
Thanks for the input jack. I look forward to any further input from your future results. I understand your reasoning for charging the biochar vs just fertilizing the plants. I was always hesitant of direct fertilizing from experiencing my grandpa killing way too many trees he's planted when he always over fertilizer them with no prior soil test or knowing what his trees need. My top soil is anywhere from 1-3ft thick very black and very fertile from experience. I'm not sure what it's missing yet. I plan to do a soil test this spring if I can find a good one somewhere. Under that is really dense tan wet clay. I wish i had truckloads of sand to help it drain better. Most of last year my compost tub was a wet soupy mess. It doesnt hardly drain even tho theres no drain in the hole and a large crack all the way through it. Im afraid any worms would just drown and die. Its not ideal for composting im sure. I did read up on it quite a bit last year when i started saving all our compostable scraps. I have another compost pile that I initially intended as a deep hole dug for a fire pit I was always burning my leaves and small sticks in. Mostly just ashes, leaves and all the hard chunks raked out of the garden along with all the leftover rotten squash and pumpkins we had. Where I planted my chestnut apple, and cherry trees last year I rototilled the heck out of the area, added another half yard of black dirt from in town, two wheelbarrows full of sand and about a cu.ft. of peat per tree in a decent sized mound and tilled again then planted in the nice loose soil. . 90% of the land is considered dnr wetland and in floodplain. I planted the apple trees at very highest spots, cherry next and chestnuts after. I'm hoping with the mounds and high enough area they stay dry enough. The water table there was about 6-8ft below the level of the Chestnut trees today. Typically in wet spring it raises to max about 2 ft higher than it currently is with rest of year much lower.
I cut down lots and lots of poplar trees trying to give more sun to my more favorable trees. I plan on burning at least a couple cords worth of it this summer. Would the regular ashes be good to amend soil with or what's the best thing to do with it? I burned a lot last year, there's a pretty good pile already started I could use. I probably won't go out of my way to make char or tea, but if I can use what I have in a beneficial way with little effort, I might as well.
==================================
Potash is the source of the K I use on my food plots. Ash is not a complete fertilizer, but it can be uses as part of fertilization.
Thanks,
Jack
One idea I've mentioned before, but nobody chimed in if they've done it or would be a good or bad idea is to mulch around the tops where all my chestnut trees are with pine needles. I've heard they are a good source of slowly releasing acid and chestnuts like slightly acidic soil. Weeds rarely grow well under pine trees from what I've seen and thought it might be a good idea for weed prevention at same time as adding some acid to the soil. Also thinking of maybe mixing it with my media for initial growing in 18s or 1 gallon pots. I have an almost unlimited supply of pine needles from an acre of 40+ yr old pines behind my grandparents house.
For now I sprinkled some osmocote around all my 1 and 2 yr old trees yesterday but just a little to not over do it. Marsh grass and weeds are I'm sure big competitors for nutrients needed for these trees.
I've tried pine needles as mulch on my trees in the field. The pH of my soils are naturally acidic so I didn't do it for that reason. I was just doing it because I have a pine farm and it was a free source of mulch to keep weeds down and hold a little moisture.
It works fine, but I stopped doing it for several reasons. First, it breaks down too fast and I couldn't keep up with it. Second, organic forms of mulch like bark or pine needles can be attractive to voles and other vermin for nesting. Some will strip bark or eat roots.
I now use water and air permeable landscaping material. I cover it with stone for mulch. The stone is permanent and doesn't break down. The landscaping material will in several years depending on the type. The stone holds it in place so I don't need staples.
Others suggest it may get too hot, but I have not found that to be an issue and fruit tree guys do it frequently because of vermin.
Thanks,
Jack
 
Quote:
==================================
Originally Posted by yoderj@cox.net
I've tried pine needles as mulch on my trees in the field. The pH of my soils are naturally acidic so I didn't do it for that reason. I was just doing it because I have a pine farm and it was a free source of mulch to keep weeds down and hold a little moisture.
It works fine, but I stopped doing it for several reasons. First, it breaks down too fast and I couldn't keep up with it. Second, organic forms of mulch like bark or pine needles can be attractive to voles and other vermin for nesting. Some will strip bark or eat roots.
I now use water and air permeable landscaping material. I cover it with stone for mulch. The stone is permanent and doesn't break down. The landscaping material will in several years depending on the type. The stone holds it in place so I don't need staples.
Others suggest it may get too hot, but I have not found that to be an issue and fruit tree guys do it frequently because of vermin.
Thanks,
Jack
==================================
I did a pH test last year and the topsoil was around 7-7.5.
I had landscaping stones and boarders around all my trees in town, but when one died it was a huge PITA to dig out all the rock, screenings under that and falling apart landscape fabric under that. The stump grinder hit a rock I missed and almost took out a neighbors car window. After that I removed all the rocks around my trees and replaced with pine mulch. I haven't hit any stray rocks with my lawnmower now that their gone too.
I haven't had any problems with mice yet, but I do have 1/2&quot;x1/2&quot; fine chicken wire rings around all of my chestnut trees. I'd have to pull the rings out to lay the fabric under and have to use some type of stakes to hold them. Now they are just buried a couple inches.
Would screenings alone be sufficient, or need a larger rock to deter the rodents?
So far my only problems have been squirrels right after initial planting.
Quote:
==================================
Originally Posted by Sparkynutz
I did a pH test last year and the topsoil was around 7-7.5.
I had landscaping stones and boarders around all my trees in town, but when one died it was a huge PITA to dig out all the rock, screenings under that and falling apart landscape fabric under that. The stump grinder hit a rock I missed and almost took out a neighbors car window. After that I removed all the rocks around my trees and replaced with pine mulch. I haven't hit any stray rocks with my lawnmower now that their gone too.
I haven't had any problems with mice yet, but I do have 1/2&quot;x1/2&quot; fine chicken wire rings around all of my chestnut trees. I'd have to pull the rings out to lay the fabric under and have to use some type of stakes to hold them. Now they are just buried a couple inches.
Would screenings alone be sufficient, or need a larger rock to deter the rodents?
So far my only problems have been squirrels right after initial planting.
==================================
If you screen the trunks or tub them, that should stop rodent from stripping bark from the trunks. That won't likely stop voles and such from nesting and munching or roots. Keep in mind, this may or may not be a problem depending on your area. Some folks seem to have issues like this and others don't.
I had a tree the size of my wrist blow over in a storm. When I set it back upright and investigated, I found holes under the mulch and some of the larger roots has been chewed off.
Some problems can be predicted and others can't. Some depend on the area and some are general. We may have different issues. I tend to post about the way I do things and why, but I don't believe this is necessarily best for everyone.
Thanks,
Jack
Compost teas really aren't a fertilizer, more of a either bacteria or fungal dominant solution that &quot;charges&quot;the micro-life in the ground surrounding the tree/shrub which make nutrients in the ground more easily available to the plant. Npk values of a compost tea are of little importance, it's the beneficial bacteria and fungi that is the purpose of compost/ewc teas. These teas can be a good source of enzymes and metabolites though. I personally don't use many aerated teas because of the vast amounts of variables that have to be considered everytime you brew, and it's just messy.
Homeworm bins are a great thing to have if you do any sort of gardening, it's very easy and environmentally friendly. Homemade ewc are sooo much better than anything you get at a big box or garden store.
Derek
Derek,
I am going to build an earth worm farm / container. After I dealt with some worm castings I realized the value of that for my seedlings.
Your post made me feel good about my decision to try this.
Quote:
==================================
Originally Posted by wbpdeer
Derek,
I am going build an earth worm farm / container. After I dealt with some worm castings I realized the value of that for my seedlings.
Your post made me feel good about my decision to try this.
==================================
The cheapest easiest option is a large fabric pot, like a smart pot 100 to 200 gal. I have one in my basement, it's awesome!
Quote:
==================================
Originally Posted by Sycamore Grove
Compost teas really aren't a fertilizer, more of a either bacteria or fungal dominant solution that &quot;charges&quot;the micro-life in the ground surrounding the tree/shrub which make nutrients in the ground more easily available to the plant. Npk values of a compost tea are of little importance, it's the beneficial bacteria and fungi that is the purpose of compost/ewc teas. These teas can be a good source of enzymes and metabolites though. I personally don't use many aerated teas because of the vast amounts of variables that have to be considered everytime you brew, and it's just messy.
Homeworm bins are a great thing to have if you do any sort of gardening, it's very easy and environmentally friendly. Homemade ewc are sooo much better than anything you get at a big box or garden store.
Derek
==================================
That is exactly what I'm using it for, to charge biochar after balancing the C:N.
Thanks,
Jack
Biochar isn't something I have personally used yet but would like to integrate into my garden. Please keep us posted on the results Jack!
Derek
Quote:
==================================
Originally Posted by wbpdeer
Derek,
I am going to build an earth worm farm / container. After I dealt with some worm castings I realized the value of that for my seedlings.
Your post made me feel good about my decision to try this.
==================================
Too much moisture in a wormbin is your worst enemy, compost all my scraps, 2 to 3 month process depending on the outside temps, then add that finished compost to my worm bin along with basalt rock dust. I had horsetail and nettle as mulch on top, they are both great bio accumulators make your ewc even better, and it's free! alfalfa hay would be a good option too! If you have any questions or concerns please ask.
http://www.redwormcomposting.com/ A great place to get started
Derek
Derek
 
END OF TRANSFER FROM QDMA FORUMS
 
Top