Permanent Trail Camera Power Project

IkemanTx

5 year old buck +
Posted here so i didn’t further hijack the AA thread.

I blew out my ankle this year just before my season started and haven’t been able to swap batteries or pull cards on any cameras.

Most cameras will be dead (or memory cards full) by now, as i run video mode on everything and the batteries have been running since may.

Losing a hunting season sucks, but what is really eating me up is losing an entire year worth of intel from not being able to do my early season battery/card swap…. So since i’ve been stuck at home for weeks I decided to work on fixing the problem.

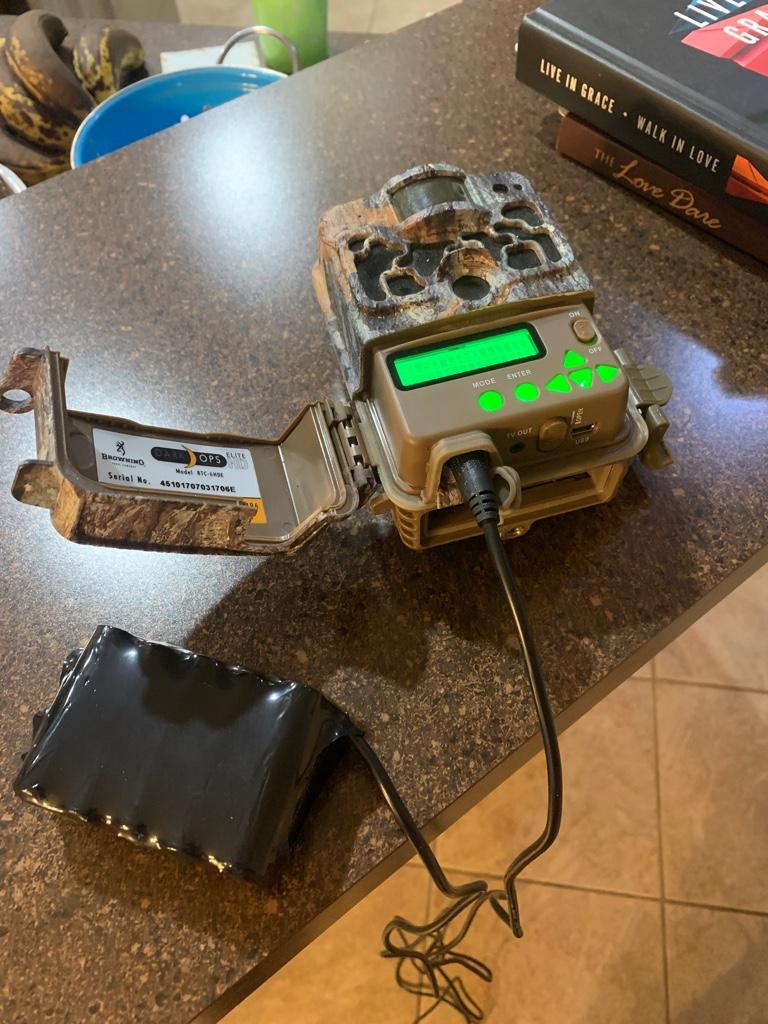
I found a video on YouTube last year from “The Handy Hunter” where he put together a small diy solar battery. The battery he uses for that build is no longer available, so my son and i soldered one up ourselves out of 3,000mah rechargeable AA batteries.
6222325c1dd53874f4f20b93013c91a9.jpg


Then, we assembled the solar panel / battery according to his video (soldering and shrink tubing instead of wire nuts).
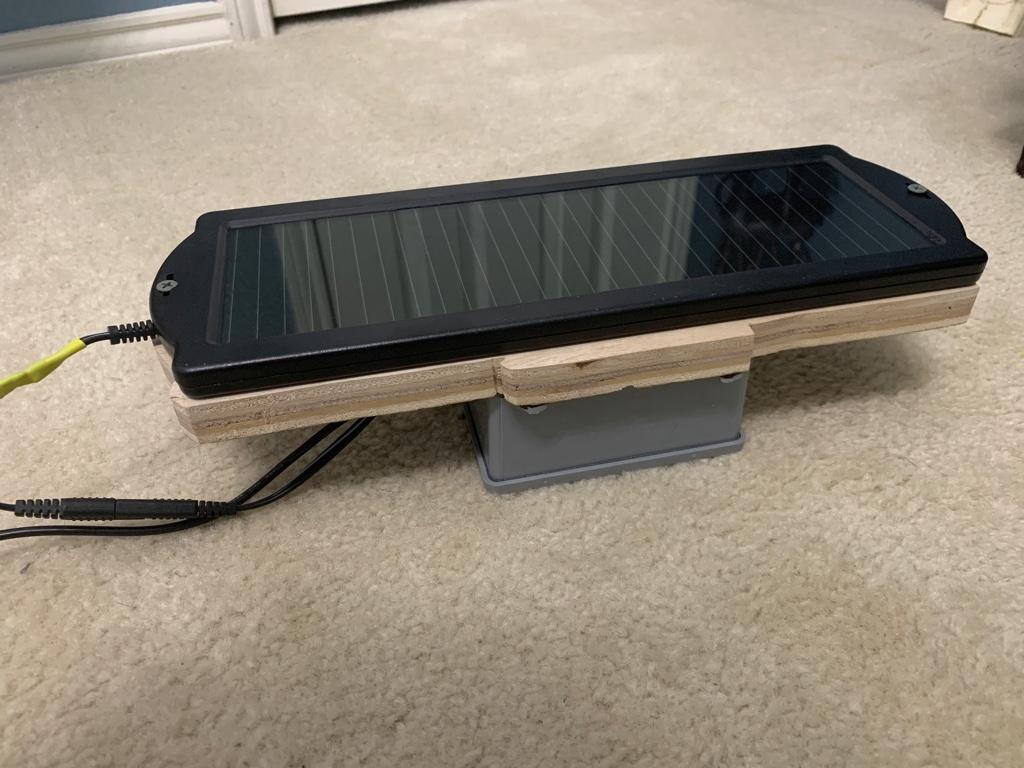
607007002631482c9a3430f55e19a30a.jpg


Most of my brownings will accept EXTREMELY large SD card sizes, so with these panels / batteries supplying permanent power i should be able to get videos for a full year without fail when paired with a 256 gig card. (Assuming the camera isn’t on a high traffic spot like a feeder) in picture mode with a memory card that big, this thing could probably run continuously for a couple of years before filling the card.

The 12v regulators i picked up are running a little lower than 12v, but the camera still runs just fine off of it. But, i wish i had tested that part before soldering and assembling.
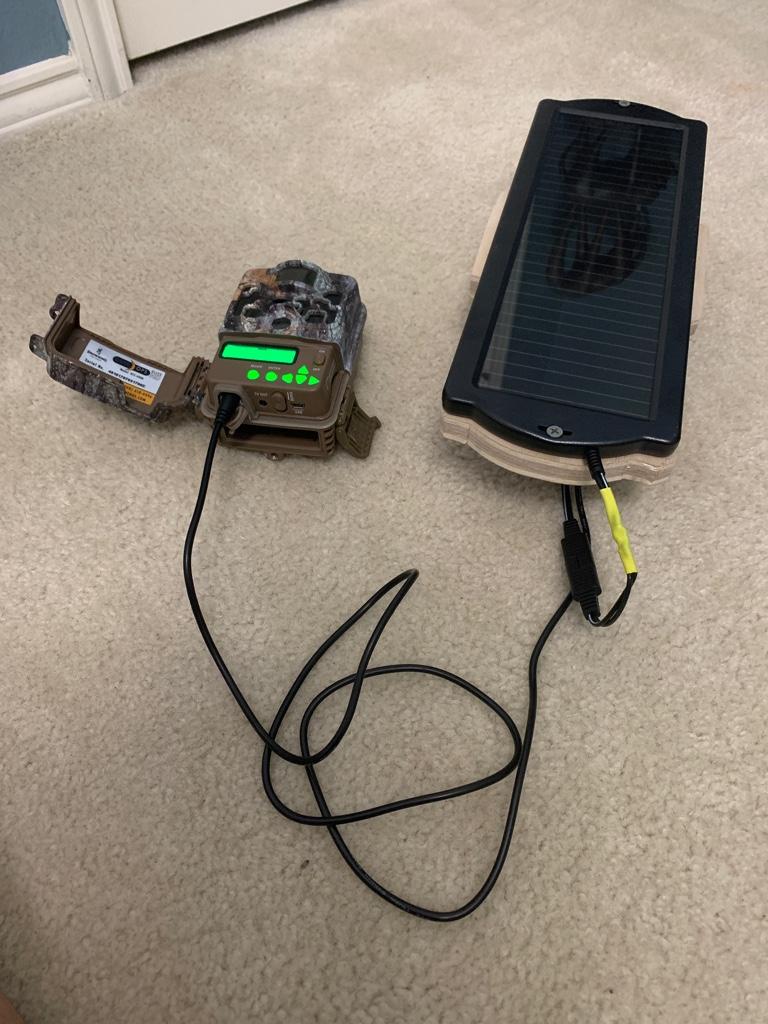
c556948a1175dd09621082a5a3edf65d.jpg


I only run 2 cameras on private land, though, and this setup is definitely not something i want to have on public land. Theres too much money and time invested in it, and i think you would be able to spot it from a mile away regardless of how good a sponge paint job is. I originally planned to do some 12v lithium battery packs that i can charge at home and just hang behind the camera for public land,
but i found a much smaller 12v solar panel, that runs 1.5 watts as opposed to this MUCH bigger panel’s 1.8 watts. That got me down a rabbit hole of just how small and ergonomic i could make something like this.


Sent from my iPhone using Tapatalk
 
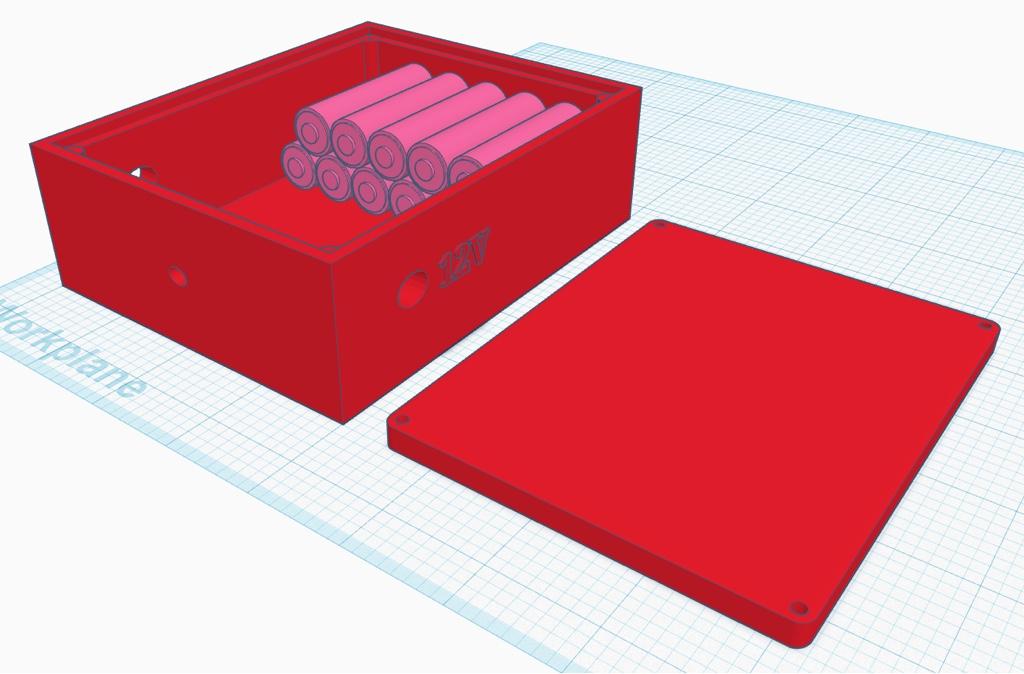
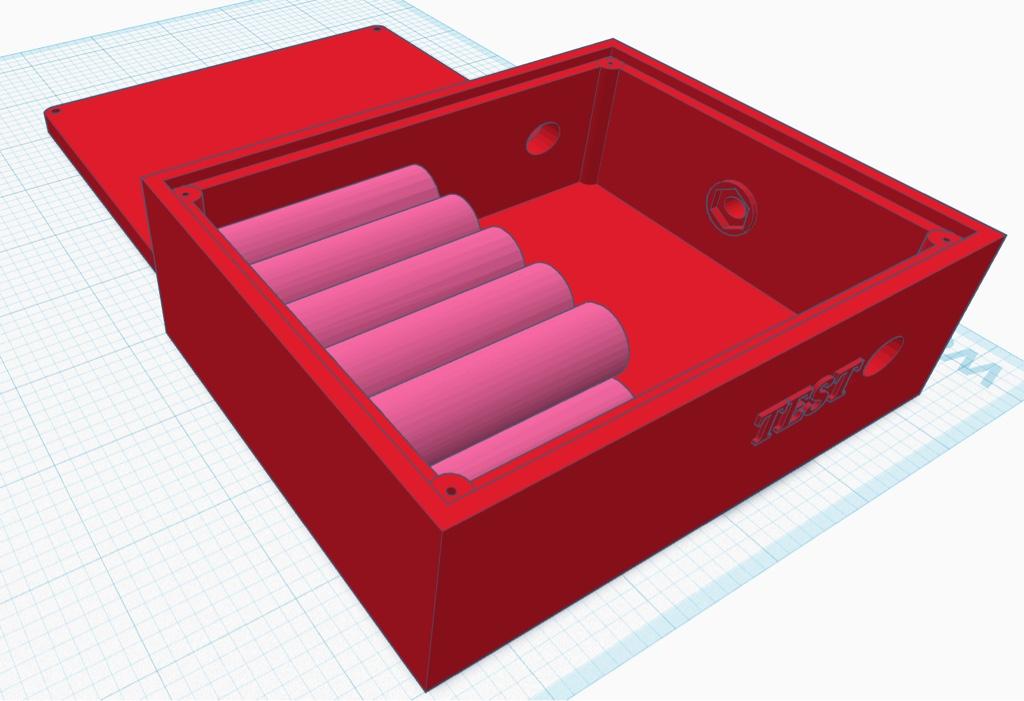
My brother recently got a 3D printer and he mentioned a 3D modeling software that is super easy to learn called TinkerCAD. He said if i get a design put together that i like, he will try to print it and send it to me for free. So, i spent a few hours learning the software and designed up a housing for everything. It took a few designs, but i think i have one that works extremely well.

The total size of the box and solar panel would be 4” X 5” X 1.6”, and it would be completely waterproof with a little silicone under the lid flange when finally assembled.

The mount is be a simple 1/4” stainless steel lag bolt in the end opposite of the battery. I designed a hex shaped hole based on the head of lag screw i intend to use and thickened the wall for a little reinforcement so when it is epoxied into place, it should distribute stress throughout that wall of the box. This would allow the box to be mounted by simply screwing the whole thing into the tree as if the box itself is the head of the lag screw. Just press it against the tree and turn.

The other 2 holes are for waterproof 5.5mm barrel sockets that a standard 5.5mm 12v cord plugs into. The first is regulated 12V power for the camera, and the second is directly connected to the battery circuit for battery testing.

a3b0f7cef1b54f4afcf5c8d80f5a2d86.jpg


2b7af10e16b9051c4b99808568b1aac3.jpg


Sent from my iPhone using Tapatalk
 
Does the 12v directly power the camera or just charge in batteries in the camera?

Sent from my SM-G986U using Tapatalk
 
Does the 12v directly power the camera or just charge in batteries in the camera?

Sent from my SM-G986U using Tapatalk

That depends on the brand and model of the camera. If the 12V connector is on the same circuit as the battery housing, it will directly charge the batteries in-camera as well as run the camera (assuming they are rechargeable).

I haven’t tested the browning cameras i currently use, but from the 6 series and 8 series AA setups they have, i assume their entire board is working on 9v-12v variable board components. Or it operates on 9v that is regulated down from 12v, so the external 12v supply is stepped down in camera anyways. I think it may be the variable voltage option, because i get DRASTIC differences of trigger sensitivity between standard AA batteries and lithium ones. The lithium batteries operate at 1.8v per battery vs the traditional 1.5v of an old school AA. The higher voltage is what i assume cause the sensor sensitivity.

I can actually run cameras off of this setup without any batteries internally at all. And, i think with an hour or two of sunlight throughout the day i could do so indefinitely. So, the batteries in-camera are essentially backups with something like this. Not as big of a deal as if the 12v only powered the camera’s board itself.


Sent from my iPhone using Tapatalk
 
Last edited:
One of the benefits to doing a pack like this is that i can maintain the higher voltages. Swapping primary cells for secondary cells (non-rechargeable vs rechargeable) ends up dropping the voltage. Rechargeable AA’s operate at 1.2v as opposed to the 1.5v of standard cells. So, if you have 8 AA’s in series… that means you will run 12 volts for non-rechargeable batteries, but only 10v for rechargeable ones.

I set this pack up with 10 rechargeable cells in series to ensure i reached the required 12v, and may run a set of non-rechargeable lithium batteries in camera as backups. I couldn’t get any additional charging of the in-camera batteries, but if my external pack failed, the camera would still be running at 12v+ instead of dropping to 10v.


Sent from my iPhone using Tapatalk
 
My buckeye cams run on a 12 volt SLA battery recharged by a solar panel. That might be an option without having to fabricate stuff.

On cameras that act as repeaters or transmit many pics a day I use lawn mower batteries.

May not need that I’d you’re not transmitting pics. But a 12 volt SLA battery last a long time.

SLA batteries are a bit too big for me to use for public land. The goal on this DIY is to get as small of a solution as possible that still functions.
The SLA/panel is a bombproof and inexpensive setup, for sure.


Sent from my iPhone using Tapatalk
 
I get that. A school bus full of kids could see my setup.
 
Got the design finalized and the files exported and sent to my brother. I’m hoping he will print them in the next few days.. because i might have the box just after thanksgiving if that is the case.


Sent from my iPhone using Tapatalk
 
Posted here so i didn’t further hijack the AA thread.

I blew out my ankle this year just before my season started and haven’t been able to swap batteries or pull cards on any cameras.

Most cameras will be dead (or memory cards full) by now, as i run video mode on everything and the batteries have been running since may.

Losing a hunting season sucks, but what is really eating me up is losing an entire year worth of intel from not being able to do my early season battery/card swap…. So since i’ve been stuck at home for weeks I decided to work on fixing the problem.

I found a video on YouTube last year from “The Handy Hunter” where he put together a small diy solar battery. The battery he uses for that build is no longer available, so my son and i soldered one up ourselves out of 3,000mah rechargeable AA batteries.
6222325c1dd53874f4f20b93013c91a9.jpg


Then, we assembled the solar panel / battery according to his video (soldering and shrink tubing instead of wire nuts).
607007002631482c9a3430f55e19a30a.jpg


Most of my brownings will accept EXTREMELY large SD card sizes, so with these panels / batteries supplying permanent power i should be able to get videos for a full year without fail when paired with a 256 gig card. (Assuming the camera isn’t on a high traffic spot like a feeder) in picture mode with a memory card that big, this thing could probably run continuously for a couple of years before filling the card.

The 12v regulators i picked up are running a little lower than 12v, but the camera still runs just fine off of it. But, i wish i had tested that part before soldering and assembling.
c556948a1175dd09621082a5a3edf65d.jpg


I only run 2 cameras on private land, though, and this setup is definitely not something i want to have on public land. Theres too much money and time invested in it, and i think you would be able to spot it from a mile away regardless of how good a sponge paint job is. I originally planned to do some 12v lithium battery packs that i can charge at home and just hang behind the camera for public land,
but i found a much smaller 12v solar panel, that runs 1.5 watts as opposed to this MUCH bigger panel’s 1.8 watts. That got me down a rabbit hole of just how small and ergonomic i could make something like this.


Sent from my iPhone using Tapatalk
Impressive build, do you know how much $ you have into it ?
 
Impressive build, do you know how much $ you have into it ?

It is hard to tell, really. The first two cost a total of $200, but that included a heat gun and a solder gun that i needed to purchase plus flux and solder. I bought a good tabletop solder gun because i plan to keep doing electrical projects with my son as a hobby. Now that i have all of that, the price will drop significantly.

With my brother printing the box, all i will have to pay os flat rate shipping for that ($15 maybe). 10 of the high quality rechargeable AA’s are $15, the new solar panel i found is $13, a pack of 20 diodes is $6 (only need one), the barrel sockets are $10 for both, the box of 1/4” lags (qty 5) is $6 and i already have the 12v regulators.

If i only build 1, and all the extra parts and pieces go to waste, it will be about $65 for this design. If I like it enough to build a few more, i could probably get that down to about $50-55


Sent from my iPhone using Tapatalk
 
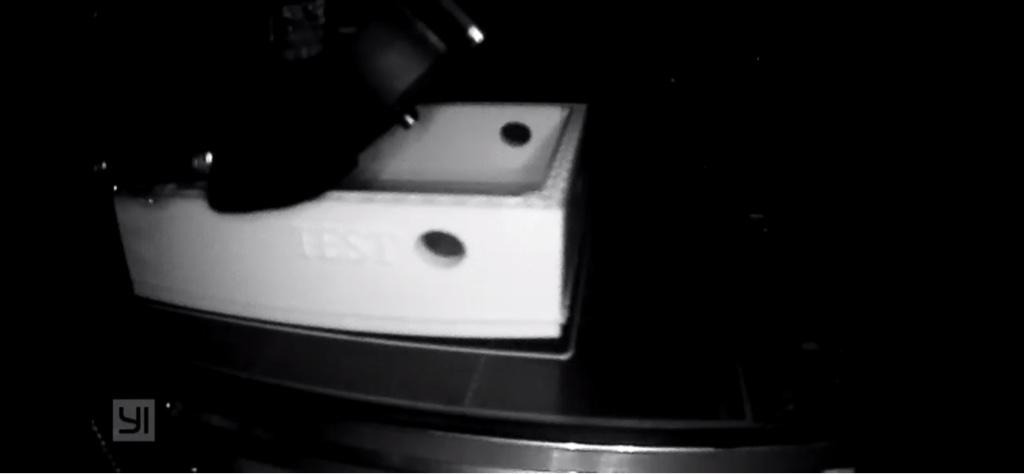
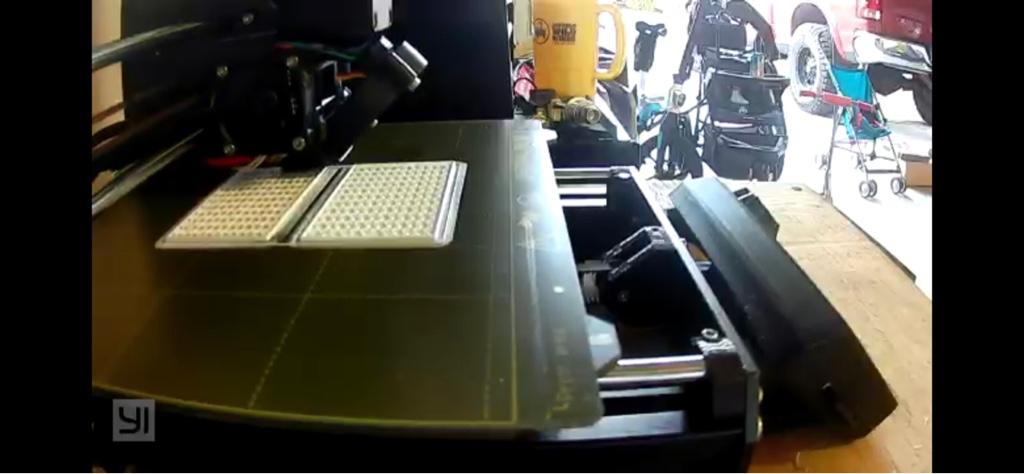
I woke up early this morning and checked the webcam my brother has on his printer…. I see my box!!

941ac9c42d979783fa221ebe1bd838a8.jpg


Sent from my iPhone using Tapatalk
 
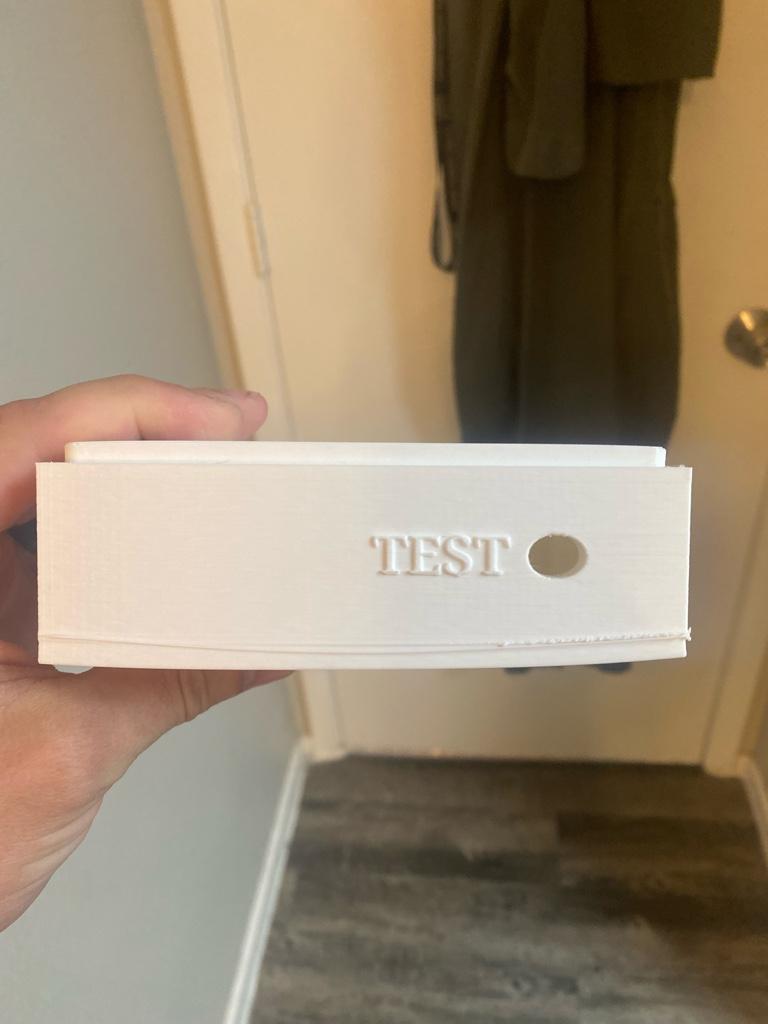
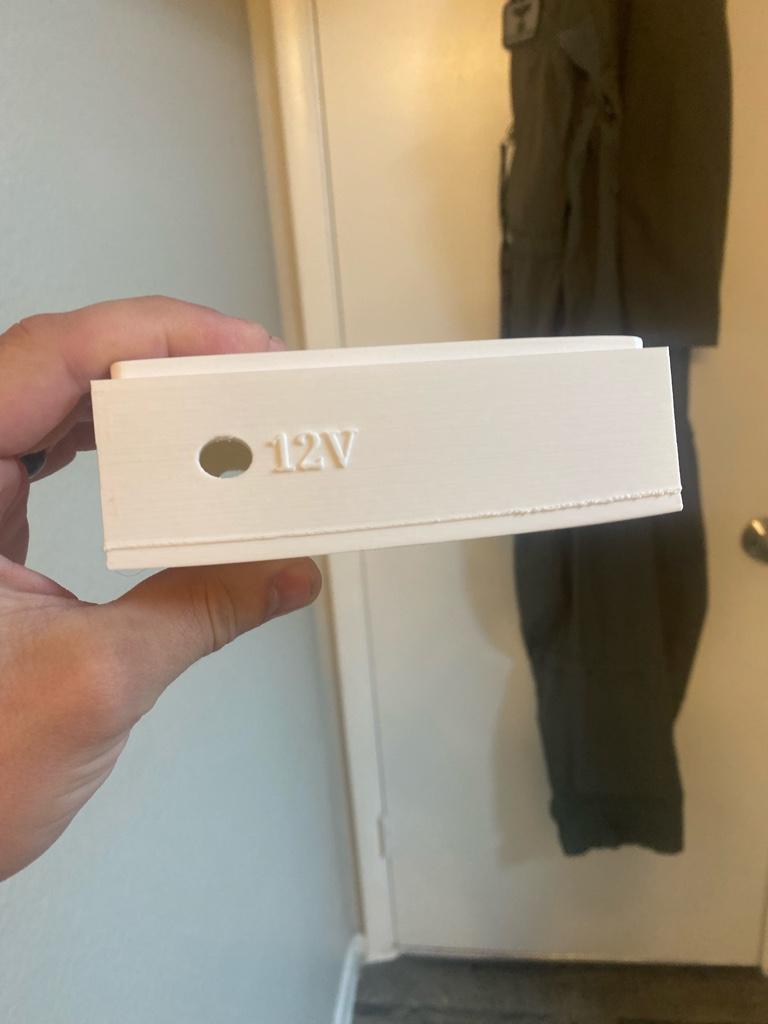
A little bit of warping in the print, but the box looks to still be useable. My brother thinks he didnt get the best bed adhesion. The garage that his printer is in isn’t heated, and they had a pretty hard temp drop last night about the time the print was started. I don’t think he will be doing another print of it until after the holidays, because he is moving in a few weeks. But, this should still definitely work for prototyping. He ran the layers larger than normal to shorten the print time on this one, (9 hours as opposed to 12.5) and that might have caused the warping.
e73100f5dfd4fc42216c2e0a3b6702be.jpg
s
80c3386c5e15fe4c0816e969c4e43cf5.jpg


Sent from my iPhone using Tapatalk
 
Try number 2. It sure is nice that my brother has a live stream camera on his printer so i can watch.
67e7ed670ec233015c38c903031d5967.jpg


Sent from my iPhone using Tapatalk
 
I saw cabelas has the solar setup for all brownings for 69.00 has anyone tried these
 
Well, a little progress…

The 3D printed boxes are in texas finally. My brother’s station with the Air Force was changed so they pieces he printed were packed away until he came through for the holidays.

The rest of the pieces to put it all together have been ordered, along with a small spot welder so i am not degrading any of the batteries with excess heat from the soldering process. I think the furthest delivery estimate for parts is January 11th, so hopefully i can get them assembled quickly after that.

I am thinking of doing a small build video for the two boxes i will be putting together, and will post it up here if i do.


Sent from my iPhone using Tapatalk
 
My buckeye cams run on a 12 volt SLA battery recharged by a solar panel. That might be an option without having to fabricate stuff.

On cameras that act as repeaters or transmit many pics a day I use lawn mower batteries.

May not need that I’d you’re not transmitting pics. But a 12 volt SLA battery last a long time.

For my repeater cams, I use large solar panels in the 50-60 watt range. Because I'm still using the old 6-volt Orion cams for most of my network, I lose a lot of power. You would not have that loss with the newer 12-volt X-series. The battery size is more related to how long I can go between good sunny days. The solar panel size dictates how fast it can recharge the battery. I have tried a few 30+ ah batteries, but they are expensive and it turns out more than I need. I now just use two 12 ah batteries in parallel. It does the job and is much less expensive.

PWM and MPPT charge controllers seem to work well for me. I now wire my BECs with the batteries outside the camera through the solar port. I then connect that internal input to the camera instead of the internal charging circuit.

Thanks,

Jack
 
Well, a little progress…

The 3D printed boxes are in texas finally. My brother’s station with the Air Force was changed so they pieces he printed were packed away until he came through for the holidays.

The rest of the pieces to put it all together have been ordered, along with a small spot welder so i am not degrading any of the batteries with excess heat from the soldering process. I think the furthest delivery estimate for parts is January 11th, so hopefully i can get them assembled quickly after that.

I am thinking of doing a small build video for the two boxes i will be putting together, and will post it up here if i do.


Sent from my iPhone using Tapatalk
How is your battery pack coming along how about a update
 
How is your battery pack coming along how about a update

The boxes warped a good bit during printing. My brother was running the printer in his garage in Vegas and the space would experience about a 20° drop overnight while the print was happening. In those conditions, the shrink on the PLA was enough that it lifted 2 opposite corners about 1/4” each side causing some heavy distortion of the fit and finish.

He has since been moved (on military orders) and is extremely busy at his new location. So, I haven’t bothered him for a re-print yet. I have been thinking of re-designing the file with thinner walls, as the original thickness was definitely overkill. If things don’t settle down with my brother’s schedule, I may just send the file out to a contract printer to get things rolling again. It will definitely up the price quite a bit, but I’m dealing more at a personal entertainment motivation at this point than trying to save money. Even if I end up slightly more expensive than Lithium batteries over time, I will have gained 12 month+ of uninterrupted video at the highest settings without having to visit the camera. That was ultimately my primary goal anyways.

I have all components except the boxes (the first warped box could be used, just not ideal), but I have held off on assembling since I don’t have the final form of the boxes yet.

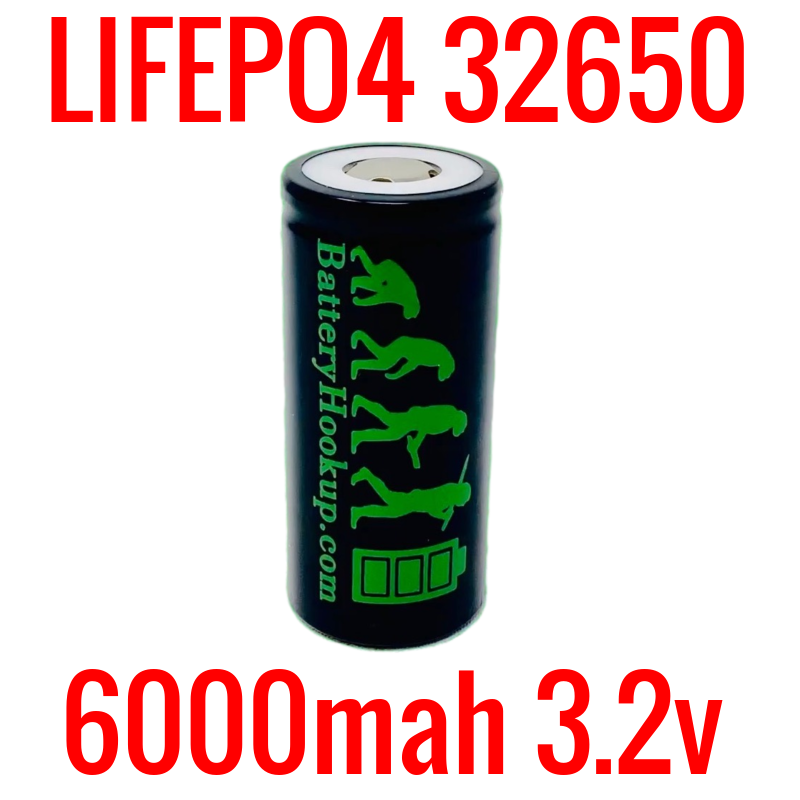
I am also thinking of doing a few battery only packs for areas with dense shade. I found these LifePo4 32650’s that I could put together a 12V pack for about $18 each. 4 of them would be equivalent to 2 full Energizer Ultimate Lithium sets, and should easily last a full year.

Link to the 32650’s below.

I really need to get things moving on this before spring green up, though, so I appreciate the comment to remind me to bring my focus back on it.


Sent from my iPhone using Tapatalk
 
Top